I know, this blog is about RC aircrafts, but I started in the RC world with cars, interest that never left me. This is why in this article we are going to take a look at the Radiolink RC6GS V2 which is a transmitter made mainly for RC cars and boats. The radio comes with R7FG receiver that has integrated gyro and telemetry.
Box
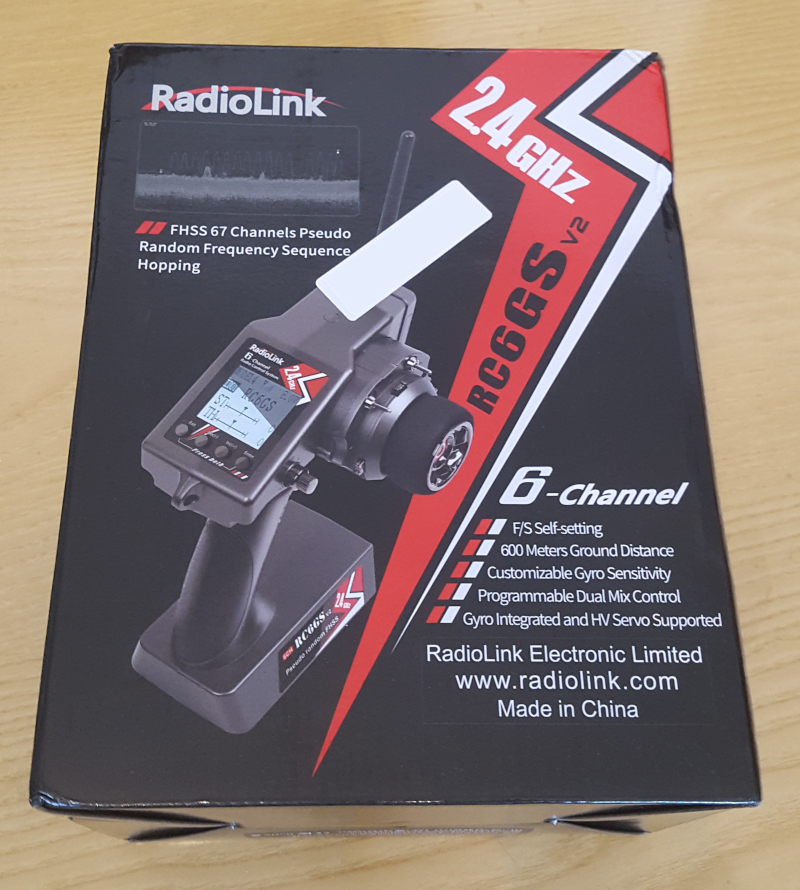
Radiolink RC6GS V2 comes in the following box:
Package contents
The following image shows the items contained in the box:
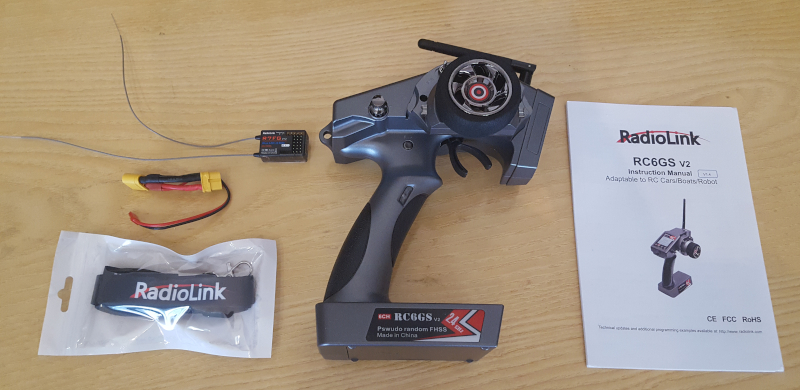
SO here is a list of what is included in the package:
- RC6GS V2 Transmitter
- R7FG Gyro Receiver
- Adjustable transmitter necklace
- Connector for reading battery voltage (XT60) and sending the value from the receiver to the transmitter through telemetry
- Instruction Manual
Specifications
Radiolink RC6GS V2 transmitter and R7FG receiver specs are reported below:
- TX channels:6
- RX channels: 7
- Modulation mode: GFSK
- Spread spectrum: FHSS 67 channels pseudo random frequency hopping
- 10 models memory storage
- Antenna length: 106mm
- Control distance: 600 meters (ground level)
- LCD screen: 128*64 resolution
- Transmitter operating voltage: 4.8-15V DC, 4 x 1.5V AA or 2S-3S LiPo battery
- Transmitter operating current: 80-120mA
- R6FG receiver operating voltage: 3.3-10V
- R6FG receiver operating current: 30mA
- RF power: <20dbm
- Frequency: 2.4Ghz ISM band (2400MHz-2483.5MHz)
- Channel resolution: 4096,the regular jitter is 0.5us
- Compatible Receivers: R7FG, R6F, R8EF, R8FM, R6FG, R8F ,R6F, R4FGM
Main features and functions
Radiolink RC6GS V2 main features and functions are the following:
- Range of 600m (1968ft)
- Vehicle battery voltage telemetry
- Upgradable firmware via USB
- Powered with NiMh or LiPo batteries
- RX with integrated Gyro with configurable sensitivity level
- Fail safe
- Anti-lock Braking System (A.B.S.)
Control knob, switches, trims and trigger
As the name suggests, Radiolink RC6GS is a 6 channel radio: this means that we have available 4 more channels in addition to the standard 2 needed for controlling RC cars and boats (throttle and steering).
So, the transmitter has:
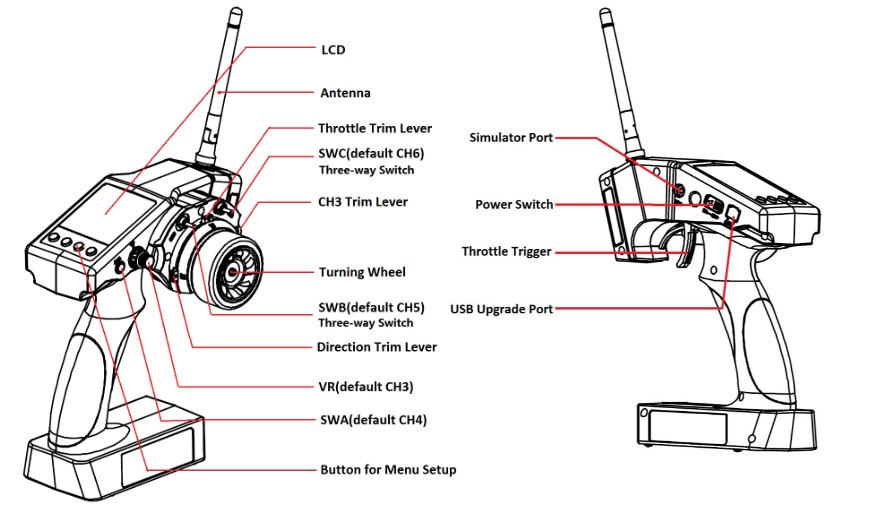
- 1 control knob (VR -> default CH3)
- 2 three position switches (SWB -> default CH5, SWC -> default CH6)
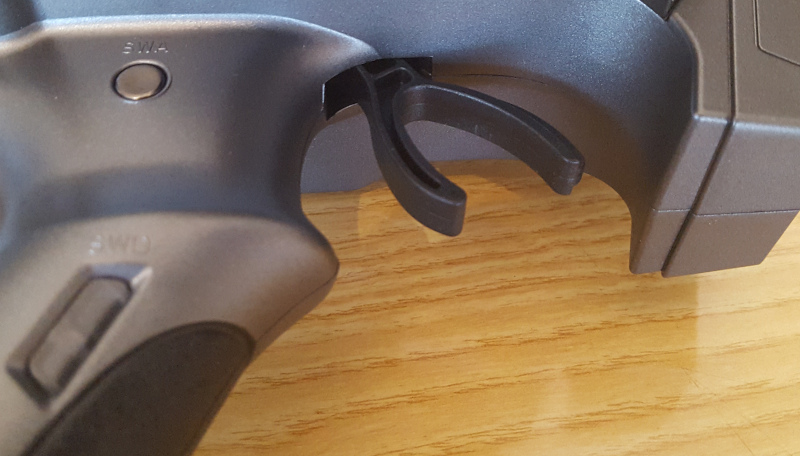
- 2 click switches (SWA/SWD -> default CH4)
These items are all actionable from the front of the radio:
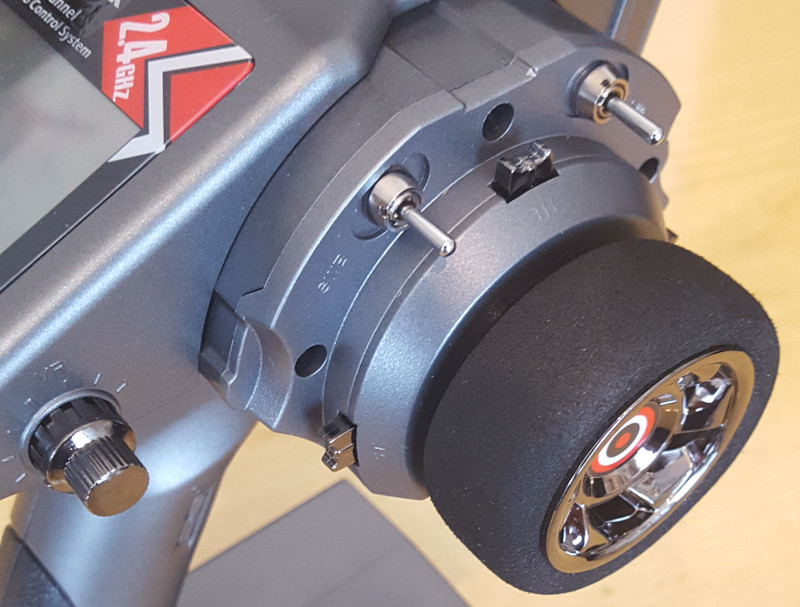
Here we can also see the two trim controls: left one for steering command, top one for throttle command.
The following image shows trigger detail on the right and SWA/SWD switches on the left:
On the back we have the ON-OFF switch, the USB upgrade port and the DSC simulator port
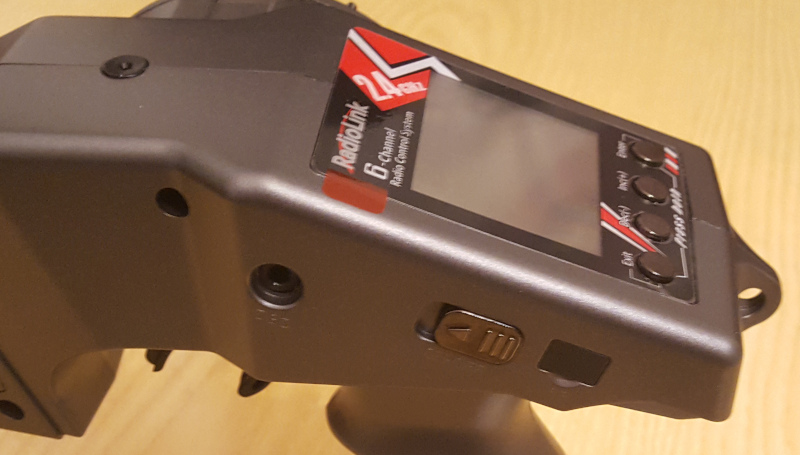
Notice the possibility to insert the support for an FPV screen on top.
Here it is a nice recap picture of all the elements:
Display
Radiolink RC6GS V2 display has a resolution of 128*64:
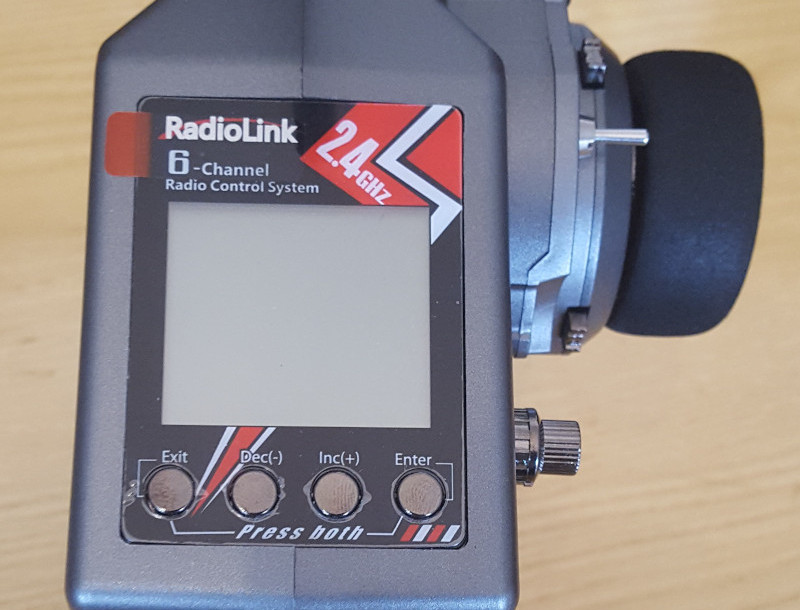
Navigation through the menus is done by 4 buttons; from the left we have:
- Exit
- Dec(-)
- Inc(+)
- Enter
Once the transmitter is powered up through the ON-OFF switch on the back the display activates:
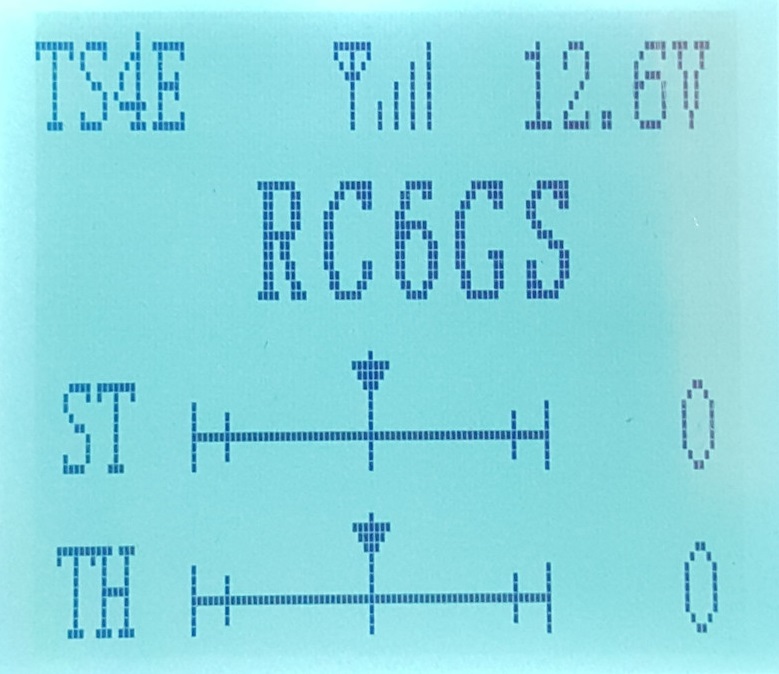
The display shows the following informations:
- top left -> model name
- top center -> receiver reception status
- top right -> transmitter battery voltage
- center -> radio model (if we activate subsidiary ID this will be on the left, while if we have battery model telemetry active then voltage value will be available on the right)
- bottom -> steering and throttle status with trim values on the right
Menu can be accessed by pressing both Exit and Enter buttons at the same time and this leads to the following functions:
- LANGUAGE -> set up Language and check firmware version
- MODEL -> Model Select
- EPA -> End Point Adjustment
- STEXP -> Steering Exponential
- STSPD -> Steering Speed
- THEXP -> Throttle Exponential
- THSPD -> Throttle Speed
- A.B.S. -> Anti-lock Braking System
- ACCEL -> Throttle Acceleration
- IDLUP -> Idle-Up
- SUB-TRIM -> Sub-trim for steering an throttle commands
- REVERSE -> Reverse channel inputs
- D/R -> Steering/Throttle Dual Rate
- ATL -> Brake Side Adjustment
- PMIX01/02 -> Programmable Mixes
- AUX-CH -> Auxiliary Channel 3, 4, 5 and 6
- NAME -> Model name
- ALARM -> Low voltage alarm
- GYRO -> Gyro Sensitivity Adjustment
- F/S -> Fail Safe
- ID SEED -> Subsidiary ID
- RESET -> Factory Reset
Let us now take a look at the main features. For a complete description of all the functionalities, take a look at Radiolink RC6GS V2 manual, which is more detailed than the paper one the transmitter comes with.
R7FG Gyro Receiver
Radiolink RC6GS package includes R7FG receiver which is a 7 channel receiver with telemetry. It comes already bound with the transmitter and has integrated gyro and high voltage servo support.
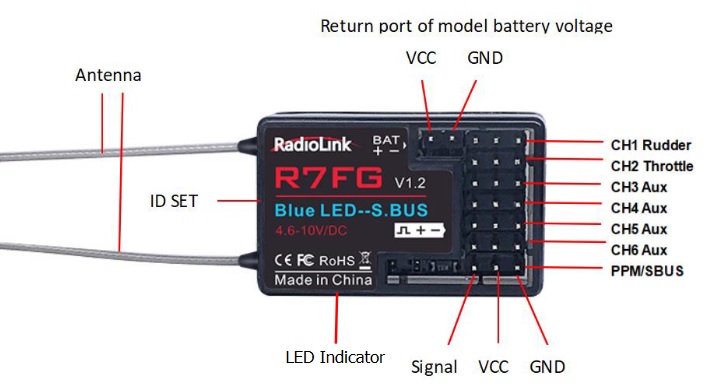
Gyro feature is not enabled by default and this can be verified by powering on the receiver and looking at the led color: solid GREEN means the transmitter is bound to the transmitter and gyro is disabled (receiver is in Mode 1 -> PWM + PPM output).
Gyro can be activated by pressing three times within 1 second the ID SET button on the left of the receiver: RED led flashes three times and led color turns solid ORANGE meaning gyro has been activated (Mode 4 -> PWM + PPM output + Gyro). Check the instruction manual if you want to know more about the other modes.
If gyro phase is set correctly the wheels should turn right to correct when the car is turned left while the wheels should turn left to correct when the car is turned right.
If the gyro phase is reversed, short press the ID SET button twice within 1 second. The RED led flashes twice means the gyro phase setting is complete.
If led color is ORANGE, but wheels are not correcting, probably gyro sensitivity is set at 0%. Gyro sensitivity can be controlled through CH3: rotating the control knob clockwise gyro correction increases.
Current sensitivity value can be checked in GYRO menu on RC6GS transmitter:
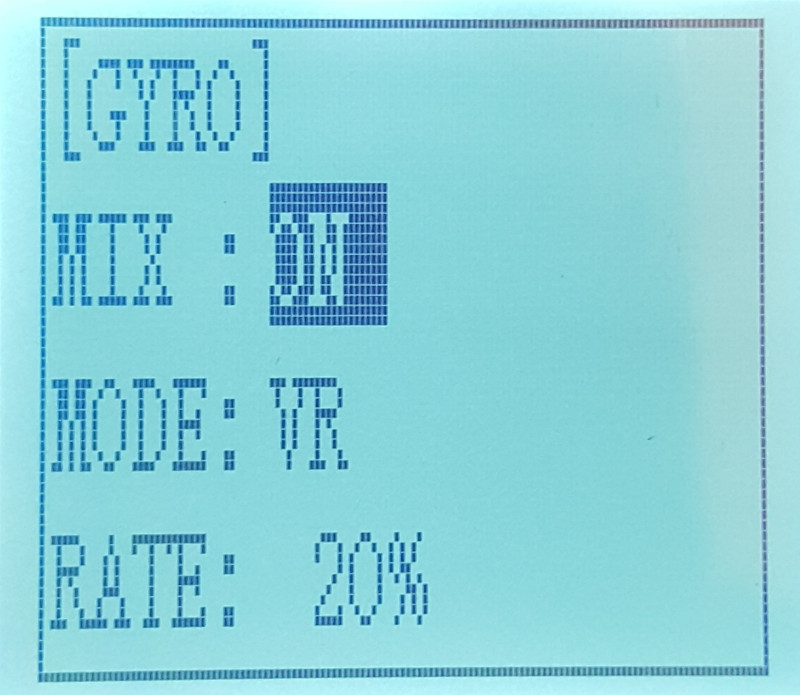
It is a good idea to activate gyro before mounting the receiver on the model, since it is always possible to disable its effects by setting its sensitivity value at 0%. Generally, a nice value ranges between 20% and 30%.
Expo
Setting steering expo is a must, it is like the roll and pitch expo setting for drones.
Configuration is pretty simple, it is just a matter of navigating to the corresponding menu and choosing the expo percentage: display shows how the steering curve changes with respect to modifications to the percentage value. The higher the value the less sensitivity we have when the stick (in this case the wheel of the radio which is used for steering) is close to the center.
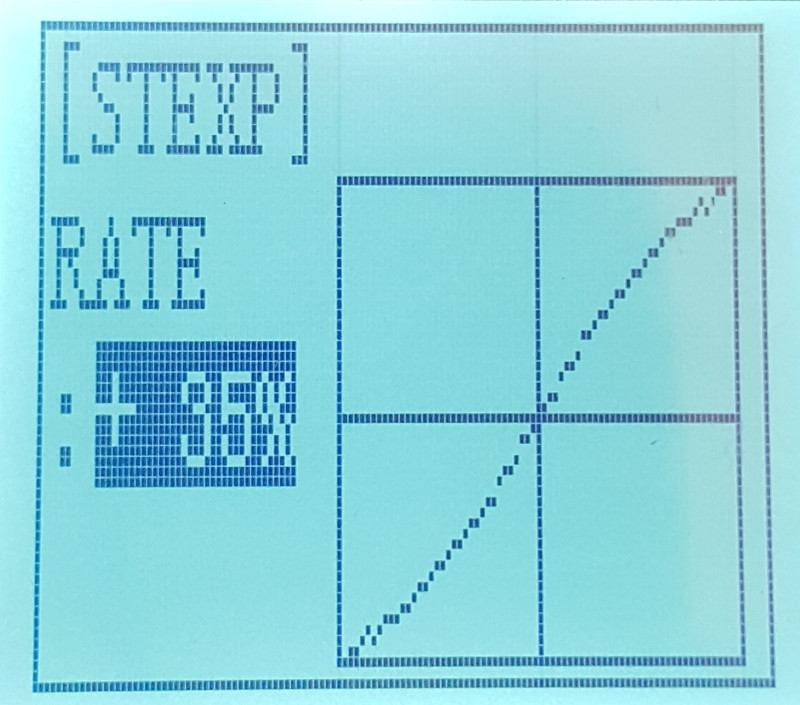
Remember that this does not effect the minimum and maximum values of the channel (this can be modified through EPA or D/R menus, depending on what we want to achieve).
Failsafe
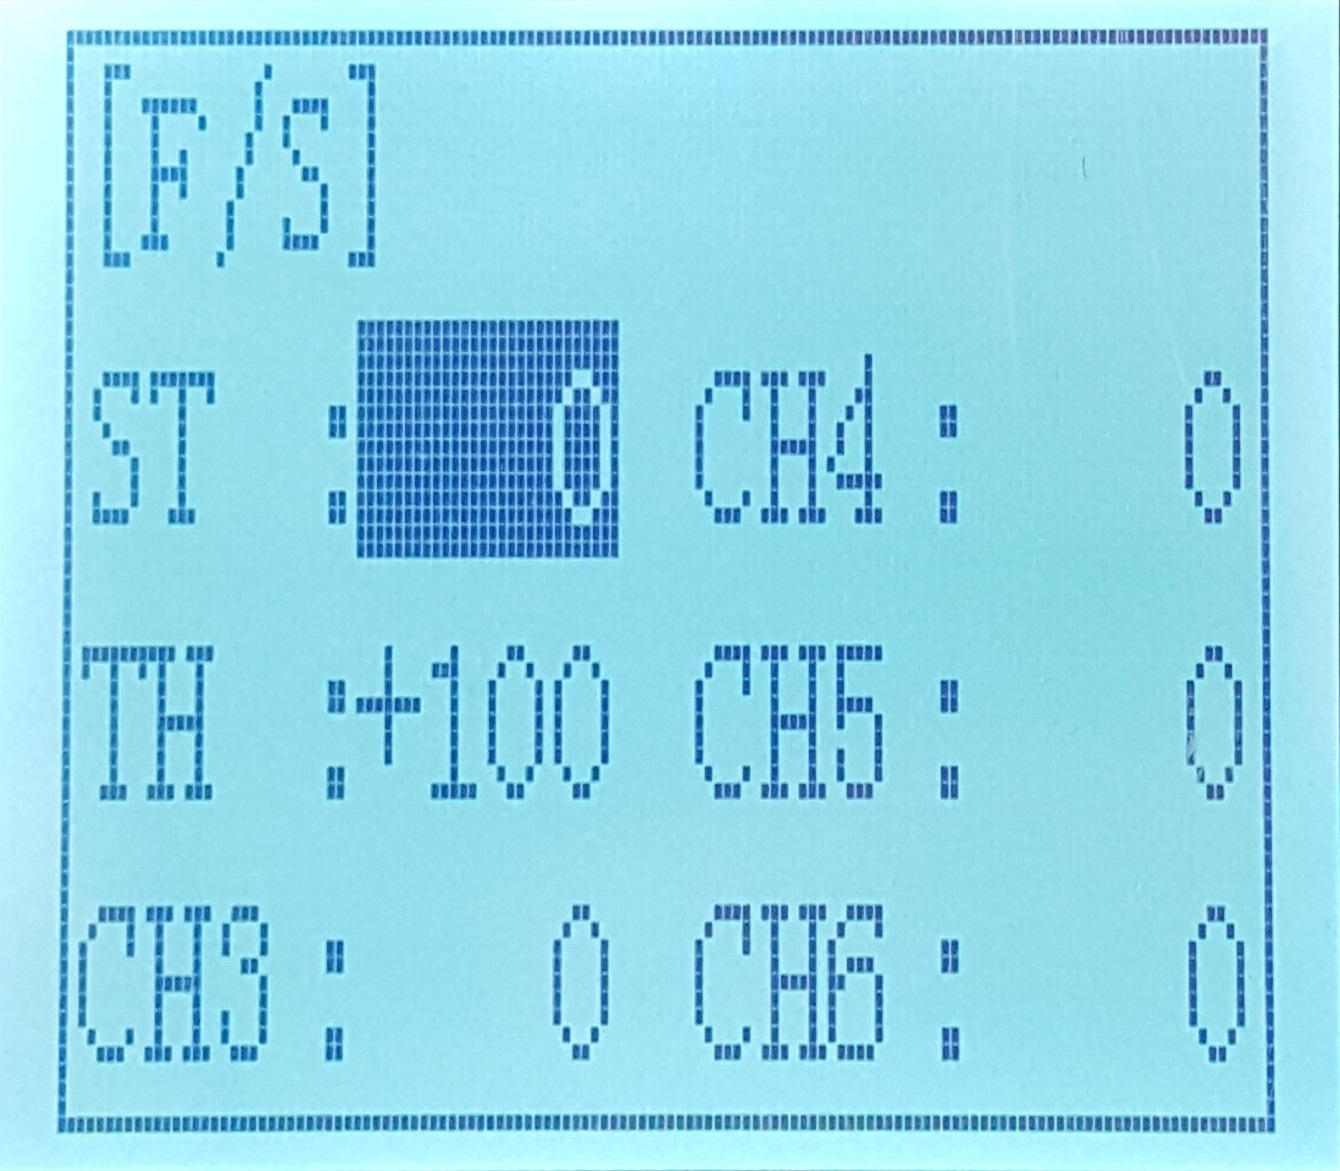
Failsafe is a must have feature: in case receiver loses connection with the transmitter it is possible to decide which value each channel will be set. This is critical to avoid runaways.
To set failsafe values it is just a matter of navigating to the specific function in the menu and selecting the channel we want to edit, then use the commands to set the value. For example, for the throttle it is a good practice to set the failsafe at the maximum braking value, so after selecting CH2 with “Enter” just use the trigger to brake and confirm the value by pressing “Enter” again.
Anti-lock Braking System (A.B.S.)
A.B.S. function implements the same concept used for real cars. Applying brakes in an incorrect way, for example during a corner, can cause under steer: activating this function causes, during braking activity, the generation of brake pulses instead of a continuous command.
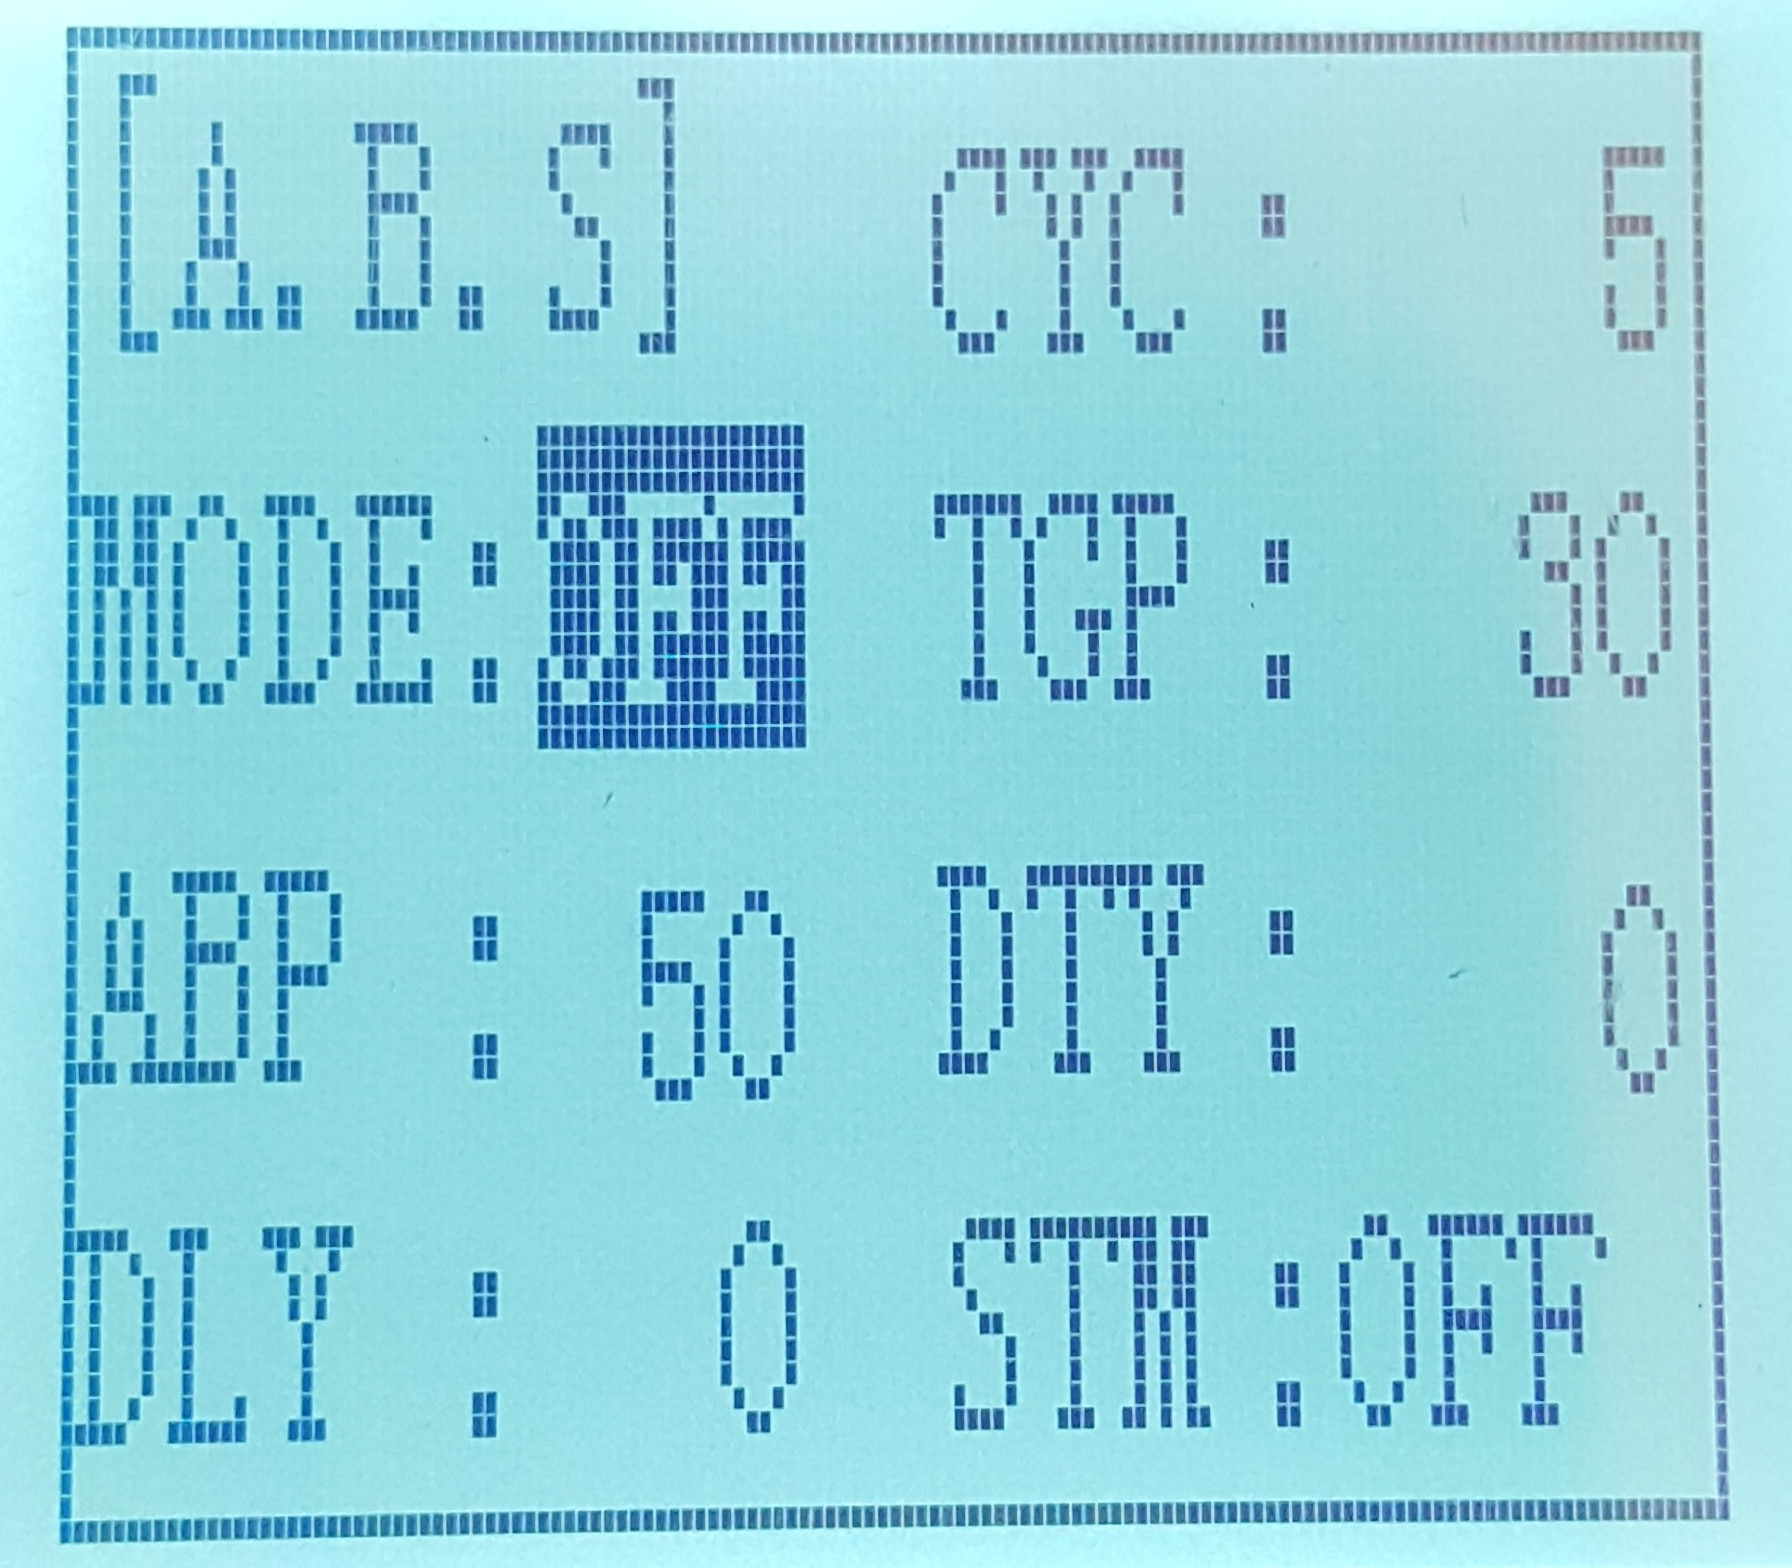
Brake return amount, pulse cycle and brake duty can be adjusted, while the region over which A.B.S. operates can be set according to the steering operation (Mixing function). Here is the meaning of every item we can set up:
- ABP -> Brake return amount
- DLY -> Delay amount
- CYC -> Cycle speed
- TGP -> Operation point
- DTY -> Cycle duty ratio
- STM -> Steering mixing
Alarm
In Alarm menu it is possible to set alarms for both battery voltage of transmitter and receiver (vehicle battery). Moreover RSSI alarm can be set, so if connection between receiver and transmitter is getting bad we get an alarm before connection is lost.
Low voltage alert is extremely useful, especially when using Li-Po batteries and there is no voltage cut-off control.
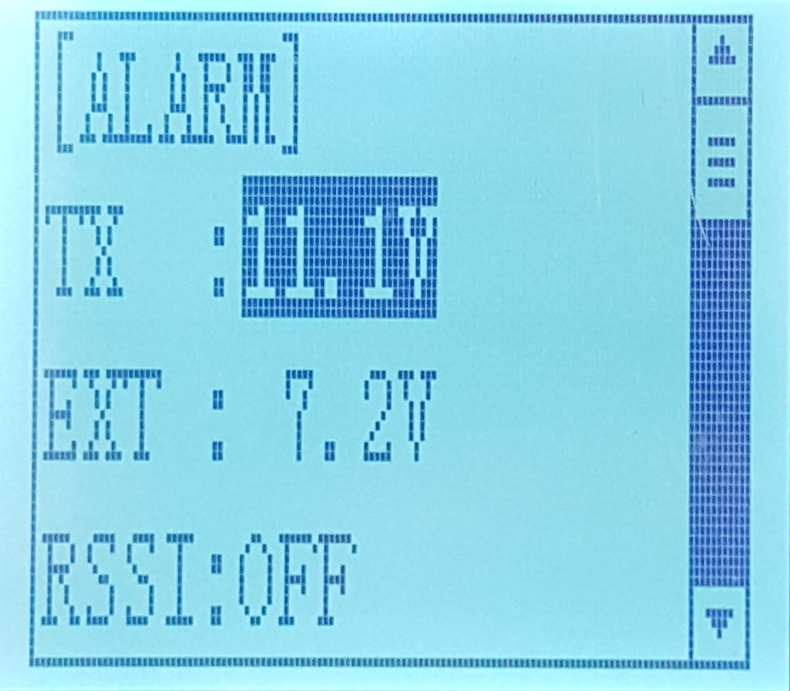
Beware that EXT voltage alarm, i.e. voltage alarm related to the battery on the vehicle, can be used only if the battery is connected to the ESC through the included cable that reports battery voltage to the R7FG receiver (this is of course for RC electric cars, not nitros).
All this is possible thanks to the telemetry feature of R7FG receiver, by means it can not only receive commands from the transmitter but it can also send data back to the radio.
Battery
Radiolink RC6GS V2 can be powered with a voltage range of 4.8V - 15V.
The good thing is that we can choose to use NiMh or LiPo batteries. Removing the sliding cover at the bottom, we get access to battery compartment:
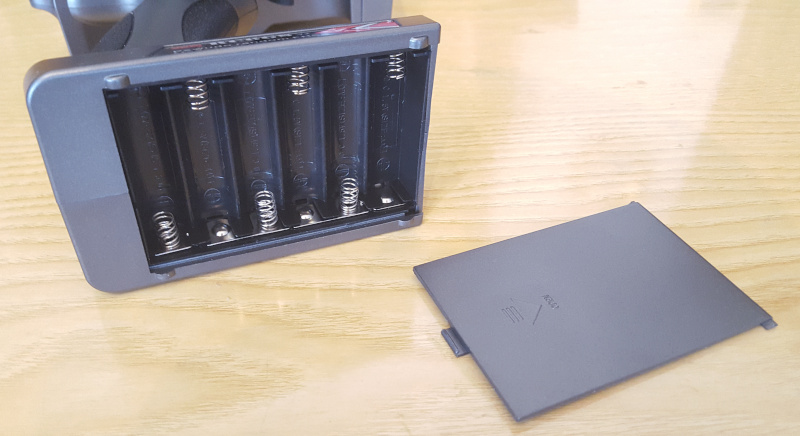
As we can see we have to use 6 x 1.2V AA NiMh batteries.
However, if we remove the battery box we can see that we can connect LiPo batteries with JST type connector:
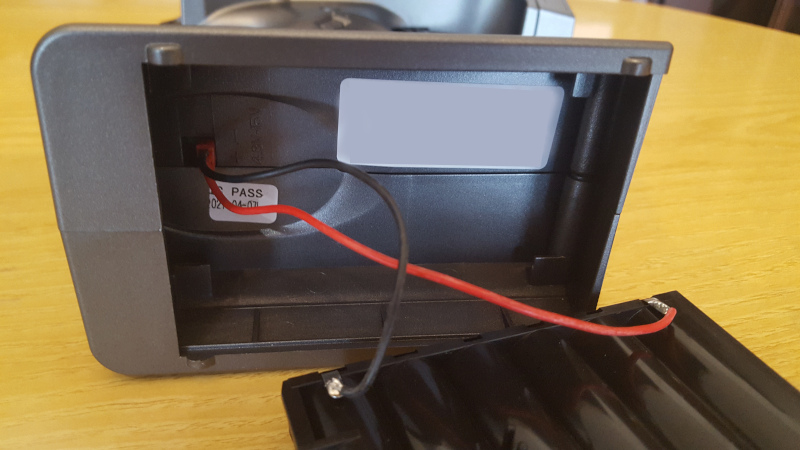
This means it is also possible to use 2S/3S LiPo battery.
So, here are some options:
Firmware upgrade
If you want to upgrade Radiolink RC6GS V2 firmware, you can take a look at the official website, where procedure and download links are available.
Beware that USB cable for connecting the radio to the PC is not included.
Conclusions
In this article Radiolink RC6GS has been reviewed and some of its main features have been shown. This radio has basically every feature an RC car/boat pilot can desire and the possibility to power it through LiPos or NiMh is just another nice factor.
This radio is a very good value for money.
Radiolink RC6GS V2 with R7FG Gyro Receiver is available here.