In the previous article, we have discussed about the EMAX Tinyhawk Freestyle quadcopter. Since it is a beginner FPV freestyle quad, some components can be upgraded to better ones and in this article we will take a look at some possible upgrades for the battery,the receiver, the FPV camera, the VTX and its 5.8 GHz antenna.
Battery Connectors
Like reported in the previous article, instead of using 2 x 1S batteries, we can switch to XT30 Connectors and use 2S batteries like the Tattu 7.6V 450mAh 95C 2S HV 4.35V Lipo Battery.
Receiver
The stock receiver is built-in the FC board: this is not a full range receiver so, if you need a better range, a good upgrade is given by the FrSky XM+ Full Range Receiver, which is a full range receiver.
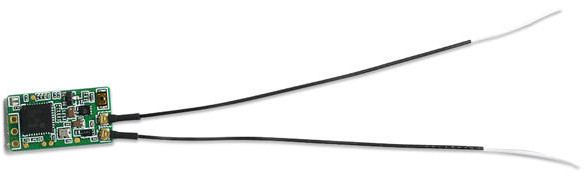
Here is FrSky XM+ Full Range Receiver schematic:
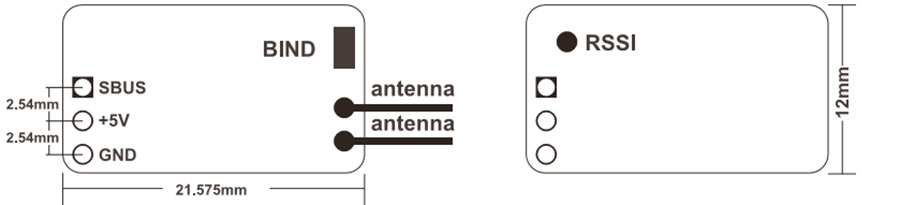
On the left side there are the pins we are interested in: SBUS (signal), +5V (power) and GND (ground).
We have to connect these pins to the same ones located on the MATEKF411RX FC:
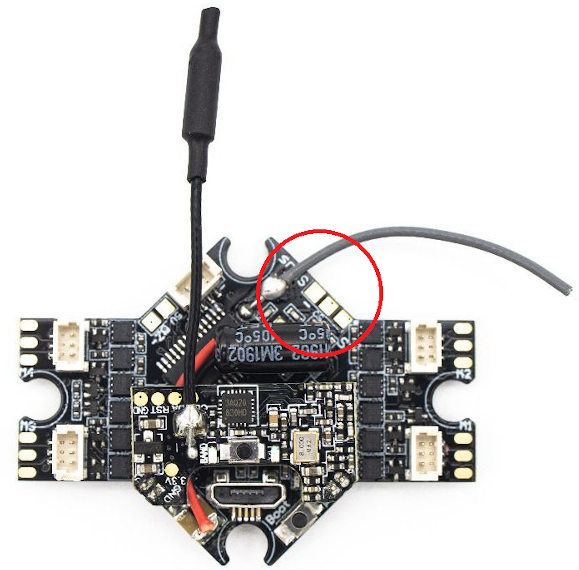
The pads on the FC are located near the gray antenna where there is the label “Sbus”:
- S (signal)
- 5V (power)
- - (ground)
Remember to pre-tin the pads and the wires for an easy soldering.
Then, it is just a matter of removing the stock antenna by unsoldering it. A good place to put the FrSky XM+ receiver is under the FC using some double sided tape to lock it down. Be careful it does not touch the frame.
We can use some zip ties to orient antennas in the desired direction.
FPV Camera
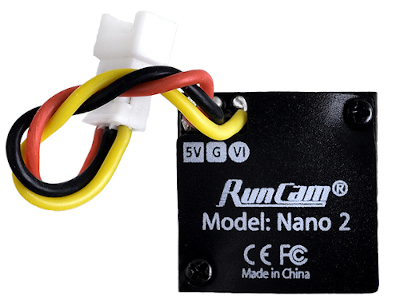
Another good upgrade is changing the stock FPV camera with the Runcam Nano V2 Camera which is more performing; the image quality is improved with its 700 TVL and 2.1mm lens (155 degrees FOV). Runcam Nano V2 FPV camera fits perfectly in the EMAX Tinyhawk Freestyle.
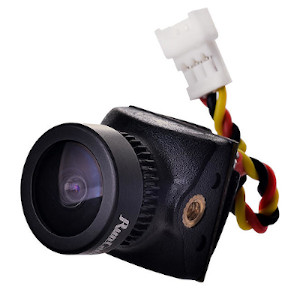
To connect the Runcam Nano V2 FPV camera, we have to remove the stock 600 VTL FPV camera. Then, we have to solder the original connector wires to the Runcam Nano V2 by keeping in mind wire color meaning:
- yellow = signal
- black = ground
- red = power
Once connections are done, we can simply fix the camera to the frame using some double sided tape with hot glue and tilt it like the stock one.
VTX and Antenna
Since the original VTX has an output power of only 25 mW, if more range is needed we can change it with a better one with similar weight and dimensions. A possible choice is given by the HGLRC Forward 350mw Mini VTX, which has a maximum output power of 350 mW and MMCX connector: this means we can use a better antenna instead of the dipole stock one.
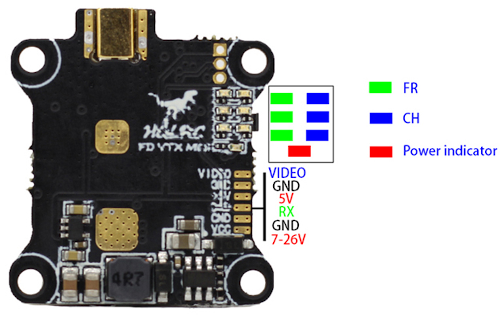
VTX comes with cables to connect it to the FC:
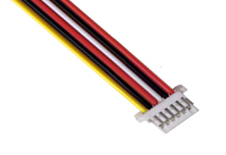
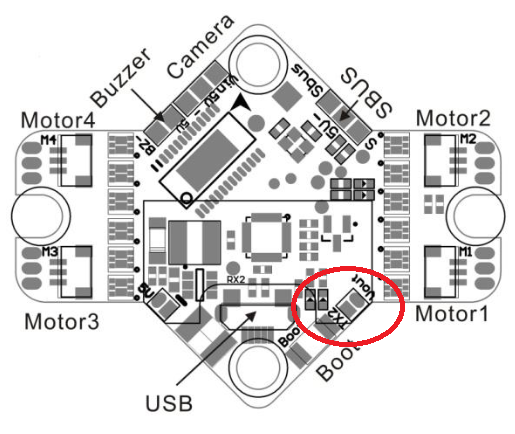
Black and red wires near the video wire (yellow) are not needed. VCC 7-26V (red wire) and GND (black) wires, near the RX wire (white), need to be soldered to the FC board battery pads, the same ones where the capacitor is soldered. Lastly, we have to solder video (yellow) and RX (white) wire to the FC:
- the yellow wire needs to be soldered to the Vout pad;
- the white wire goes to TX2 pad.
When fixing the VTX to the frame be careful the board does not touch the frame: for example, we can use some double sided tape to isolate them.
A good antenna for this VTX is the Lumenier AXII 2 Antenna with MMCX, which is a 5.8 GHz omnidirectional antenna:

To keep the antenna in place, we can use some zip ties.
Conclusions
EMAX Tinyhawk Freestyle is a very good mini quad, but lacks in range, so with the receiver and VTX/Antenna mods we do not need to worry anymore of radio failsafe or video feed lost. Moreover with Runcam Nano V2 we gain a better video image quality with better lighting control.