DJI Mavic Air is a high-end drone capable of recording cinematic footage in high and ultra (4K) definition at an affordable price. It is available in two different color schemes, Arctic White (the one presented in this review) and Onyx Black, and two kits: standard or “Fly More Combo”, which provides three batteries instead of one, more spare propellers, a battery charging hub, a battery power bank adapter and a travel bag.
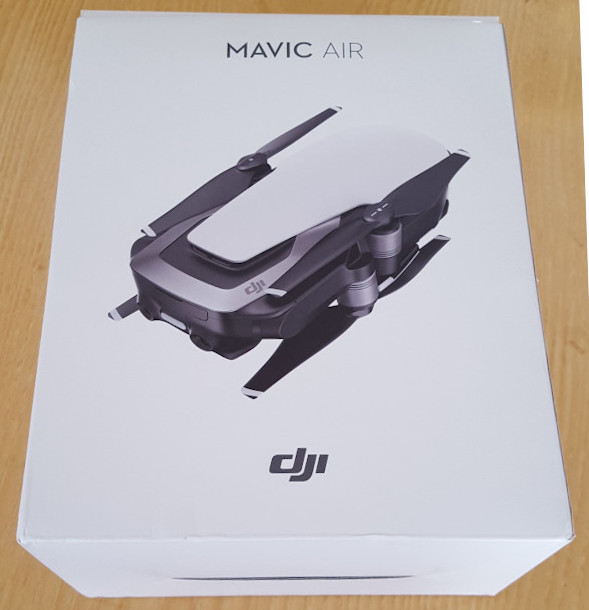
DJI Mavic Air Arctic White comes in this nice box:
Package Contents
The image down below shows what is included inside the box:
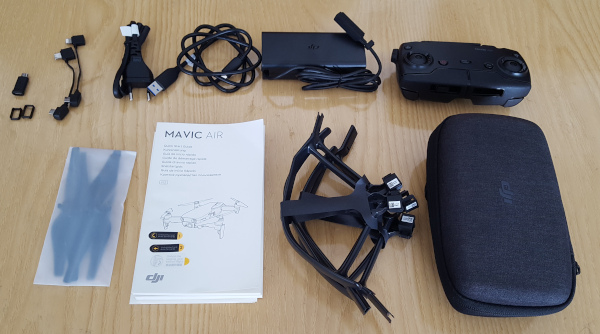
These are the items contained in the package:
- Mavic Air, which weights 430 g, stored in a nice case;
- propellers guard;
- radio controller;
- USB cable and adapter;
- battery charger (one for both drone and radio controller) and power cable;
- cables to connect different smartphone brands to the radio controller;
- instruction manual;
- spare propellers.
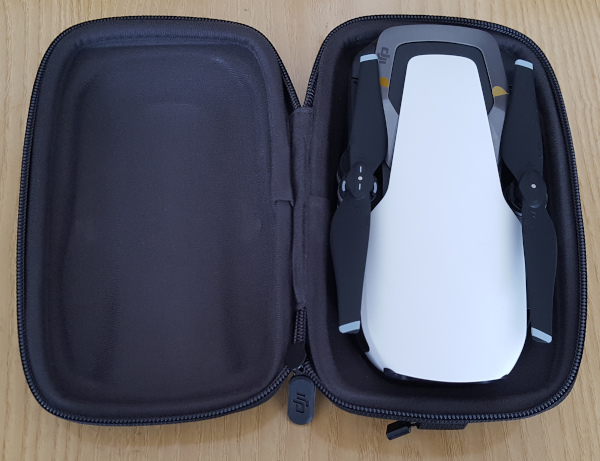
The following image shows the content of the little case:
Specifications
Since Mavic Air specifications are quite long and detailed, here is the link at the official DJI website with all the info.
Overview
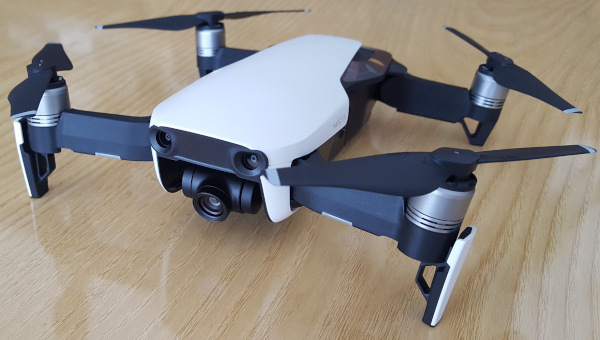
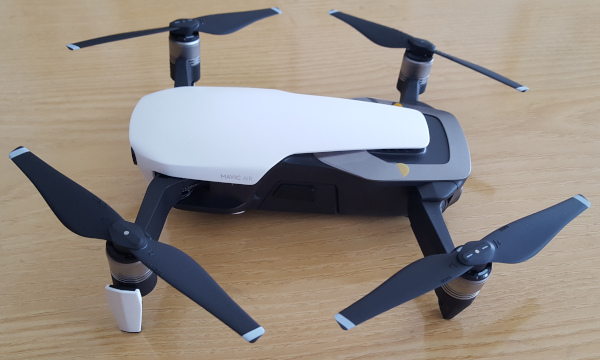
The following image shows the Mavic Air unfolded: to proceed with the unfolding, we have to start from the back arms that come up through a rotation movement and next by simply opening the front arms by pulling them outwards. Front arms have also two legs which act not only as a support, but more important they are Mavic Air antennae.
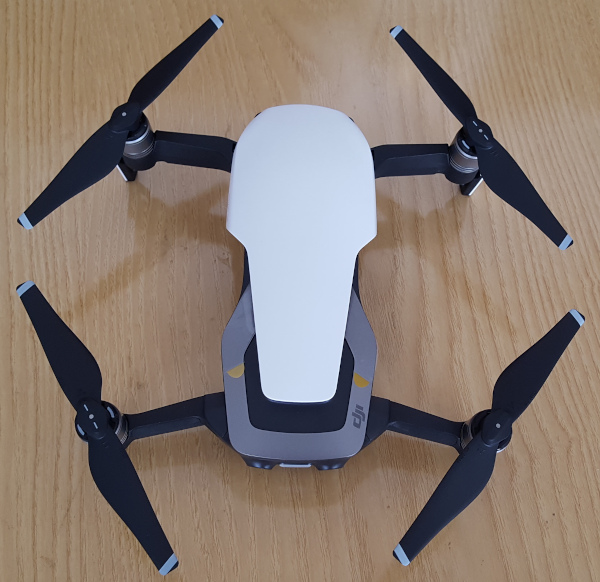
Note that counter-clockwise rotating propellers have additional white signs on the top mid part, so it is easier to recognize them:
Camera, sensors and battery
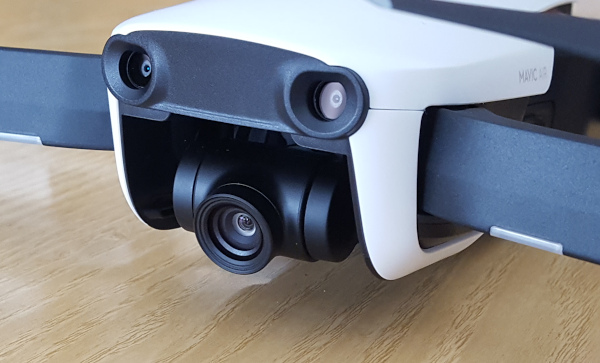
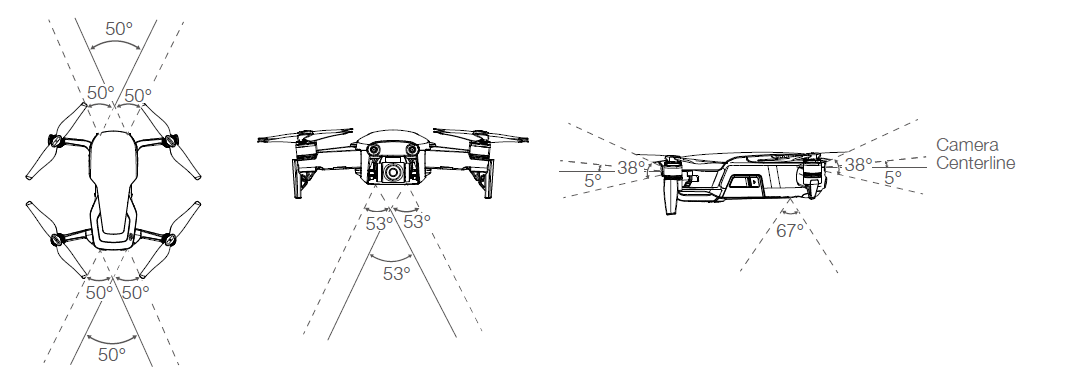
The camera used both for recording video footage and for FPV (First Person View) uses a 1/2.3” CMOS sensor with 12 MP and a FOV of 85°. The camera has a f/2.8 lens with a 24mm focal length to shoot high-quality photos and videos even in 4K@30FPS. The camera is mounted on a very good 3-axis gimbal system assuring stable video footage.
Forward Vision System is composed by two cameras as shown in the following image:
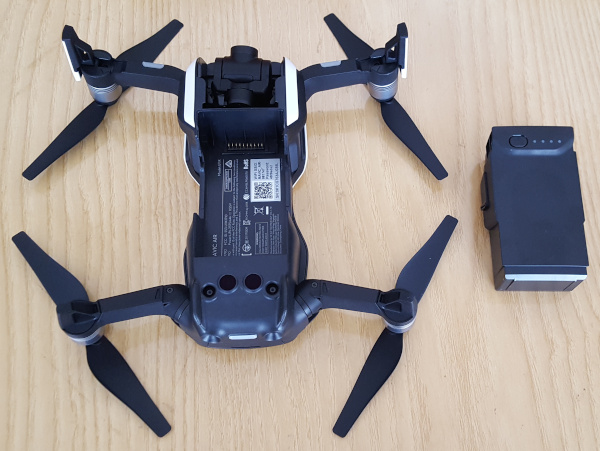
Here is the detail of the bottom part where the battery is attached: this is a 3S LiPo intelligent flight battery with a capacity of 2375 mAh. This battery has the Auto-Discharging Function, by means to prevent swelling, the battery automatically discharges to below 65% of the maximum discharge when it is left in idle for more than 10 days. With a single press on the button on the battery, it is possible to check its current charge level through four blinking green lights. Holding the button down turns on or off the DJI Mavic Air.
Note the presence of bottom sensors used to help the aircraft maintain its current position, so as to hover in place more precisely.
This Downward Vision System is also very effective in indoor flight and other places where GPS signal is not available. This system is composed by two cameras and a 3D infrared module.
Like Forward Vision System, Backward Vision System is realized by two cameras:
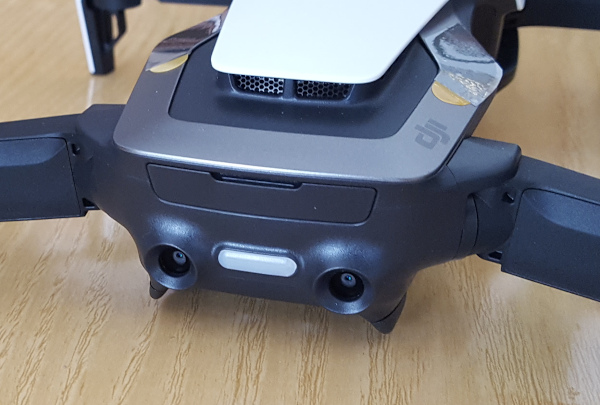
On the back there are also a led indicating aircraft status and a door hiding a USB-C port to connect a device to the internal storage (8 GB SD card) and download photo and videos from the drone. Here, there is also the place for an external SD card, up to 128GB (refer to the documentation mentioned before for compatible SD card models).
The image below shows the detection fields of the three vision systems discussed before:
DJI Remote Radio Controller
The Remote Radio Controller features DJI’s enhanced Wi-Fi technology, which enables a maximum transmission distance of 4 km (in FCC mode) and downlinking of 720p video from the DJI Mavic Air to the device running DJI GO4 App. is powered by a rechargeable battery that has a capacity of 2970 mAh, which ensures a working time of about 3 hours. By pressing the power button once it is possible to check current battery charge level. Holding the power button down turns on or off the radio controller.
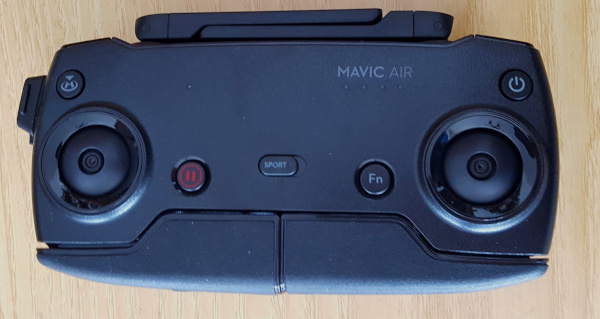
DJI Remote Radio Controller has a compact design and it is foldable, just like the drone:
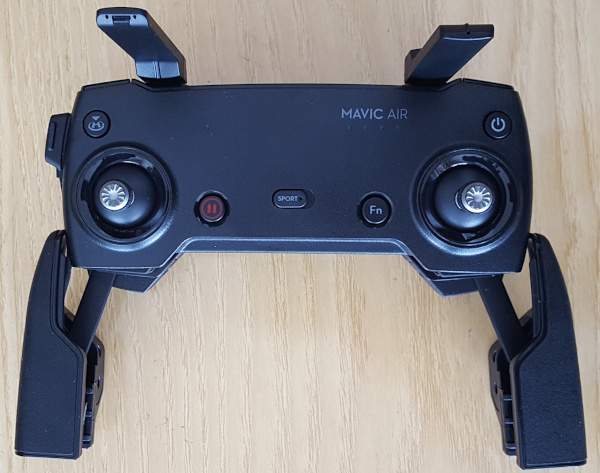
When unfolded and with the sticks mounted on, it looks like this:
On the front part there are five buttons: RTH (Return To Home), Pause Flight button (to end some flight mode, for example Return To Home), Sport (to switch between P-mode and S-mode), Fn (customizable function through DJI GO4 App) and Power button.
There is also a USB port for downlinking with a tablet instead of a smartphone device.

On top, there are two buttons, one for taking photos, the other one for starting/stopping video recording.
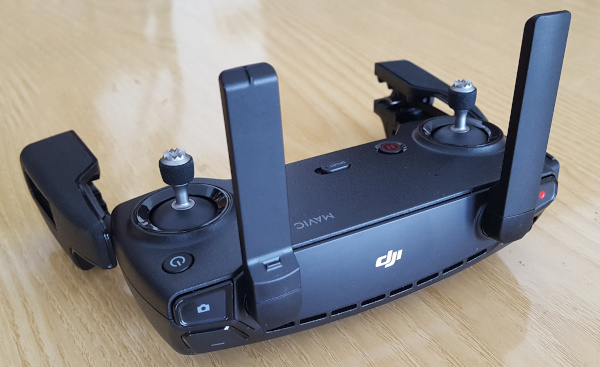
On the left there is the charging port (necessary DJI adapter included in the package with USB-C cable), which is also the same port through which the Radio Controller is connected to the mobile device running the DJI GO4 App.
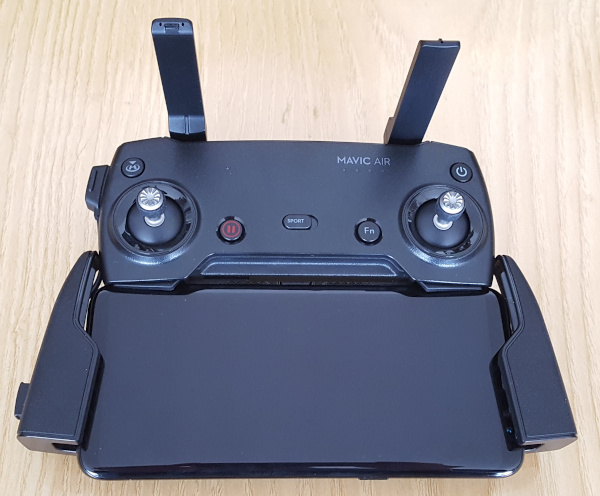
The image above shows DJI Radio Controller with a Samsung Galaxy S8 mounted on.
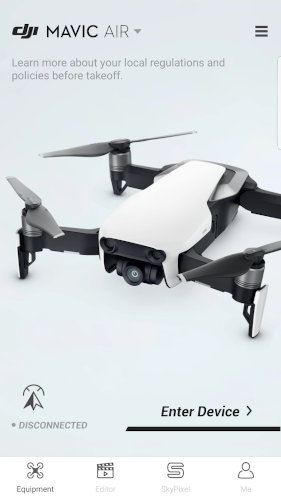
DJI GO4 App
DJI GO4 App is used to view FPV downlink on the mobile device the app is installed on. The app is available for free download on the Google Play Store for Android users and on the Apple Store for iOS users.
The following image shows mobile device screen after launching the app:
When connecting the aircraft for the first time, it is important to download and install the latest firmware available. The drone will also update maps used by DJI’s GEO system that defines which zones are safe to fly.
Once everything is updated, the app shows the current FPV video image in real time:

As the screenshot shows, FPV reports real time video from drone camera with many information on the overlay: in the top part it is reported aircraft status with GPS signal strength; if no satellite is acquired, then the tag OPTI is displayed meaning the aircraft will fly using vision sensors to maintain its current position. After that, there is an indicator of the Forward and Backward Vision System status and another one for wireless connection, which can be @2.4GHz or @5.8GHz, followed by battery level expressed in percentage. The last icon represents three dots: by tapping on it, it is possible to access a menu with the following configuration settings:
- MC Settings;
- Visual Navigation Settings;
- Remote Controller Settings;
- Image Transmission Settings;
- Aircraft Battery;
- General Settings.
Under these top icons, informations about camera settings are reported: ISO, Shutter, EV, White Balance and remaining space on the SD card when recording videos or taking photos at current resolution.
On the left side there are four icons for the following flight modes:
- Auto Take Off / Land;
- Return To Home;
- Intelligent Flight Modes;
- Advanced Pilot Assistance System (APAS), which allows autonomous obstacle avoidance.
The bottom part displays flight telemetry:
- D = distance between the aircraft and the Home Point;
- H = height from the Home Point;
- HS = aircraft horizontal speed;
- VS = aircraft vertical speed;
- VPS = visual positioning system clearance.
On the right side there are four icons: from the top, the first one toggles between video recording and photo shooting. Tapping on the second one, it is possible to start/stop recording or take photos. The third icon allows to enter the menu to configure camera settings, while the last one gives access to the SD card to view video and photos taken during the flight session.
The mid part of the screen shows obstacle detection system activity displaying the distance from the closest obstacle detected. The color of the indicators varies based on the distance from the aircraft and the obstacle.
Finally, on the bottom left, there is the map showing GPS location and flight path (flight data are recorded in the app and can be analyzed after the flight).
Intelligent Flight Modes
DJI Mavic Air features Intelligent Flight Modes, i.e. autonomous functions through which the aircraft can perform interesting moves for aerial shots. These modes are the following:
- QuickShots
- Dronie
- Circle
- Elix
- Rocket
- Boomerang
- Asteroid
- ActiveTrack
- SmartCapture
- Tripod Mode
- Cinematic Mode
- TapFly
- Point of Interest
Intelligent Flight Modes can be entered by clicking on the radio controller icon on the left of the screen (under the Return To Home icon).
Conclusions
DJI Mavic Air is one of the best drones for filming high quality footage; it is a portable and really easy to fly product featuring high quality technology.
Intelligent Flight Modes are just awesome for taking good cinematic shoots and the obstacle detection system is very accurate.
You can buy the DJI Mavic Air here. Now DJI Mavic Air 2 is available here.