In this post we will see how to configure switches on the FrSky Taranis X9D Plus SE 2019, the notorious radio transmitter using FrSky protocol and presented in this previous article, and how to set up flight modes on Betaflight Configurator through the configured switches. Since FrSky Taranis X9D Plus SE 2019 is loaded with OpenTX firmware (in my case the version is OpenTX 2.3.0), this guide is valid for all the transmitter using OpenTX firmware.
Setting up switches on OpenTX
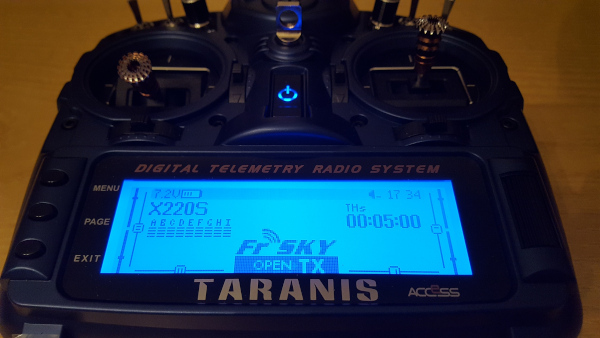
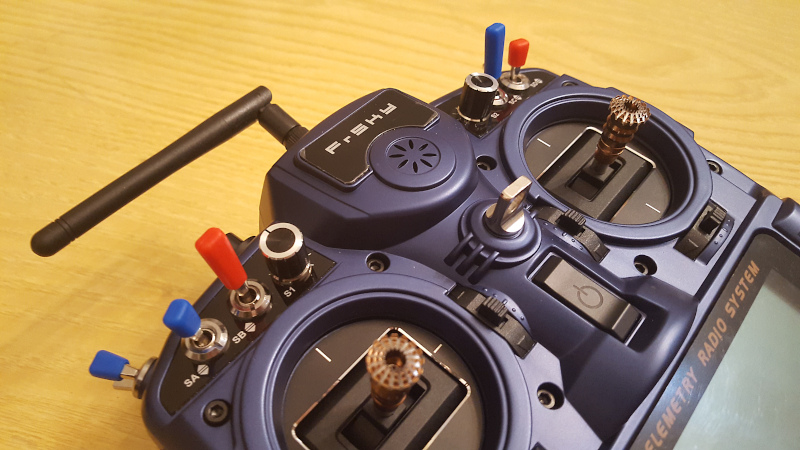
After turning on the FrSky Taranis X9D Plus SE 2019 by holding the power button, the LCD display turns on and we get the starting screen with our aircraft model page, in my case the Eachine X220S.
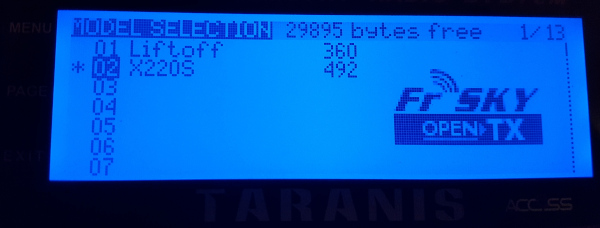
To proceed with the configuration of the switches, we need to go to the MODEL SELECTION menu, by pressing the MENU button; note the 1/13 on the top right of the display, indicating we are at page 1 of 13.
By pressing the PAGE button we can move to the next page (hold it to go to the previous page): we need to reach page number 5, which is INPUTS page. Here we can create new inputs and use them to set up, for example, switches.
When reaching INPUTS page for the first time, we have only 4 inputs: Thr (throttle), Ail (aileron), Ele (elevator), Rud (rudder).
Arming/disarming switch
Here is presented the detail for setting up an arming/disarming switch. To set the others (MODE, BEEP, TURTLE), it is just a matter of applying the same configuration.
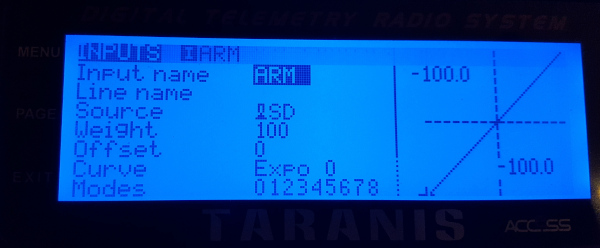
First, we need to create a new INPUT (page 5/13), that we name ARM, since we want to configure a switch that has the arming/disarming functionality. To move between the inputs, we can use the scroll wheel on the right:
By pressing and holding the scroll wheel button on an input line, we can edit the corresponding input. We are interested in two fields: “Input name” and “Source”. In the first one, we write ARM since this is the name we want to assign to this input, while in the second one we need to assign the switch name, in my case “SD”. To assign the switch, instead of scrolling through the list, one can simply change the switch position to have the field automatically filled in with the corresponding switch name.
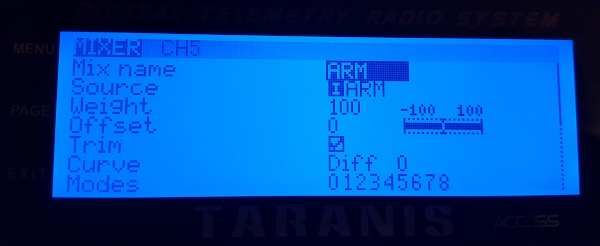
Once the INPUT is created, we need to assign that input to a MIXER (page 6/13) channel. Since the first four channels are already occupied by default aircraft commands, we use CH5 for ARM functionality:
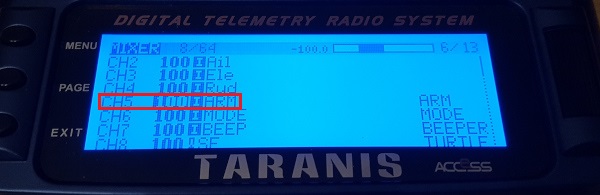
Like for the INPUTS, in MIXER menu we enter in the channel we are interested in using the scroll wheel button: once in edit mode, we set a MIX name and the Source: since we have defined an ARM input, we can configure it as our source (of course, we could have set up directly “SD” switch name, but I think creating an INPUT and referring to it is more clear).
Then, we just repeat this process for all the switches we need.
Adding sound or voice speech when flipping switches
Suppose now we want to have a sound or a voice track played when a switch is flipped; this can be useful, especially when flying with FPV goggles on.
This can be done using SPECIAL FUNCTIONS menu (page 11/13): some sounds and voice tracks are already available in the “SD card contents” from OpenTX download page. However, there is a good sound pack available here, called Amber Sound pack, which has many tracks.
So, the first thing to do is to download “SD card contents” for OpenTX: downloads are available here.
“SD card contents” for OpenTX 2.3.0 are here. Be careful to choose the correct transmitter model on the download page (for example, if you have the FrSky Taranis X9D Plus SE 2019, the correct folder is opentx-x9d+2019).
So, in my case, the correct file is this one, since the documentation reports the following note: “Note: 2.3.0 uses 2.3v0021”.
Once downloaded, we need an SD card for the FrSky Taranis X9D Plus SE 2019 on which we are going to transfer the downloaded file and extract its contents. We can either load the zip archive directly into the SD card by connecting it to the PC through a USB adapter or insert the SD card into the radio and then transfer the zip archive using the USB cable included with the Taranis. I suggest to proceed using the first solution since the transfer speed is better.
If everything went correctly, we should get the welcome sound when turning on the transmitter.
If you want to install also the Amber Sound pack, just download the file from the link mentioned above and extract its contents (“SOUNDS” folder) in the SD card like done before for the “SD card contents” zip archive.
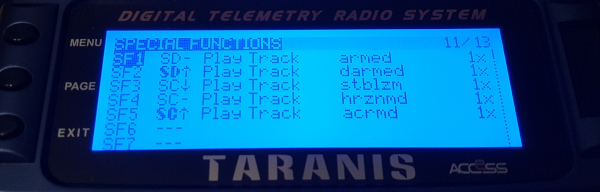
Then, to setup sound or voice tracks, it is just a matter of going into the SPECIAL FUNCTIONS menu and select the corresponding switch name and sound/track by selecting it using the scroll wheel. The following image shows the tracks for arming, disarming, stabilize (angle) mode, horizon mode and acro (air) mode respectively playing when flipping SD and SC switches.
Setting up switches in Betaflight Configurator
Finally, we have to set up the switches through Betaflight Configurator, so the flight controller knows what to do when a switch is flipped (the fact we have named one input as “ARM” does mean nothing to the flight controller until we make this configuration).
So, in Modes tab of Betaflight Configurator we can make an association between AUX channels, representing the switches, and modes recognized by the flight controller.
Here is the setup for ARM, ANGLE, HORIZON, BEEPER, AIR MODE, FLIP OVER AFTER CRASH (turtle mode):
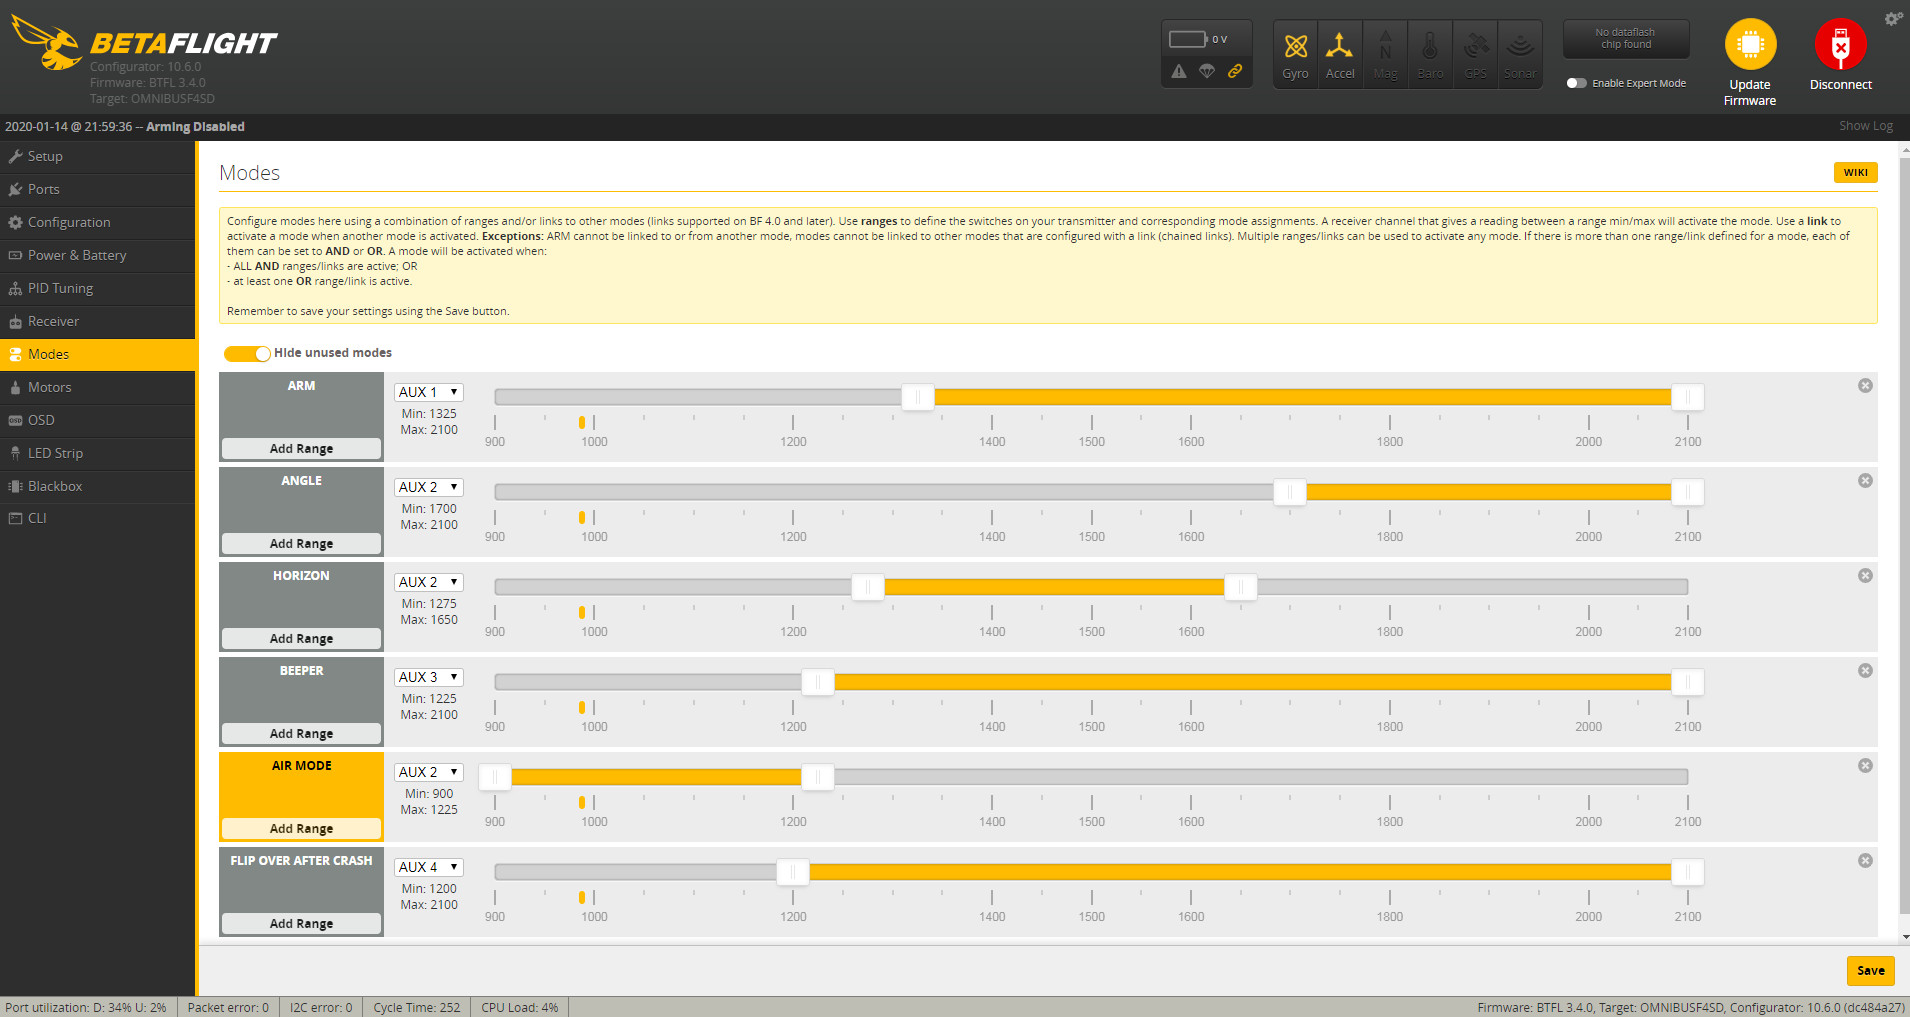
So we have:
- SD (AUX1) -> arm/disarm
- SC (AUX2) -> angle, horizon , air modes
- SA (AUX3) -> beeper
- SE (AUX4) -> flip over after crash (turtle mode)
Receiver
In case you are looking for a good receiver for the FrSky Taranis X9D Plus 2019, a good choice is the FrSky XM+ which is lightweight and it is a full range receiver.
Anti-slipping switch caps
A very nice addition to every transmitter is the use of anti-slipping switch caps, which also have the nice function of remembering the different functions assigned to each switch. For example, we can use a red cap switch for the ARM/DISARM switch.
LDARC Rubber Anti-slipping Switch Caps are perfect for the FrSky Taranis X9D Plus 2019:
Conclusions
In this article we have seen how to set up and configure switches on the FrSky Taranis X9D Plus SE 2019 and how to activate flight modes in Betaflight Configurator by flipping the corresponding associated switch on the radio transmitter. Moreover, we have also seen how to play a sound or a voice track when flipping a switch by downloading and installing OpenTX SD card contents and Amber Sound pack.
For an overview of the FrSky Taranis X9D Plus SE 2019, read this article.