DJI Mavic Air 2 is the successor of the DJI Mavic Air portable drone. In this article we will take a look at the features and improvements made by DJI, which has developed an impressive product.
Like its predecessor, Mavic Air 2 is available in two different kits: standard and Fly More Combo. The second kit has 2 more batteries, ND filters (ND16/64/256), 6 pairs of propellers (instead of 4), a battery charger hub and a shoulder bag for carrying the drone.
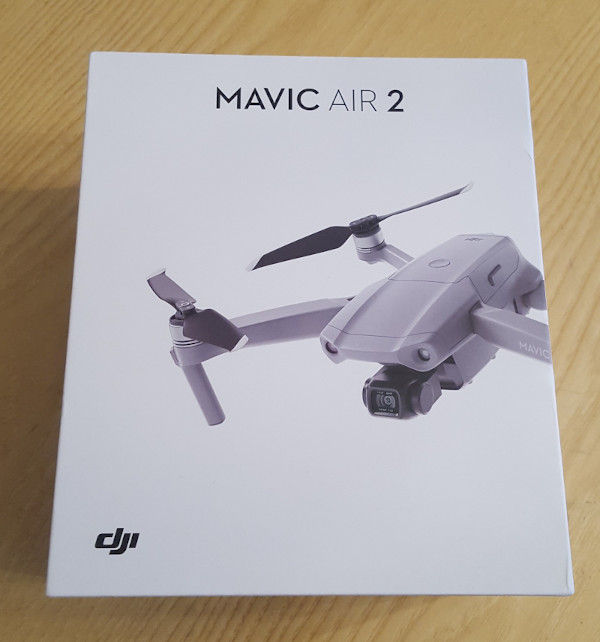
DJI Mavic Air 2 Standard Version Box
In this review we will examine the standard version. Here is the Mavic Air 2 box:
Opening the box we get immediately the view of the folded drone:
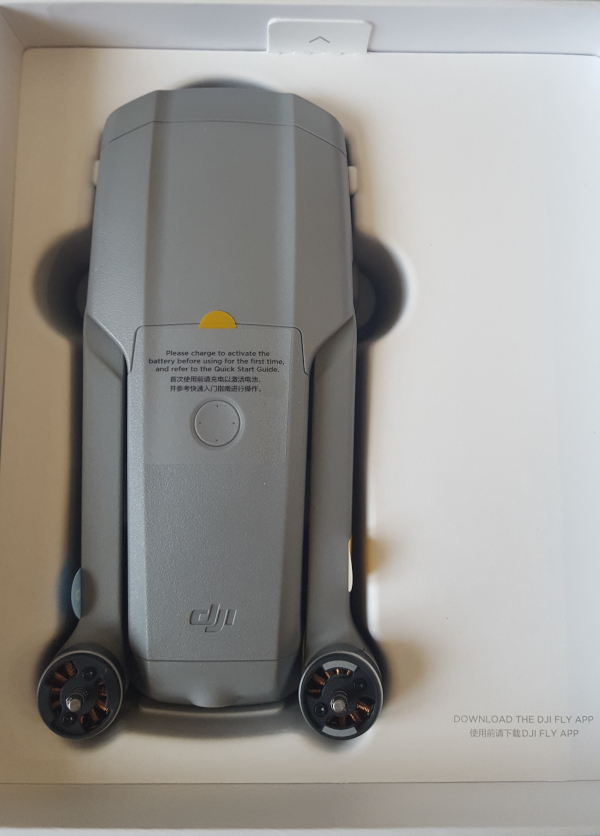
Note there is a sticker telling us that the battery will be activated after the first charge.
Package Contents
The following image shows the contents of the box:
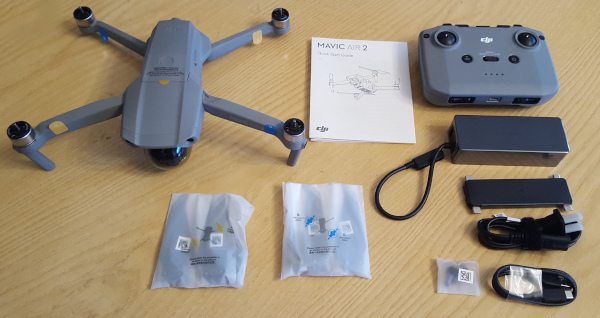
- DJI Mavic Air 2, which weights 570g (140g heavier than its predecessor);
- radio controller;
- USB to type C cable;
- battery charger (one for both drone and radio controller) and power cable;
- cables to connect different smartphone brands to the radio controller;
- 3 pairs of propellers (CCW props can be recognized by the presence of a white marker and the same marker is on the drone to guide the user during the assembly);
- spare control sticks;
- instruction manual.
Specifications
Since DJI Mavic Air 2 specifications are quite long and detailed, here is the link at the official DJI website with all the info.
DJI Mavic Air 2 main features are the following:
- 4k@60fps videos;
- 48MP photos;
- 34 minutes max flight time;
- 10km 1080p video transmission;
- HDR;
- FocusTrack;
- 8K Hyperlapse.
Overview
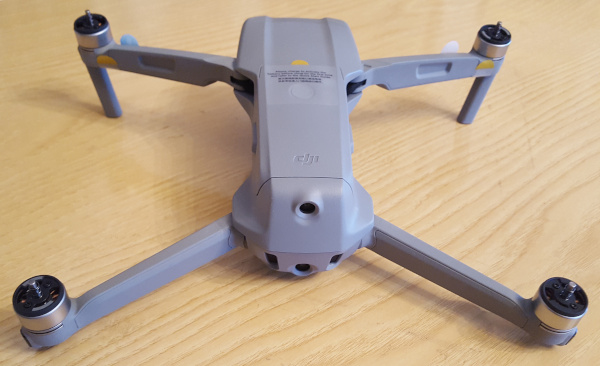
Down below DJI Mavic Air 2 is shown unfolded:
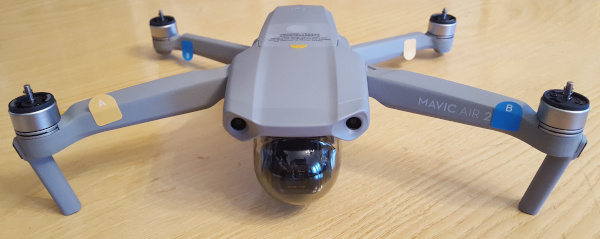
Front landing gears are drone built-in antennas.
Camera
Hidden under the camera gimbal protector, there is the camera which has a SONY IMX586 Quad Bayer 1/2” CMOS sensor:
- FOV: 84°
- Equivalent Focal Length: 24mm
- Aperture: f/2.8
- Focus Range: 1m to ∞
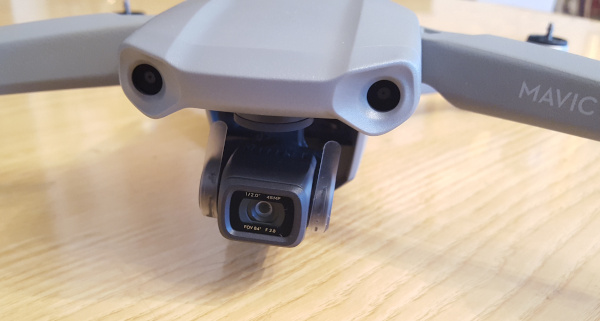
The camera is capable of taking videos up to 4K@60fps and of capturing photos up to 48MP.
Of course the sensor is not that big, but this camera can handle dynamic range situations pretty well, especially if we are going to use some ND filters, like Sunnylife ND Lens Filters for DJI Mavic Air 2. ND filters are a must have since they can improve drastically photo and video footage quality in certain light conditions and if we want to capture particular shots.
Vision System
On the front there are two sensors used by the Advanced Pilot Assistance System (APAS), i.e. DJI obstacle avoidance system. For the same purpose, there are two sensors on the back:
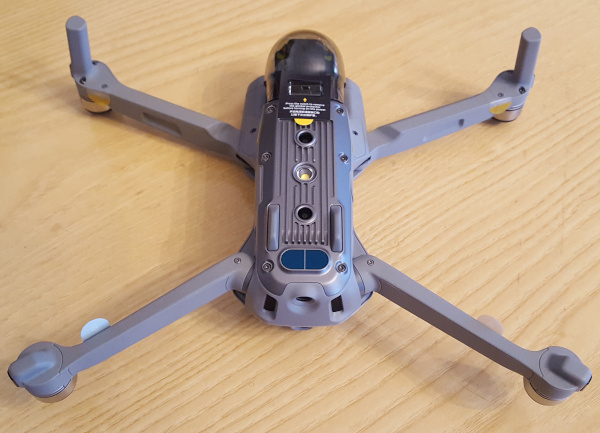
Under the drone there are also other sensors for the downward vision system and the infrared sensing system. Moreover, there is an auxiliary bottom led light on the central part.
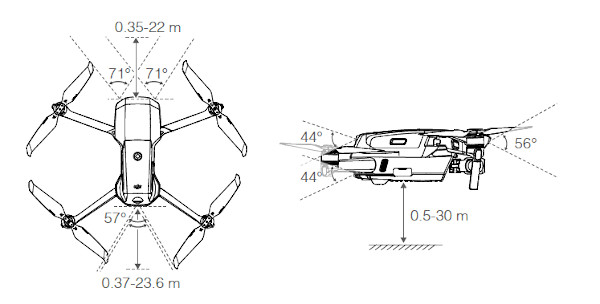
The following image shows vision system detection ranges for obstacle avoidance:
Battery
DJI Mavic Air 2 has an intelligent flight battery, by means it automatically discharge to 40%-60% when it is in idle for more than 10 days (4 days are needed to reach that percentage). It is a 3S 3500mAh LiPo that can keep the drone in the air for a maximum of 34 minutes.

On the top side, 4 leds indicate battery charge status by pressing the circular button once.
If you need some spare DJI Mavic Air 2 original batteries, you can find them here: Original 3S 3500mAh 40.42Wh Intelligent Flight Battery 34mins Flight Time for DJI Mavic Air 2.
Radio Controller
The radio controller is bigger than the Mavic Air one, but it is more comfortable. The sticks are kept in the bottom part and can be easily mounted on by screwing them in place.
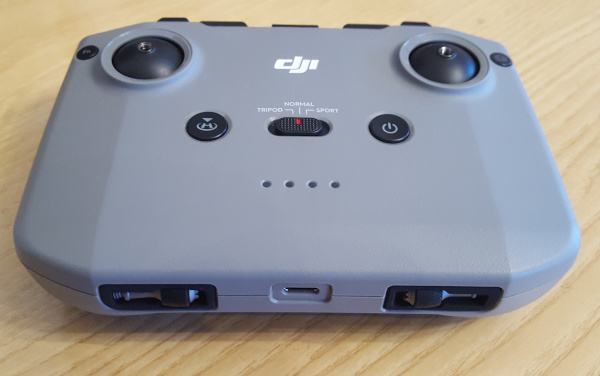
In the front part, there are 4 buttons and a slider:
- top left -> Fn button;
- top right -> Photo/Video switch;
- mid left -> return home / stop advanced flight modes button;
- mid right -> power button;
- slider -> tripod, normal, sport mode switch.
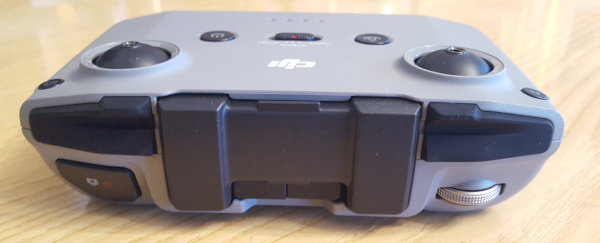
On the top part there is a button for taking photos or starting/stopping videos depending on the current mode and a scroll wheel to change camera angle through gimbal adjustment:
Differently from its predecessor,this controller has a the phone holder on the top part instead of the bottom, which is definitely a better choice:
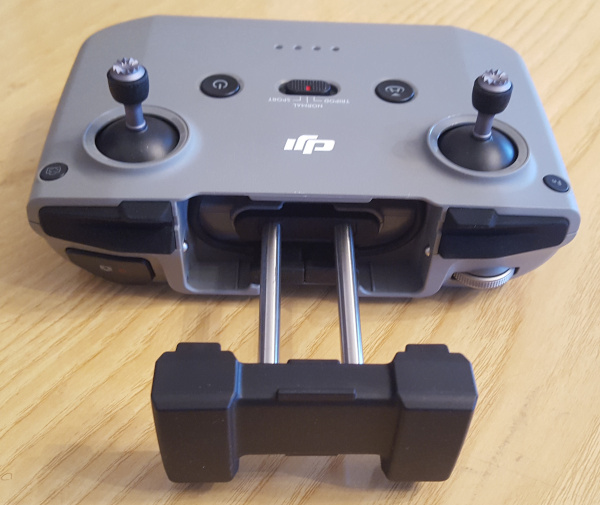
Phone connection cable to the remote is well kept inside when not in use.
Finally, 4 leds indicate battery charge status by pressing the power button once.
Storage
DJI Mavic Air 2 has an internal storage of 8GB. This is good, but not enough considering the high quality videos and photos it can acquire, in fact it can reach a writing bit rate up to 120 Mbps, i.e. 15MBs. This means that in a single minute of video recording it can produce a 900MB video file. This is why there is the possibility to add an external SD card, up to 256GB.
The only consideration to keep in mind while looking for the additional SD card it is that we need one that is capable of a writing speed of at least 15MBs: a cheap good choice is the BlitzWolf BW-TF1 Class 10 UHS-3 V30 64GB or 128GB SD Card, which has a writing speed > 30MBs (beware that 32GB version has lower speeds, so consider at least 64GB version).
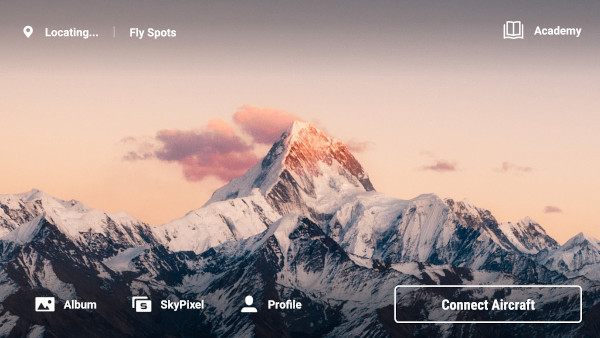
DJI Fly App
Differently from the Mavic Air which was controlled by DJI GO4 app, DJI Mavic Air 2 uses DJI Fly app (same as Mavic Mini). Of course, a DJI account is necessary to be able to use the app and register the drone, so you have to create it in the official DJI website.
Once started, we get the prompt for connecting to the aircraft:
If the connection is successful we get the camera view on the screen:
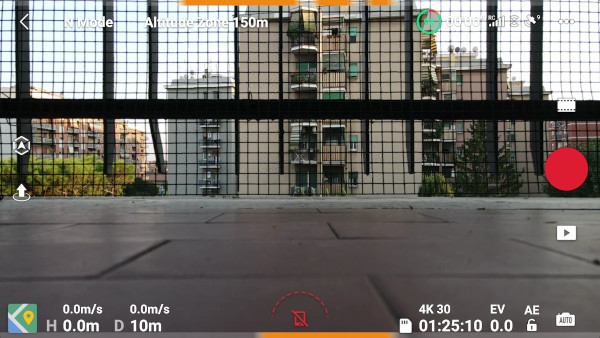
From here we get all Mavic Air 2 informations, like battery percentage, remaining flight time, RC signal, number of satellites and of course all the controls for the drone. On the left, for example, we have the icon to take off and another icon showing obstacle avoidance status (green icon if bypass is active, white if brake is active, red if it is off). On the top right, tapping on the three white dots, there is the possibility to change settings, while on the mid right we can change photo/video modes (and also access intelligent flight modes, like QuickShot) and view our photos and videos:
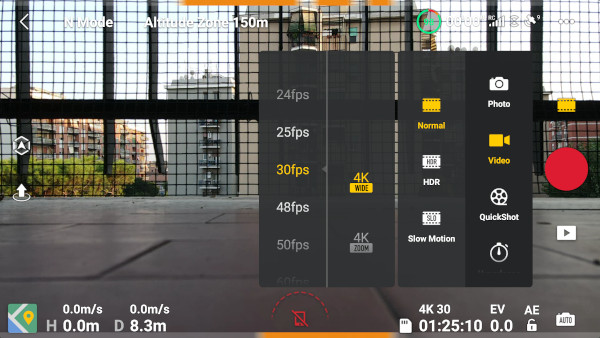
We have five main modes accessible from the “film icon” on the right:
- Photo
- Video
- QuickShot
- Hyperlapse
- Pano
Photo Mode
Selecting Photo mode, there are six choices:
- Single Photo
- 48 MP
- Smart
- AEB (Automatic Exposure Bracketing)
- Burst
- Timed Shot
Video Mode
In Video mode, there are three possible ways to record videos:
- Normal (4K Wide @ 24/25/30/48/50/60 fps, 4K Zoom @ 24/25/30 fps, 2.7K @ 24/25/30/48/50/60 fps, 1080p @ 24/25/30/48/50/60 fps)
- HDR (4K Wide @ 24/25/30 fps, 2.7K @ 24/25/30 fps, 1080p @ 24/25/30 fps)
- Slow Motion (1080p @ 120/240 fps)
Intelligent Flight Modes
Like its predecessor, DJI Mavic Air 2 features Intelligent Flight Modes, i.e. autonomous functions through which the aircraft can perform interesting maneuvers for aerial shots. These modes are the following:
- FocusTrack
- Spotlight 2.0 (default mode)
- ActiveTrack 3.0 (Trace, Parallel)
- Point Of Interest 3.0
- QuickShot
- Dronie
- Rocket
- Circle
- Elix
- Boomerang
- Asteroid
- Hyperlapse
- Free
- Circle
- Course Lock
- Waypoint
While Quickshot and Hyperlapse are accessible by tapping on the “film icon” on the right of the app (just like other modes), FocusTrack can be activated by dragging a box on the screen in the camera view around the subject we want to track. To stop FocusTrack we have to press the Return Home button once which acts like a Flight Pause button also for the other intelligent flight modes. These modes can be activated only in flight.
Pano Mode
In Pano (panorama) mode there are four possibilities:
- Sphere: 360 degrees shot
- 180°: wide shot at 180 degrees
- Wide-angle: wider than a regular photo on both horizontal and vertical axes, but not as wide as the 180° on the horizontal axis
- Vertical: takes multiple shots on the vertical axis and aligns them vertically
Panorama shots are very nice and it is a good idea to take some pictures in this mode when you are shooting.
DJI Fly App Menu Settings
DJI Fly app menu settings are grouped in the following:
- Safety -> options like APAS configuration
- Control -> options like aircraft measurement units and gimbal mode
- Camera -> photo/video options
- Transmission -> definition and frequency
- About -> firmware informations
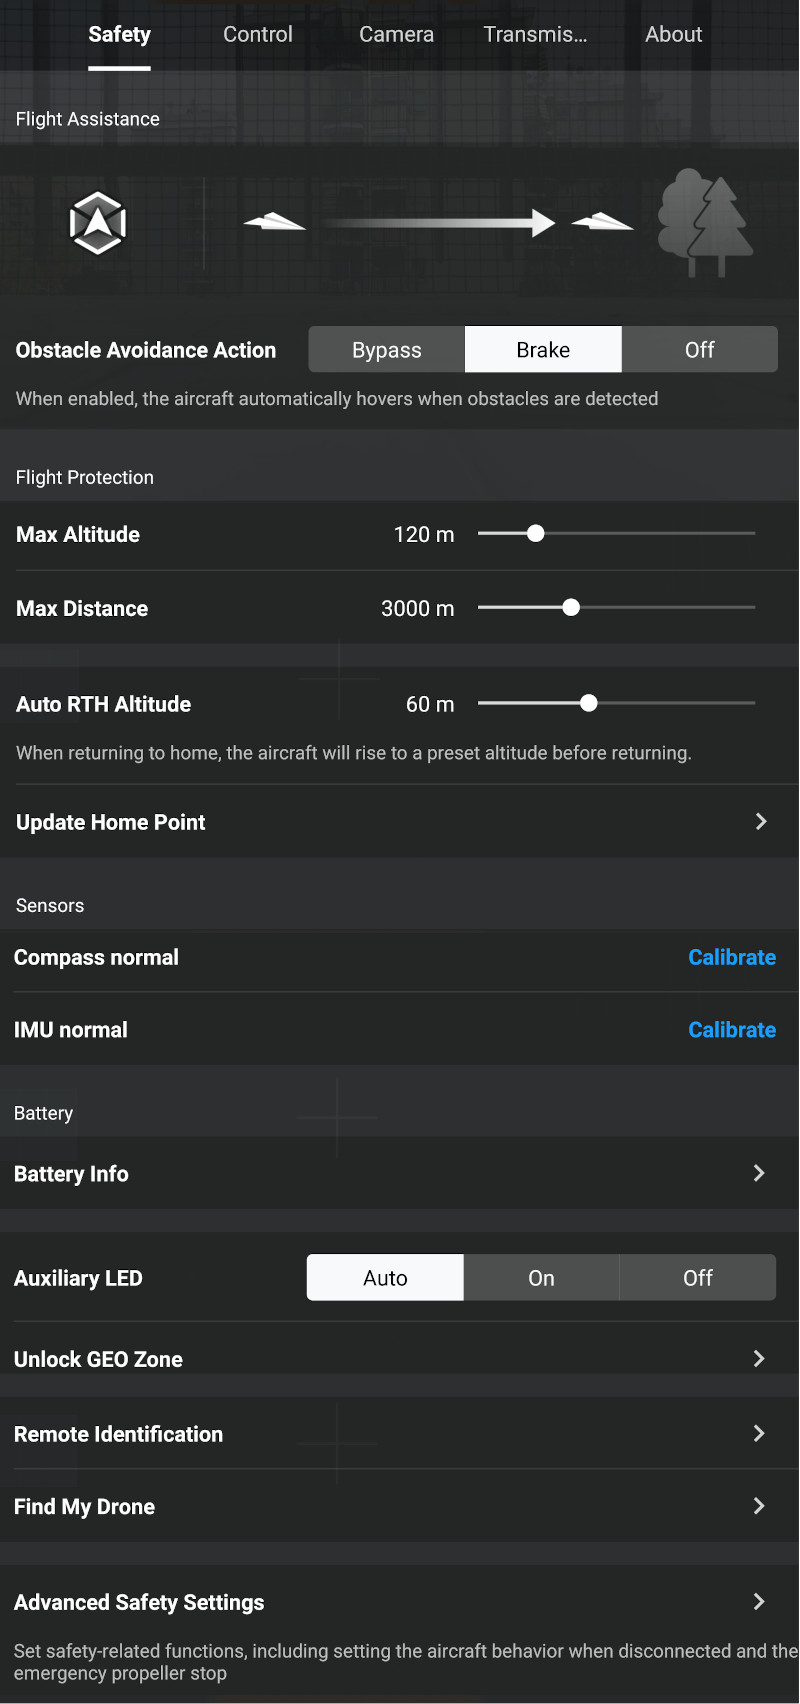
Safety Menu
Safety menu contains all configurations related to secure flying.
The first one is Flight Assistance, which has three options:
- Bypass: when the drone identifies an obstacle through its sensors, it proceeds in the direction bypassing the obstacle
- Brake: when the drone identifies an obstacle through its sensors, it just stops hovering in place
- Off: autonomous obstacle avoidance is off (beware this is off by default when flying in Sport Mode), so flying towards an obstacle will result in a crash if no manual action is taken
In Flight Protection we can change maximum altitude and distance, return to home altitude and we can update the Home Point, i.e. the position the drone will return to if RTH procedure is initiated.
In Sensors section we can start procedures to calibrate Compass and IMU.
In Battery section we can find information about battery status.
Then we have options about Auxiliary LED (located at the bottom of the DJI Mavic Air 2), Unlock GEO Zone, Remote Identification and Find My Drone.
The last one is Advanced Safety Settings: here we can choose the behavior of the aircraft when it loses connections from the remote controller: return to home should be the best choice, but we can also choose to hover or land (this last one should be avoided).
Control Menu
In Aircraft section of Control Menu, the first option allow us to set up aircraft distance measurement units:
- metric (m)
- metric (km)
- imperial
Activating target scanning allow us to see on the FPV screen which subjects are automatically recognized in the frame by drone camera software. This could be useful for FocusTrack.
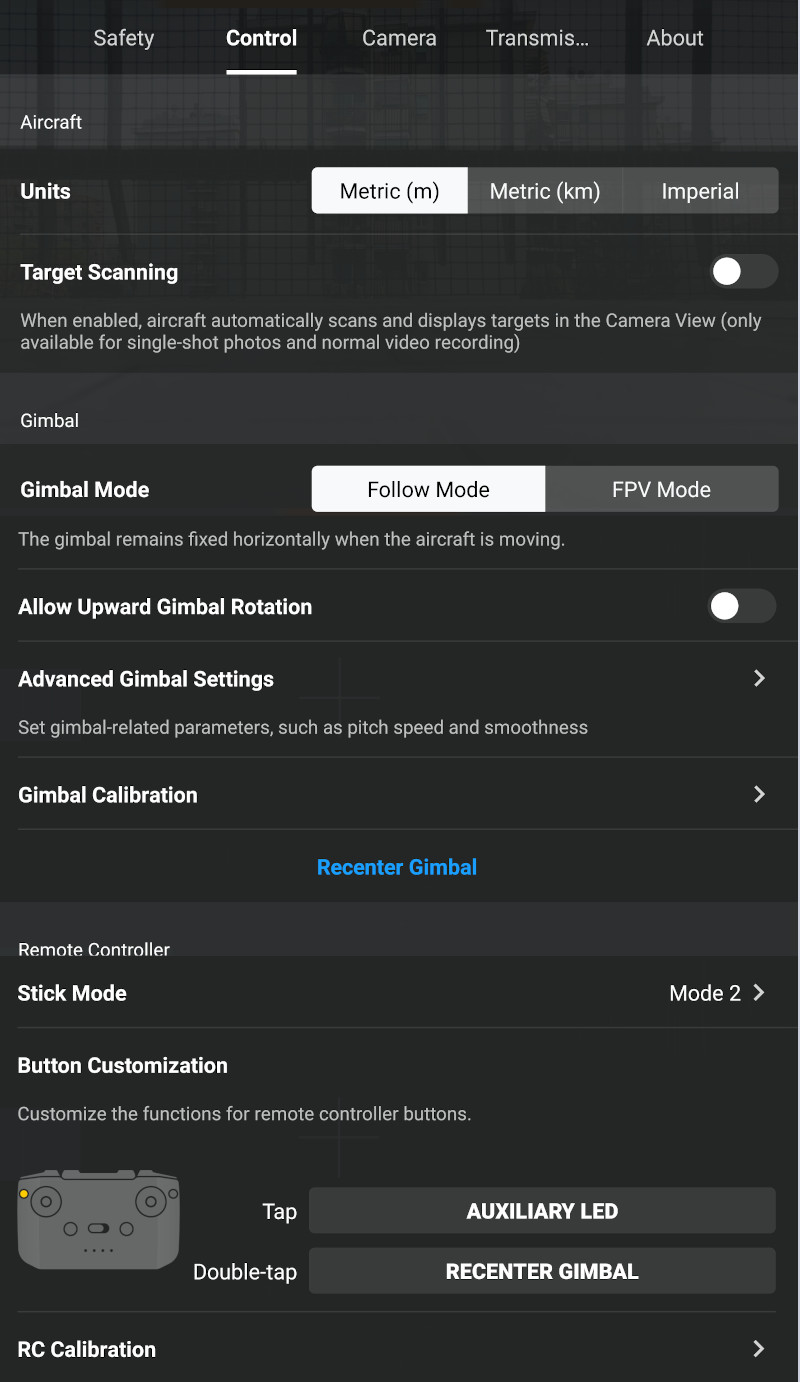
Gimbal section contains various options to configure gimbal behavior and set up:
- Gimbal Mode: Follow Mode / FPV Mode, in the first case the gimbal is fixed horizontally while in the second case its inclination with respect to the horizon changes
- Allow Upward Gimbal Rotation: gimbal can be slightly rotated upwards
- Advanced Gimbal Settings: contains a section to set up gimbal parameters like speed and smoothness
- Gimbal Calibration: this allows to start gimbal calibration procedure
We can also press Recenter Gimbal to reset gimbal in central position.
The last section is for the RC controller: we can set up two functions for the Fn button, one for the single tap, the other for double-tap. Default functions are the activation of the auxiliary bottom led and gimbal reset to center position.
Camera Menu
Camera Menu changes slightly if we are in photo or video mode.
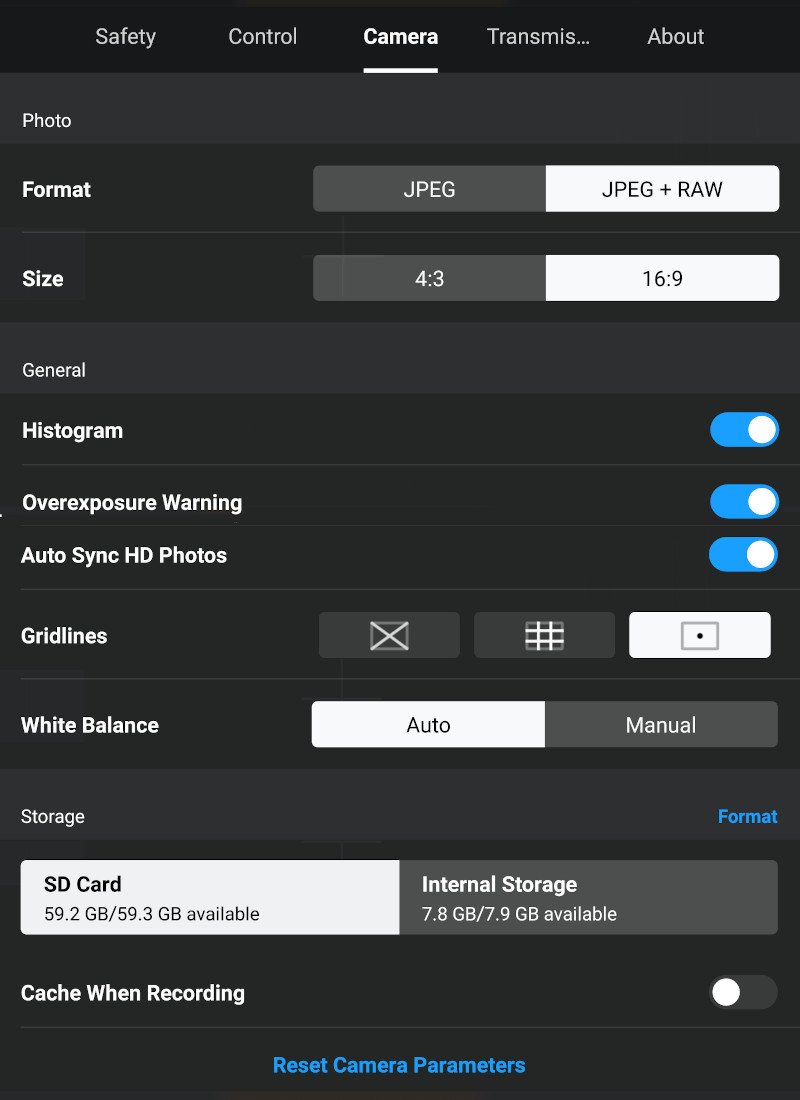
Camera menu for photo shooting has the first section with two elements:
- Format: JPEG / JPEG + RAW (the second option is recommended since it collects the highest amount of information from the shot saving a DNG file on which we can work in post to reveal the highest amount of details)
- Size 4:3 / 16:9, i.e. photo aspect ratio
The following two options are really important since they give indication about the exposure of our shot:
- Histogram: graph to evaluate exposure
- Overexposure Warning: zebras stripes appear in the picture for overexposed areas
Auto Sync HD Photos automatically downloads photos to the device connected to the rc controller (for example, the smarthphone).
Gridlines are useful to center a subject in the frame and to apply the rule of thirds.
Next line is to set up White Balance to auto or manual.
In Storage section we can choose to save our photos and videos on the external SD card or on the internal memory.
We can also activate Cache When Recording, meaning the device will save low resolution video footage when recording is on.
The last line is for resetting camera parameters to default.
Camera menu for video recording is pretty much the same, just the initial part is different. In fact, here we can choose between MP4 / MOV for Format and between H.264 / H.265 for Coding Format.
Color can be changed between Normal / D-Cinelike (overall contrast of the image is lower)
Activating Video Subtitles saves flight information in a SRT files so it is possible to add these details (Aperture, Shutter Speed, ISO, EV, GPS, Distance, Height, Horizontal Speed, Vertical Speed) to the footage in post.

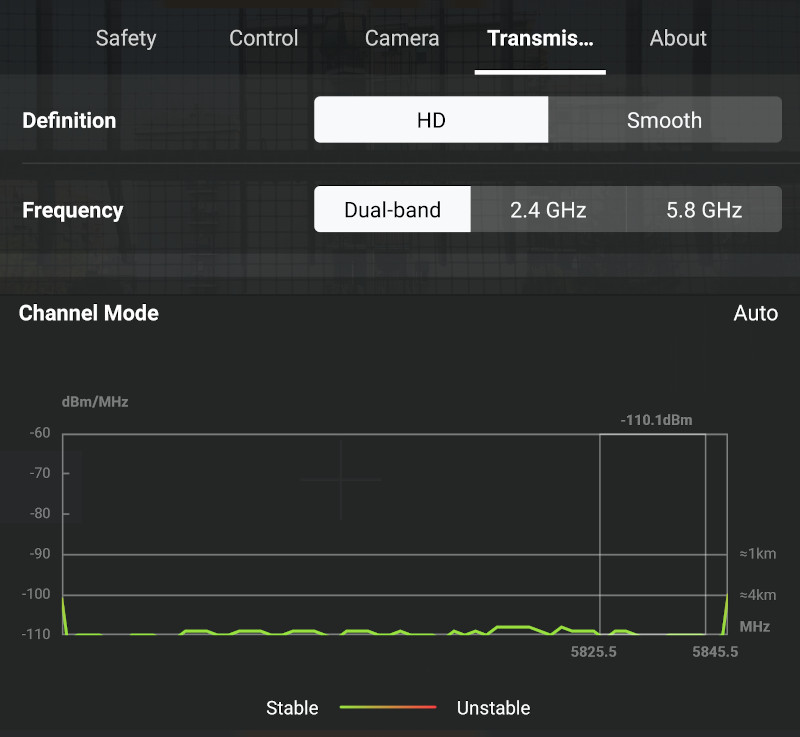
Transmission Menu
In transmission Menu we can change two settings: video transmission quality (HD / Smooth) and transmission frequency (Dual Band / 2.4 GHz / 5.8 GHz).
A nice feature of this tab is the spectrum analyzer so we can evaluate possible interferences affecting drone / controller communication.
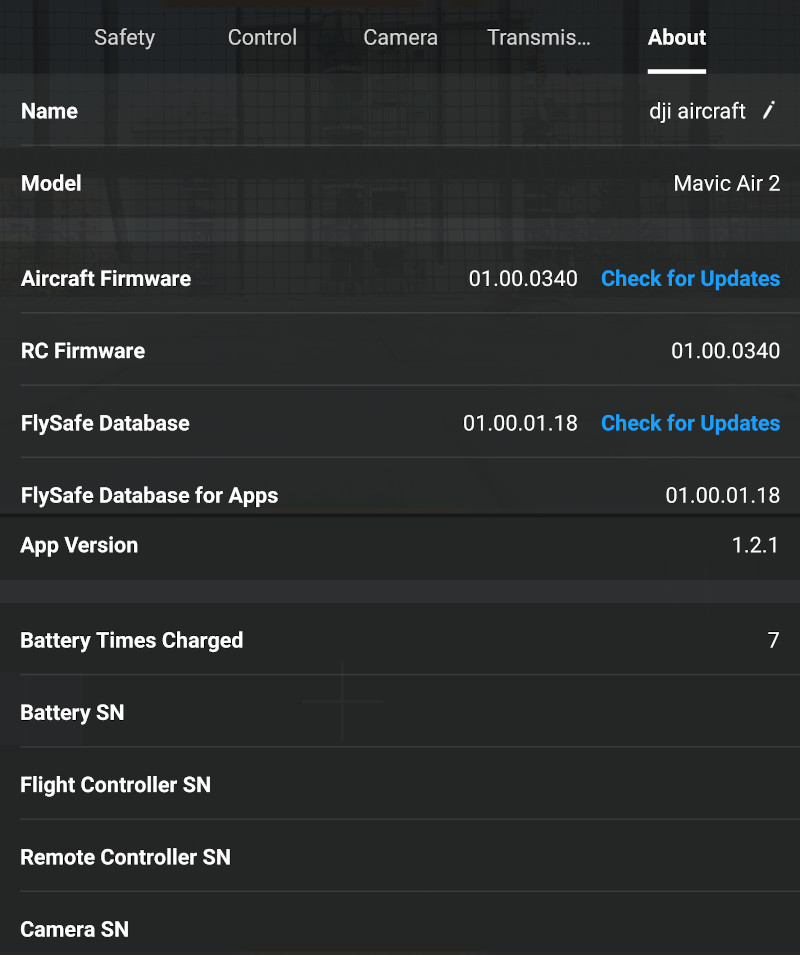
About Menu
The last tab is About Menu, which contains information about the aircraft like version of the firmware installed and FlySafe database version (maps): from here we can also check for available updates.
Serial numbers have been obscured.
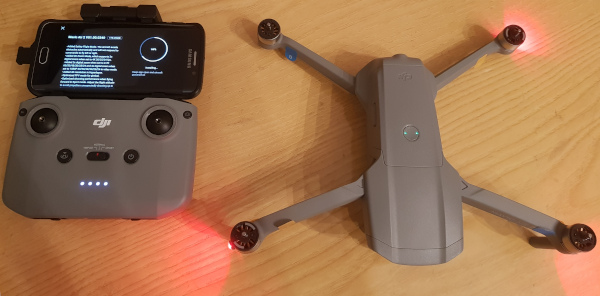
Firmware update
Before flying for the first time it is important to update the Mavic Air 2 with the latest firmware available. The update process is shown in the following image:
Flight Recorder
It is useful to know that flight data can be accessed using DJI Assistant 2 for Mavic available in the download area of DJI official website.
Aerial footage
Here you can take a look at a short aerial footage from the DJI Mavic Air 2 on the Youtube channel.
Conclusions
DJI Mavic Air 2 is an impressive drone with stunning photo and video capabilities; the advanced flight modes are a really nice features allowing suggestive shots: it really gives you the ability to focus on the shots instead on piloting since its autonomous flight modes are very accurate.
DJI Mavic Air 2 is available here in both standard and Fly More Combo kits.
If you are looking for a nice and cheap drone bag for carrying the DJI Mavic Air 2, you can take a look at this article.