If you are in photography you already know how ND filters work and how they can drastically affect photos or video shots. If you are not familiar with them, in this article we will go through an explanation of why they are so important. Then, we will take a look at the Sunnylife ND4/ND8/ND16/ND32 Lens Filters for the DJI Mavic Air 2 and see how to use them to capture nice photos and videos.
Exposure
To dive in deep in this topic, we need to introduce the basic concept of exposure, i.e. how the light reaches the camera sensor. Exposure is crucial in photography because exposing an image properly determines the ideal amount of brightness, which is fundamental to have the highest amount of details in photos or videos.
Exposure is affected basically by three parameters, better known as “exposure triangle”:
- aperture: dimension of the “hole” that lets the light reach the camera sensor
- shutter speed: how long the aperture stays open to let the light in (for each frame or picture), i.e. the duration of the exposure
- ISO: sensitivity of the camera sensor to the light that is coming in the aperture
DJI Mavic Air 2 has a 1/2” CMOS camera sensor with a focal length of 24mm and an aperture of f/2.8. Since this parameter is locked, we can do nothing about it; just be aware that this value controls the depth of field, by means the range of distance over which objects appear in sharp focus.
Instead, we have control on the other two parameters: shutter speed and ISO.
Exposure control on DJI Fly App
When we shoot photos or videos with our DJI Mavic Air 2, we basically have two options to handle exposure in DJI Fly App, auto or manual. In auto mode the software adjust these values autonomously by changing them depending on the lights conditions.
This is not always a good choice and a common example is the case in which we are filming in a bright day and we pass from a shot where we do not have the sky in the frame to a situation in which we have both the landscape and the bright sky in the frame. To compensate the big difference in brightness auto exposure kicks in darkening the picture and causing a loss in landscape details.
This is why manual mode is nice: we can set ISO and shutter speed at a specific value and they will not change, so we have the same chosen exposure level even if the bright sky enters in the frame.
These parameters can be modified in the bottom right of DJI Fly App camera view:
ISO and shutter speed values
As you can imagine, in manual mode becomes really important to understand how to set ISO and shutter speed values properly to have the best looking image in terms of exposure.
For ISO parameter, good values for DJI Mavic Air 2 camera are between 100-400: generally 100 or 200 are preferred; values greater than 400 tend to introduce too much noise in the image. Noise increases with greater ISO values and this is due to the higher sensitivity: beware that an ISO value of 200 makes camera sensor twice as sensitive to light as ISO 100.
The other parameter we can work on is the shutter speed (directly related to exposure time): the higher the value, the longer the aperture stays open so more light reaches camera sensor, causing a blurred effect on moving subjects called subject blur (or on static objects if the camera holder is moving, then we talk about camera blur).
For video recording, the general rule (called 180 degree rule) says that we have to double the shutter speed with respect to the frames per second we are recording. For example:
- recording at 30 fps -> shutter speed 1/60 s
- recording at 60 fps -> shutter speed 1/120 s
- recording at 24 fps -> shutter speed 1/50 s (since 1/48 s is not available)
This technique is perfect for cinematic footage since it produces the smoothest and most natural looking video due to the blurring effect.
Unfortunately, using the standard lens, these shutter speed values are impossible to set in light conditions we have during a bright day. In fact, the image will result overexposed: this is one of the situations in which we need ND filters.
Another example is related to photography: imagine we want to take a shot by night with a long exposure time to capture traffic lights trail or we want to capture the motion effect for a waterfall; in this case we have to slow the shutter speed down (exposure time increases) and this causes the image to become really bright due to the big amount of light entering in the aperture, so a way to compensate this behavior is to use ND filters.
ND Filters
Consider ND (Neutral-Density) camera filters like sunglasses: they basically reduce the amount of light coming from the lens to the camera sensor, so we can adjust shutter speed to the value we want. Based on their capability to reduce the light ND filters are identified by numbers like ND4, ND8, ND16, ND32 and so on: the higher the number the more the filter is effective in reducing the amount of light. For example, a ND4 filter reduces four times the amount of incoming light.
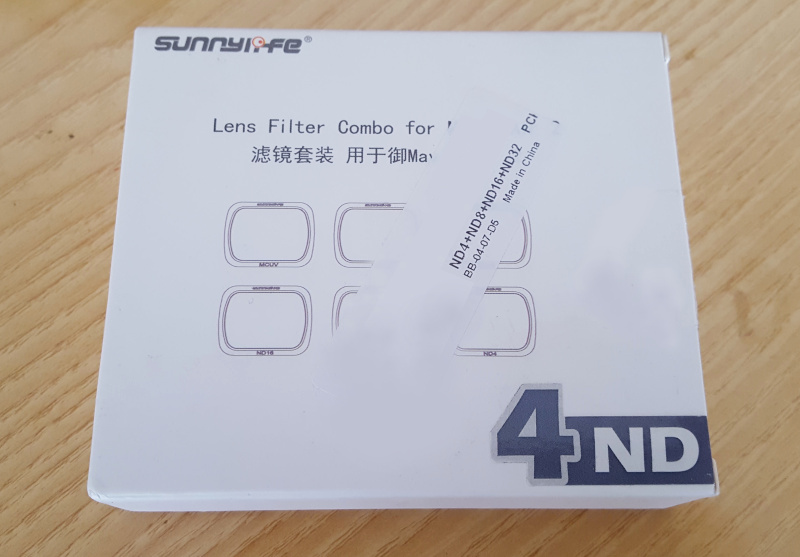
So now we take a look at the Sunnylife ND4/ND8/ND16/ND32 Lens Filters, which are a very good choice for the DJI Mavic Air 2.
Package Contents
This is Sunnylife ND filters package:
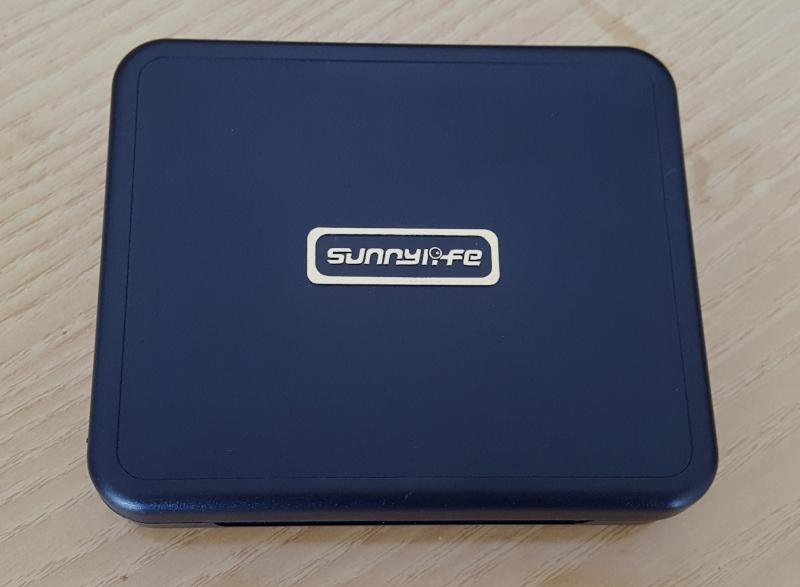
It contains the following ND filters case:
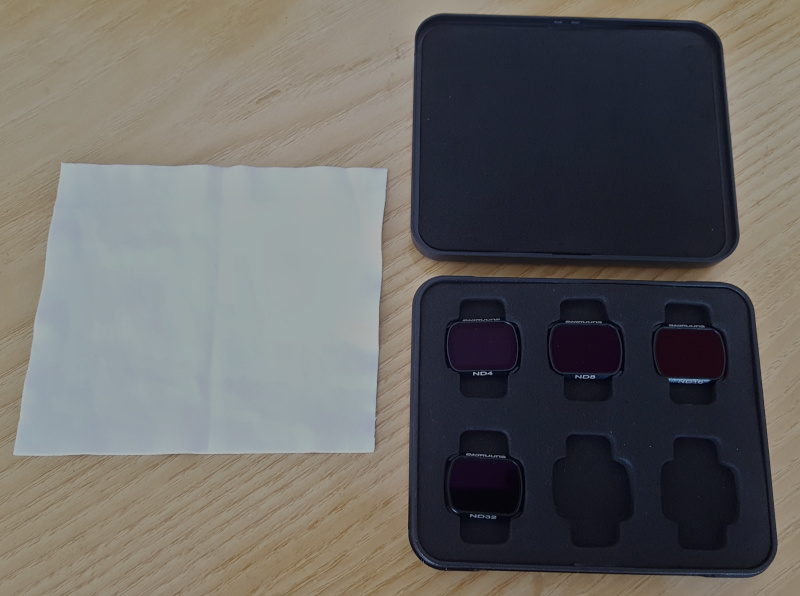
The case stores four ND filters (ND4/ND8/ND16/ND32) and a cleaning cloth:
ND filters mounting on DJI Mavic Air 2
In order to mount Sunnylife ND filters on the DJI Mavic Air 2 we have to remove the stock “cover” (it is just a border). This is a simple step: just press the cover a little bit and gently rotate it counterclockwise. It should come out easily.

Once done remember to put it inside the ND filters case to avoid losing it.
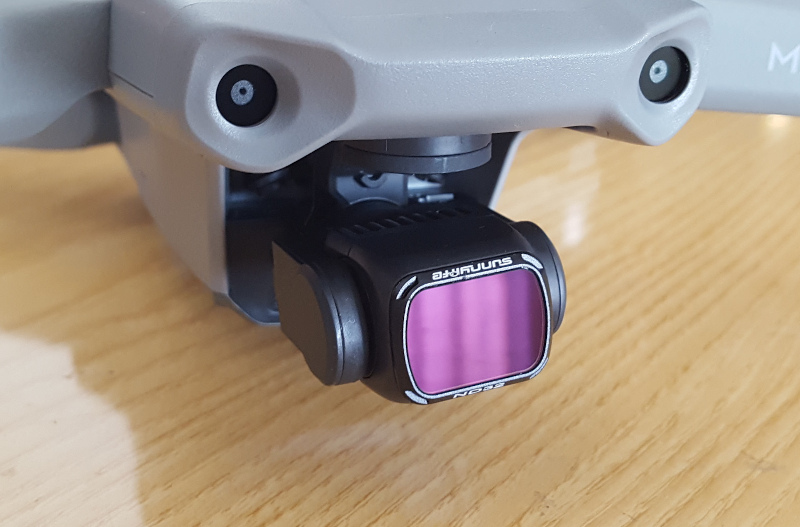
Then it is just a matter of choosing the ND filter you want to use, insert it by adapting to the camera holes and rotating clockwise until it is securely fixed. The following image shows Sunnylife ND32 filter mounted on the DJI Mavic Air 2:
ND filters use cases
In this section we will take a look at some use cases where equipping DJI Mavic Air 2 with Sunnylife ND filters is critical to take shots with correct exposure. Of course, in the following we are going to use manual camera settings, because we want full control on the image.
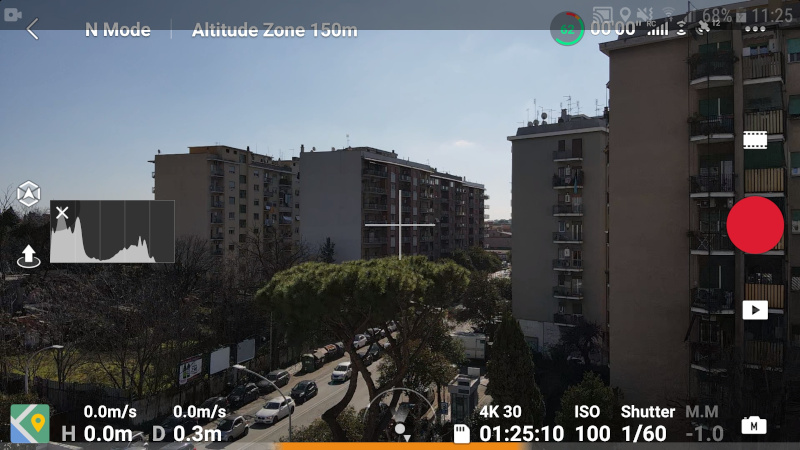
In this first example we have in the frame a very bright sky.
Remembering what we said previously about the 180 degree rule, a good setting for video recording to have the most natural motion blur in the footage we have to double shutter speed value with respect to the frame rate.
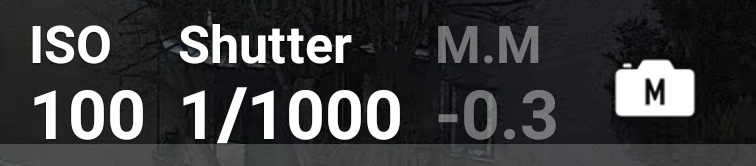
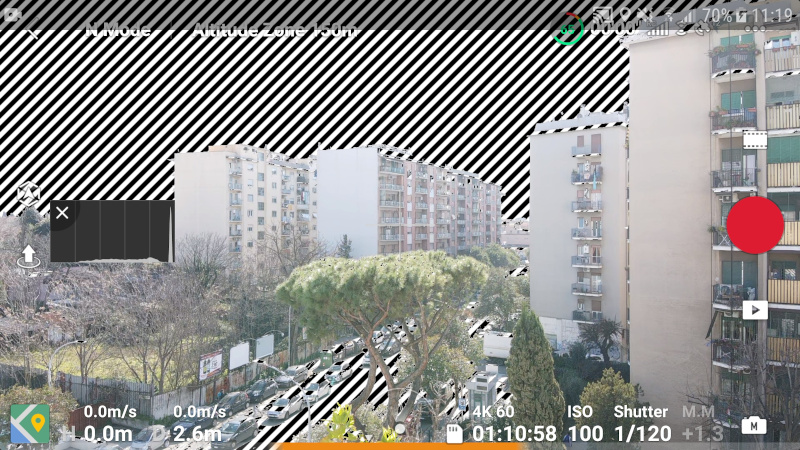
As we can see with the help of the histogram and of the overexposure warning (zebra stripes), in these light conditions and with no filters equipped, the image is overexposed with the desired exposure time of 1/120 s:
- ISO 100
- shutter speed 1/120 s
- 4K@60 fps
- no filter
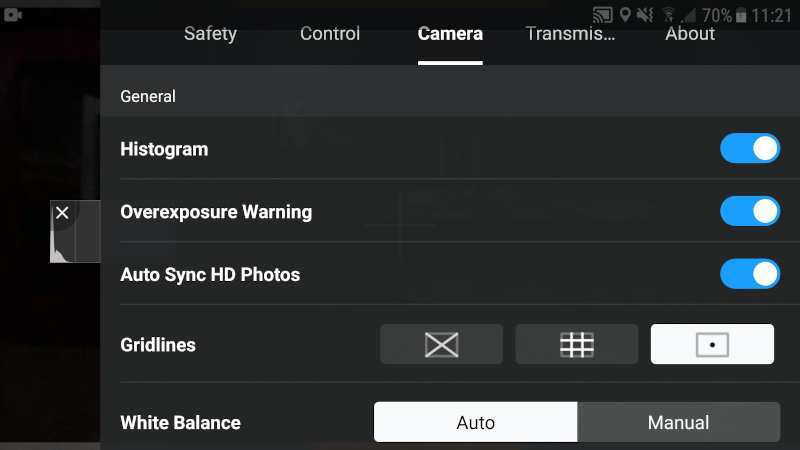
Beware that histogram and overexposure warning can be activated in camera menu:
This means we need to handle the increase in brightness by equipping ND filters.
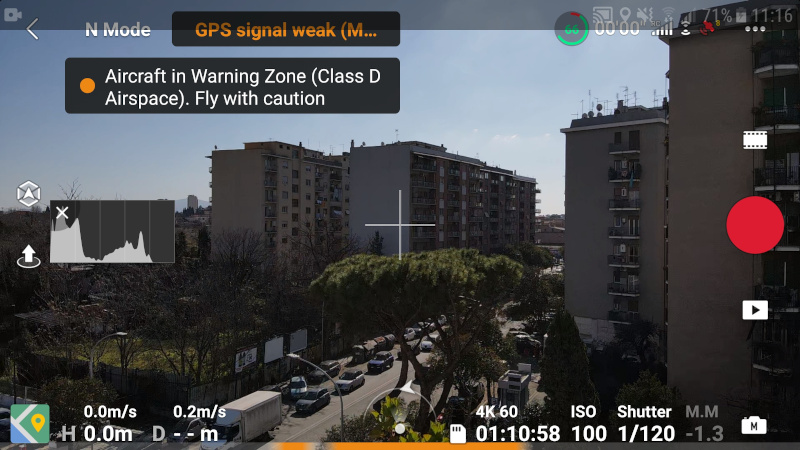
For this situation we might want to use the ND16.
- ISO 100
- shutter speed 1/120 s
- 4K@60 fps
- ND16
These combination of filter and parameters seems a good choice:
If we increase the time the shutter is opened (1/60 s > 1/120 s), we need to use an ND32 (shutter opened for more time -> more light comes in -> we need more filtering):
- ISO 100
- shutter speed 1/60 s
- 4K@30 fps
- ND32
In this second example we want to capture a long exposure night shot, so we set the shutter speed at 3”, meaning the aperture stays open for 3 seconds. This causes a big amount of light to enter and reach the camera sensor, so ND filters are necessary even if we are shooting at night.
ND4, ND8 or even ND16 are the most used in this conditions, it always depends from the light amount in the place we are shooting. Here are the setting for the following shot in Single photo mode:
- ISO 100
- shutter speed 3”
- ND8 (image shown is JPEG generated by drone itself, no post-processing on RAW file in this example)
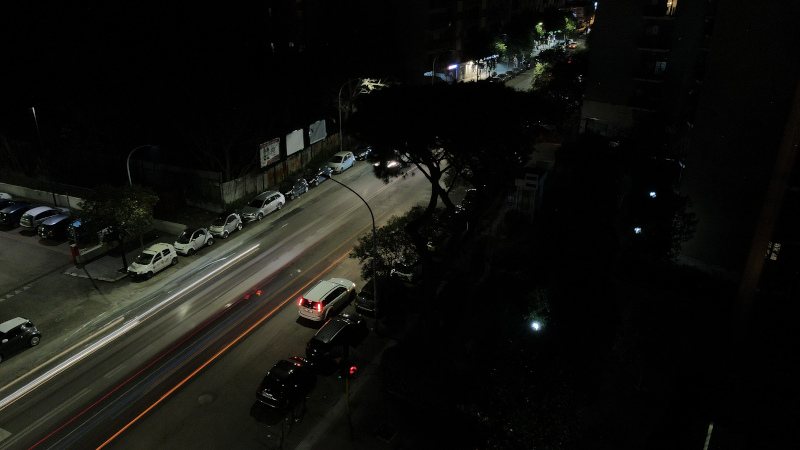
As the image shows, with this set up, we are able to capture traffic lights trails during the night.
Conclusions
In this article we have seen what is exposure and how we can modify two parameters related to it on DJI Mavic Air 2: ISO and shutter speed.
This can be achieved by changing their values on the DJI Fly App. We have also seen how ND filters are useful if we want to capture photos in particular light conditions or if we want to record videos giving our footage a cinematic look.
Sunnylife ND4/ND8/ND16/ND32 Lens Filters for DJI Mavic Air 2 are available here.
For a tutorial on photo editing take a look at how to edit drone photos in RAW format using Darktable article.
If you are looking for a review of the DJI Mavic Air 2 you can take a look here.
If you are looking for a nice bag for carrying your DJI Mavic Air 2, this is a valid choice.