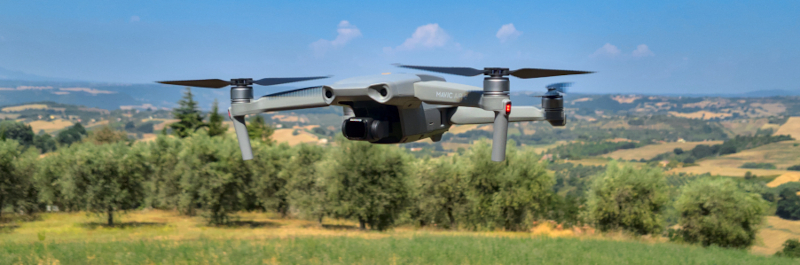
One of the reasons drones are so popular is because they allow to look at things from a different perspective by capturing awesome shots from the sky.
High quality models have the possibility to shoot in RAW format, like happens in digital photo cameras, i.e. to save pictures with the highest amount of information instead of having the classic compressed JPEG file (this is why images in RAW format have a bigger dimension in terms of bytes).
This enables the possibility to edit photos in post production easily at home using photo editing software and reaching the desired result without spending too much time on the field taking the perfect shot.
The DJI Mavic Air 2 is a fantastic drone capable of taking pictures in RAW format, specifically in .DNG extension, and it is the one used to take the photo we are going to edit in this article.
In order to take pictures with the desired shutter speed, Sunnylife ND filters have been used in combination with the DJI Mavic Air 2. If you want to know more about that, take a look at the Sunnylife ND lens filters for DJI Mavic Air 2 article.
Since we are going to edit photos, we need a software that is capable to handle RAW image files: the chosen one for this tutorial is Darktable, which is a very powerful open source photo editing application.
Downloading and installing Darktable
Darktable, like the official website reports, is an open source photography workflow application and raw developer. This software has basically all the features available in the well known Adobe Photoshop Lightroom, but it is free (!).
Darktable is available for basically every type of OS (Microsoft Windows, Linux, MAC OS) and you can find installation instructions at the dedicated page. Installation is pretty simple, since generally (for example for Microsoft Windows) it is just a matter of launching the installation executable and going through the standard Wizard.
Once the installation process is over we can start using Darktable software.
Launching Darktable
Launching the program we are prompted with Darktable import interface, that is called “lighttable”:
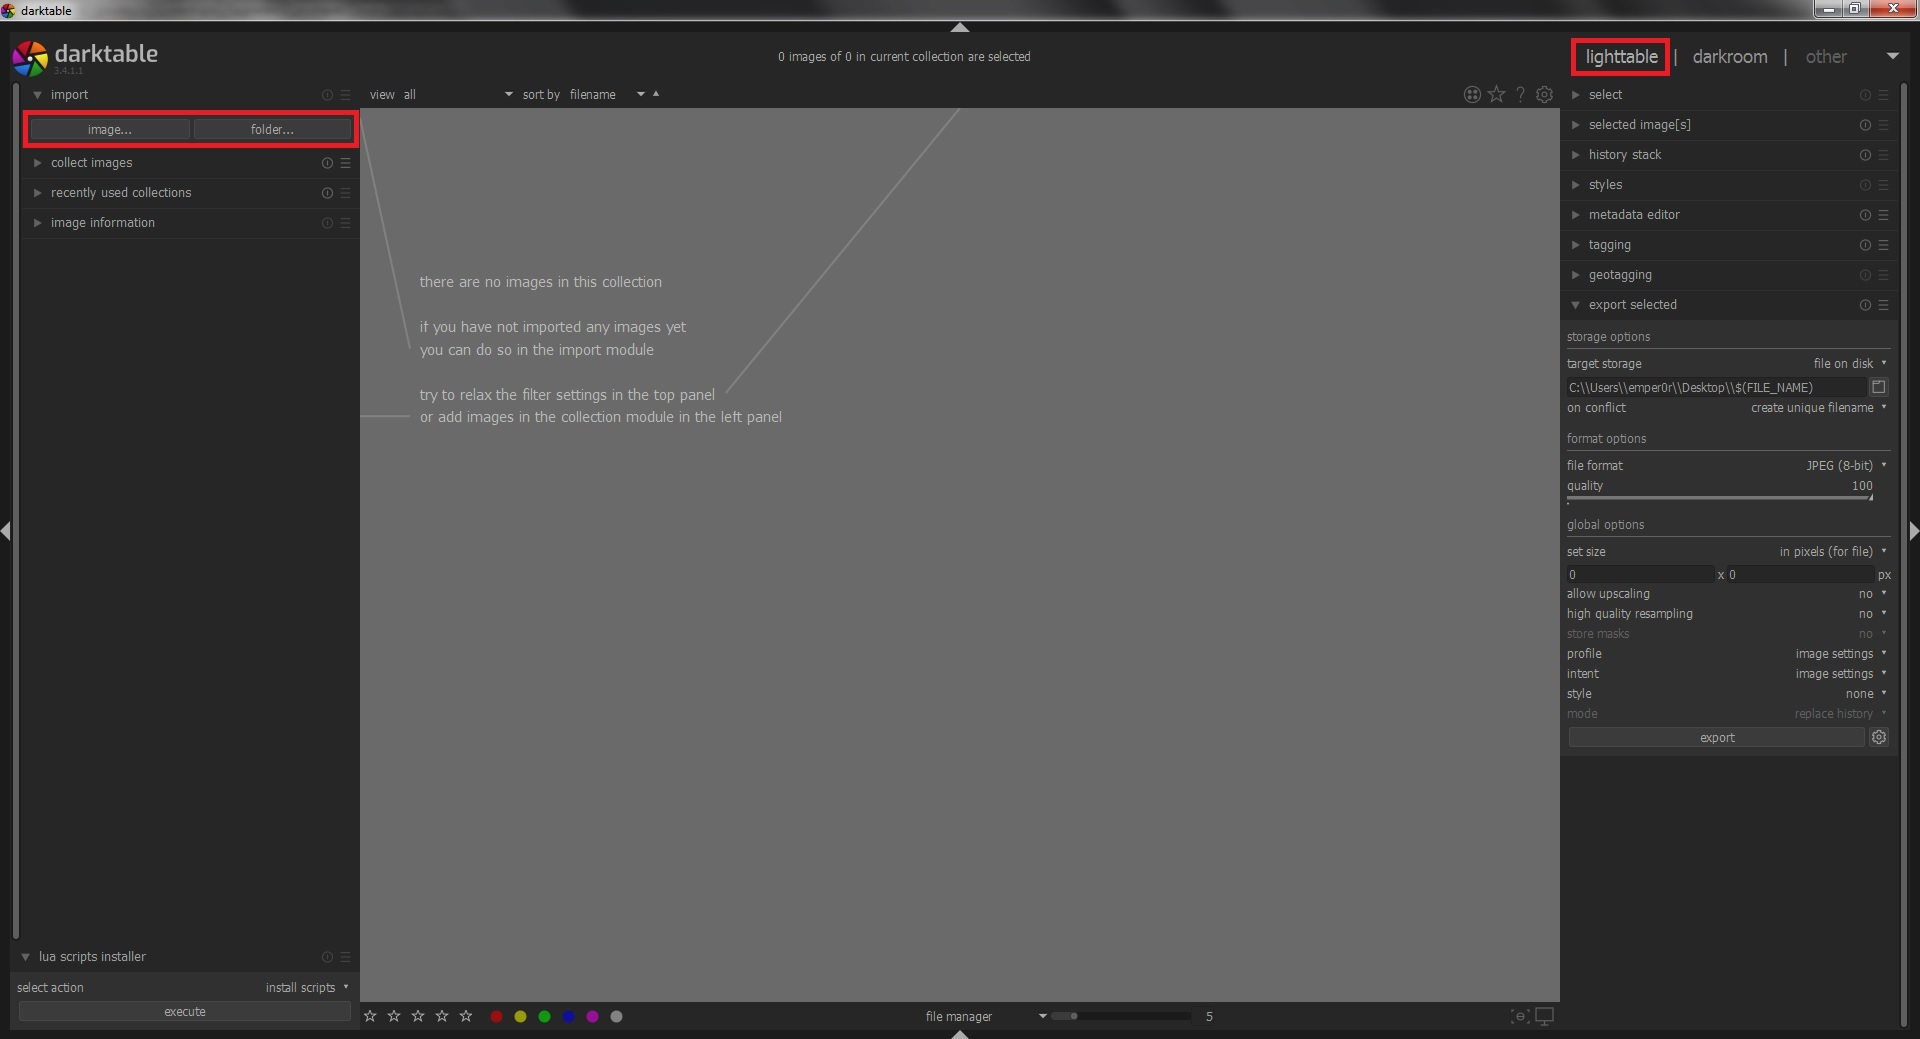
As shown, on the top left there are two buttons “image” and “folder”: by clicking them, it is possible to import a single image or a folder in Darktable.
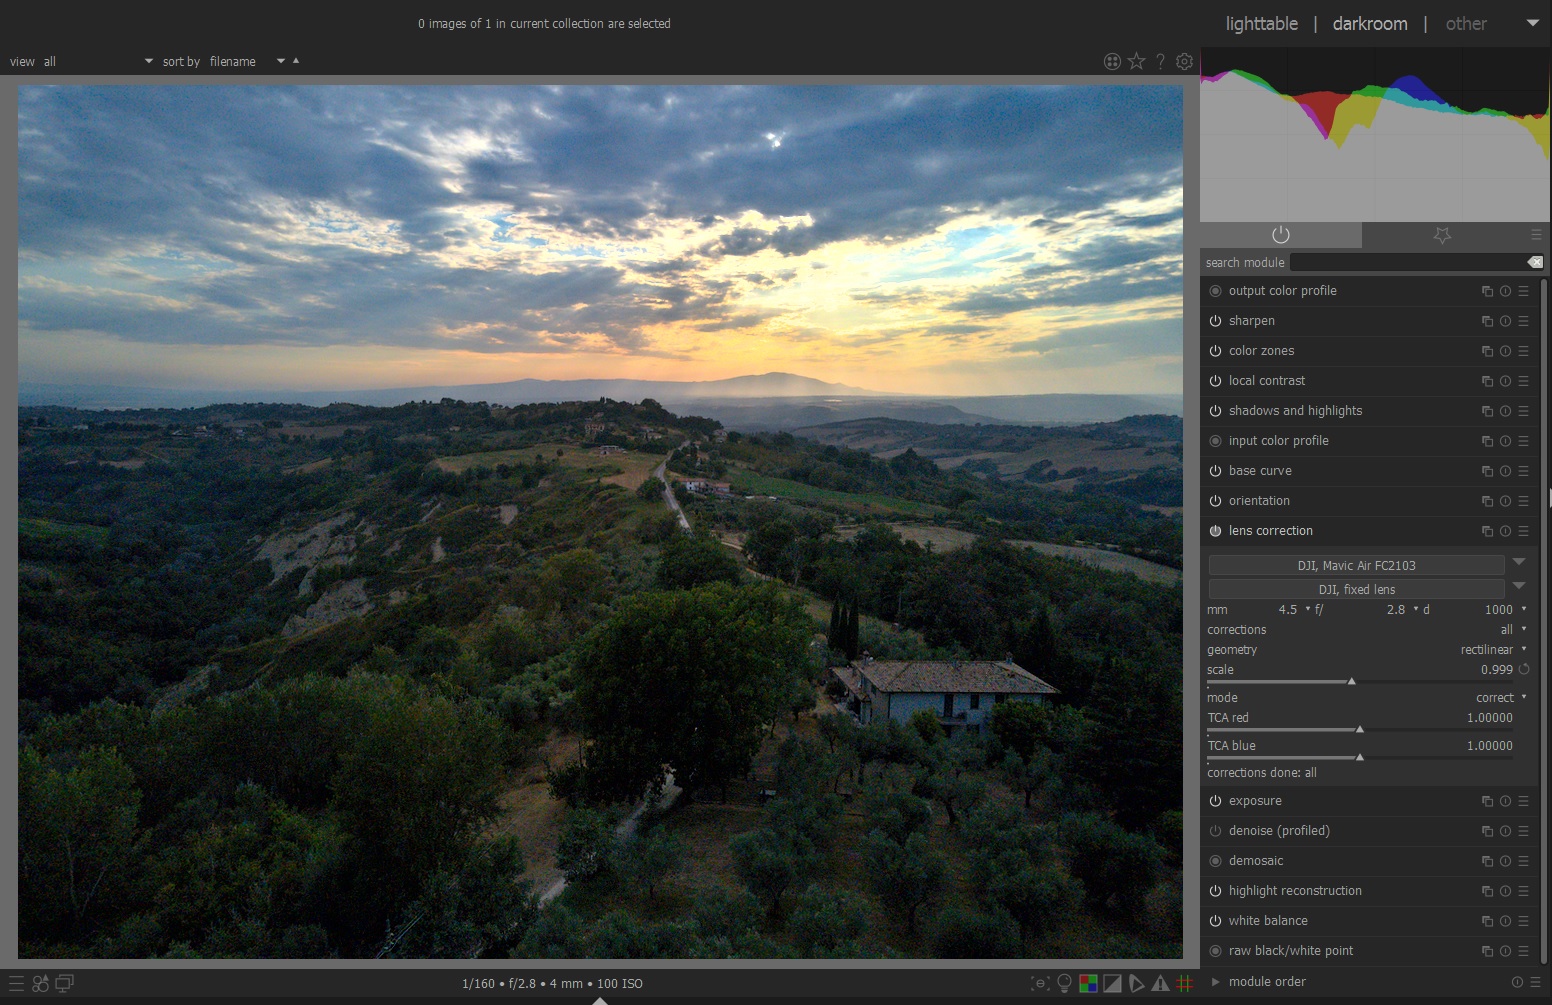
Once the RAW file has been imported, we get transferred to the darkroom interface, which is the one we are going to use for the editing process.
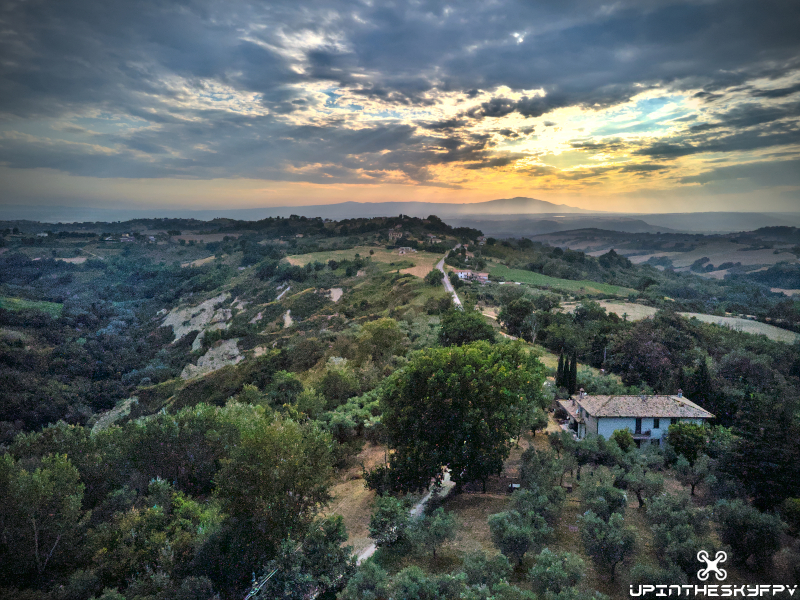
Here is the image we are going to work on:
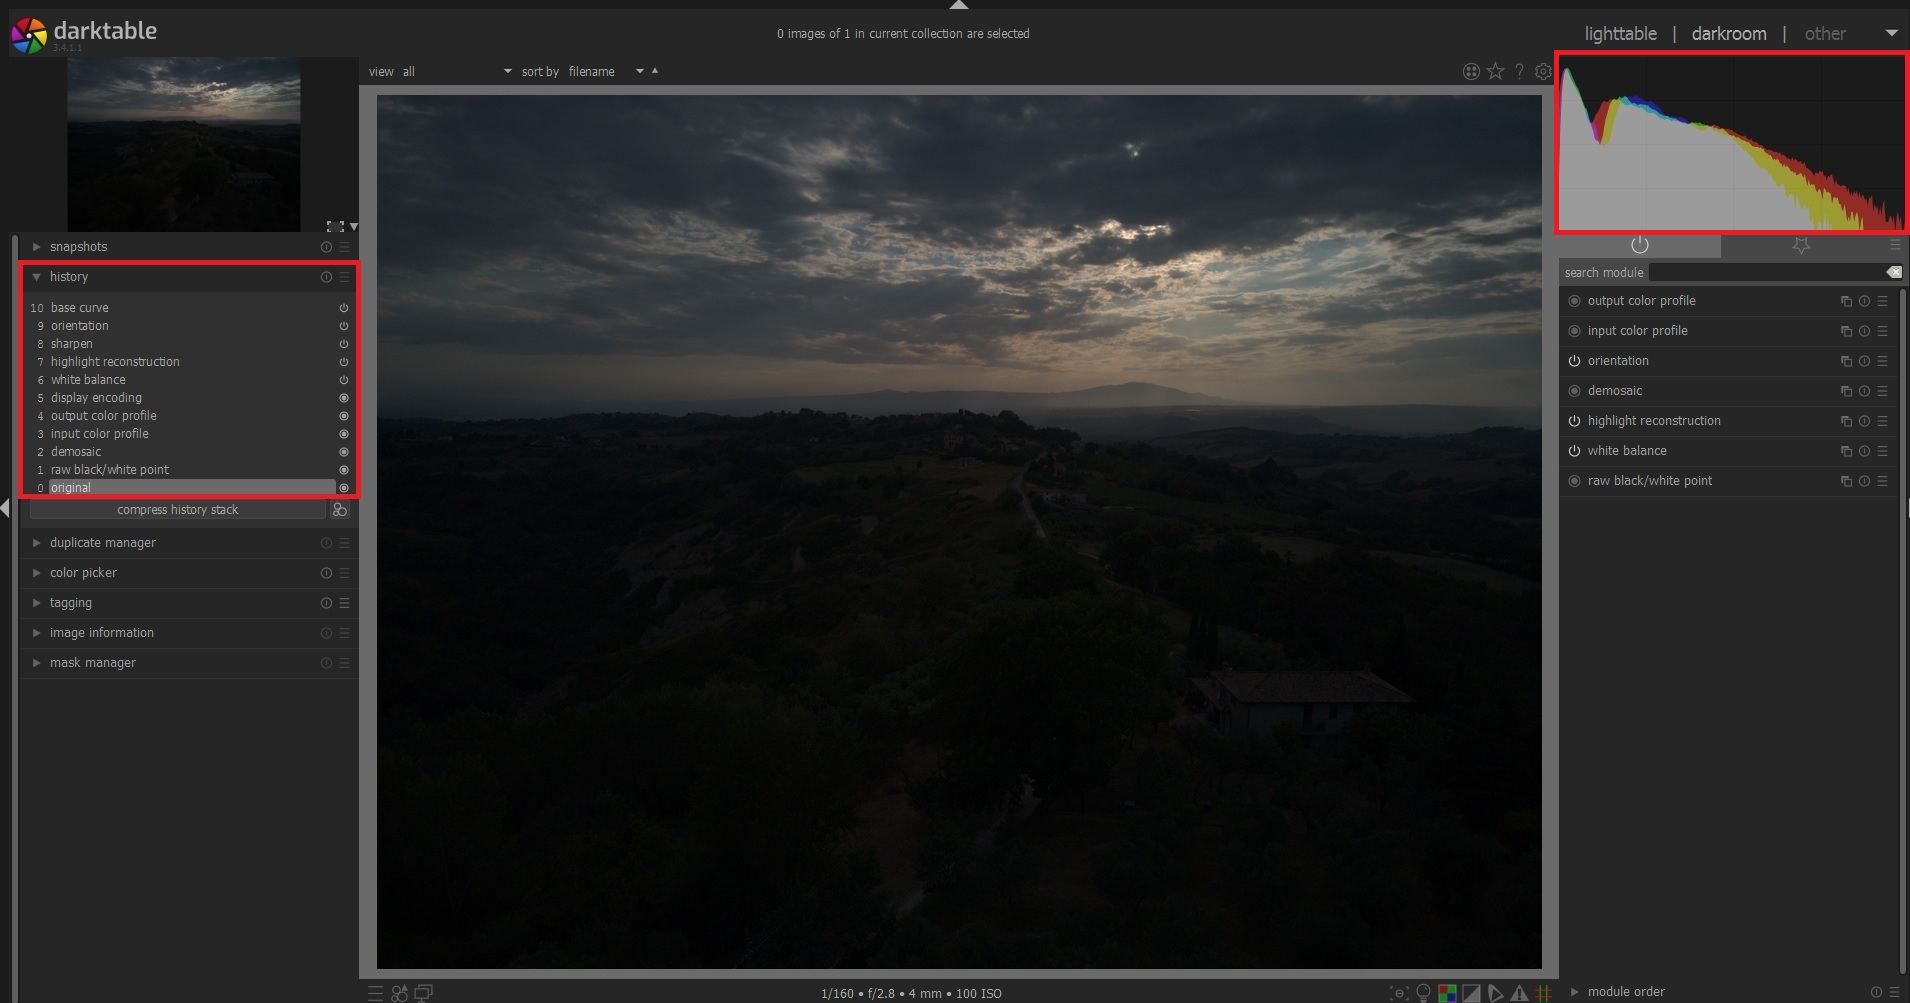
As we can see from the histogram on the top right, the image is correctly exposed so in post we can recover the details of the darkest parts of the picture by manually increasing the exposure through Darkroom.
This picture has been captured using an ISO of 100 and a shutter speed of 1/160 s (focal length for the DJI Mavic Air 2 is 24mm with aperture f/2.8 and this cannot be changed). This information is also reported in the bottom part of Darktable interface.
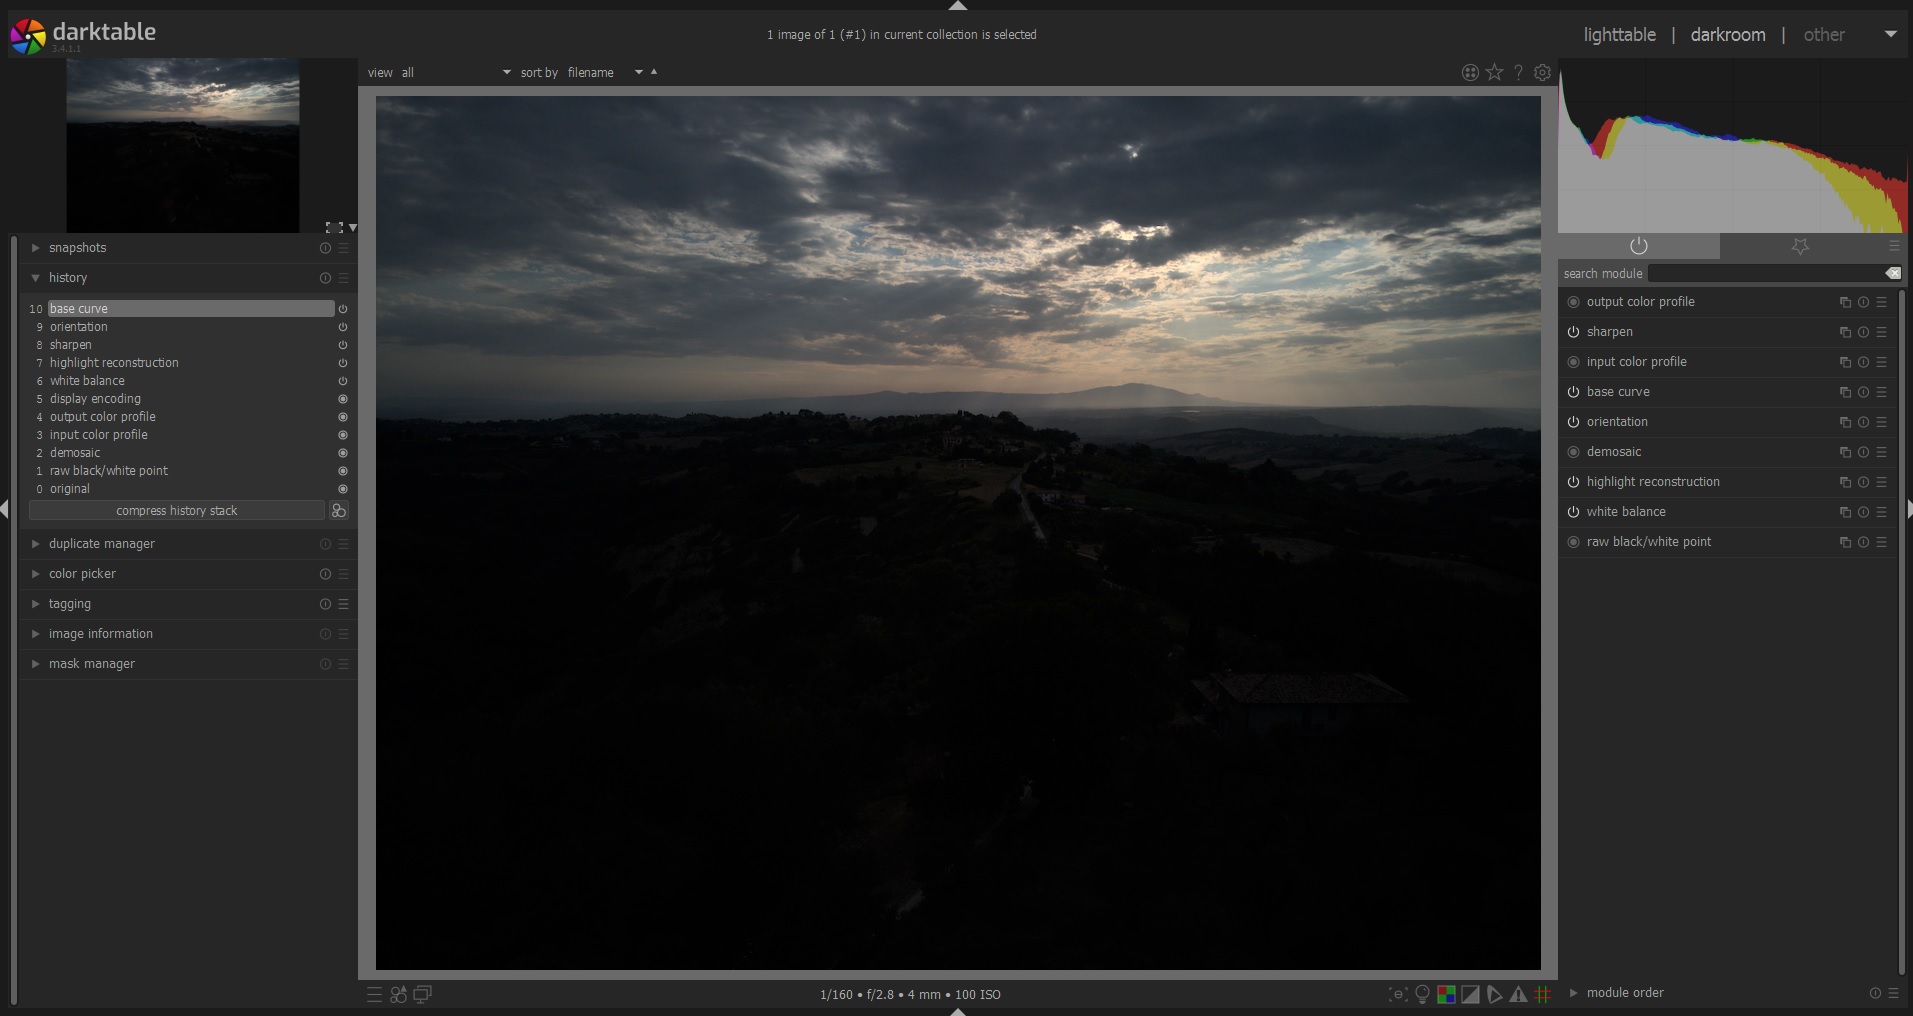
As shown in the left tab called “history”, Darktable applies by default ten basic corrections to the imported image. We can look at the differences from the original RAW image by clicking on the desired step in the history itself (“10 -> base curve” is the last one).
If the image had been taken with different exposure in order to show the bottom part of the frame, this would have caused the burn of the top part due to the high dynamic range of this particular shot. Situation like this one are common especially when the sun is in the shot, so it is always better to underexpose the image.
Moreover, due to the size of the sensor, sunset situations are very difficult to handle, so in this cases it is critical to shot with the correct exposure.
That said, we can now begin the post editing process in Darktable.
Shadow and Highlights
We can start by using the first module called “Shadow and Highlights”. To use a module it is just a matter of searching for it using the “search module” box and selecting it. Once it has been selected the corresponding panel opens showing the parameters we can change.
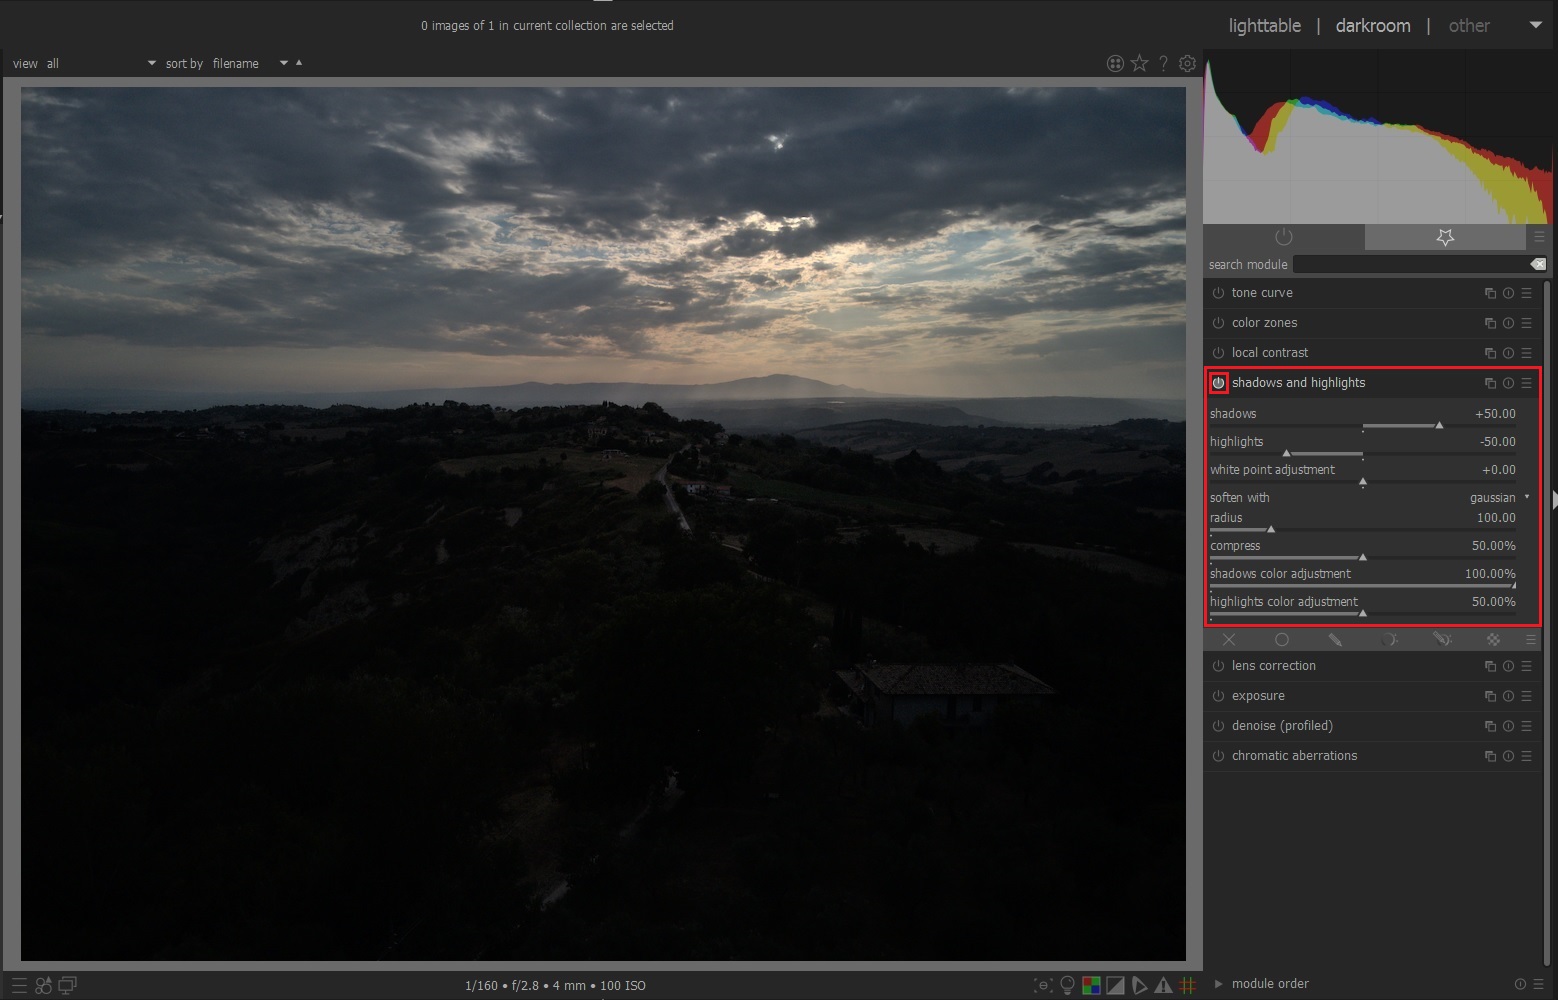
Beware that some modules apply changes just after they have been activated: of course, by playing with the values we get more or less impact.
In order to view the difference, it is possible to click on the on/off button near the module name: this hides the effects of the module itself and it is very useful to check if we are going in the right direction.
This module modifies the tonal range of the shadows and highlights of an image by enhancing local contrast.
Exposure
“Exposure” module is one of the most important: it increases or decreases the overall brightness of an image. This means we can “revive” the dark part of the image by recovering hidden details and bringing them back to the light.
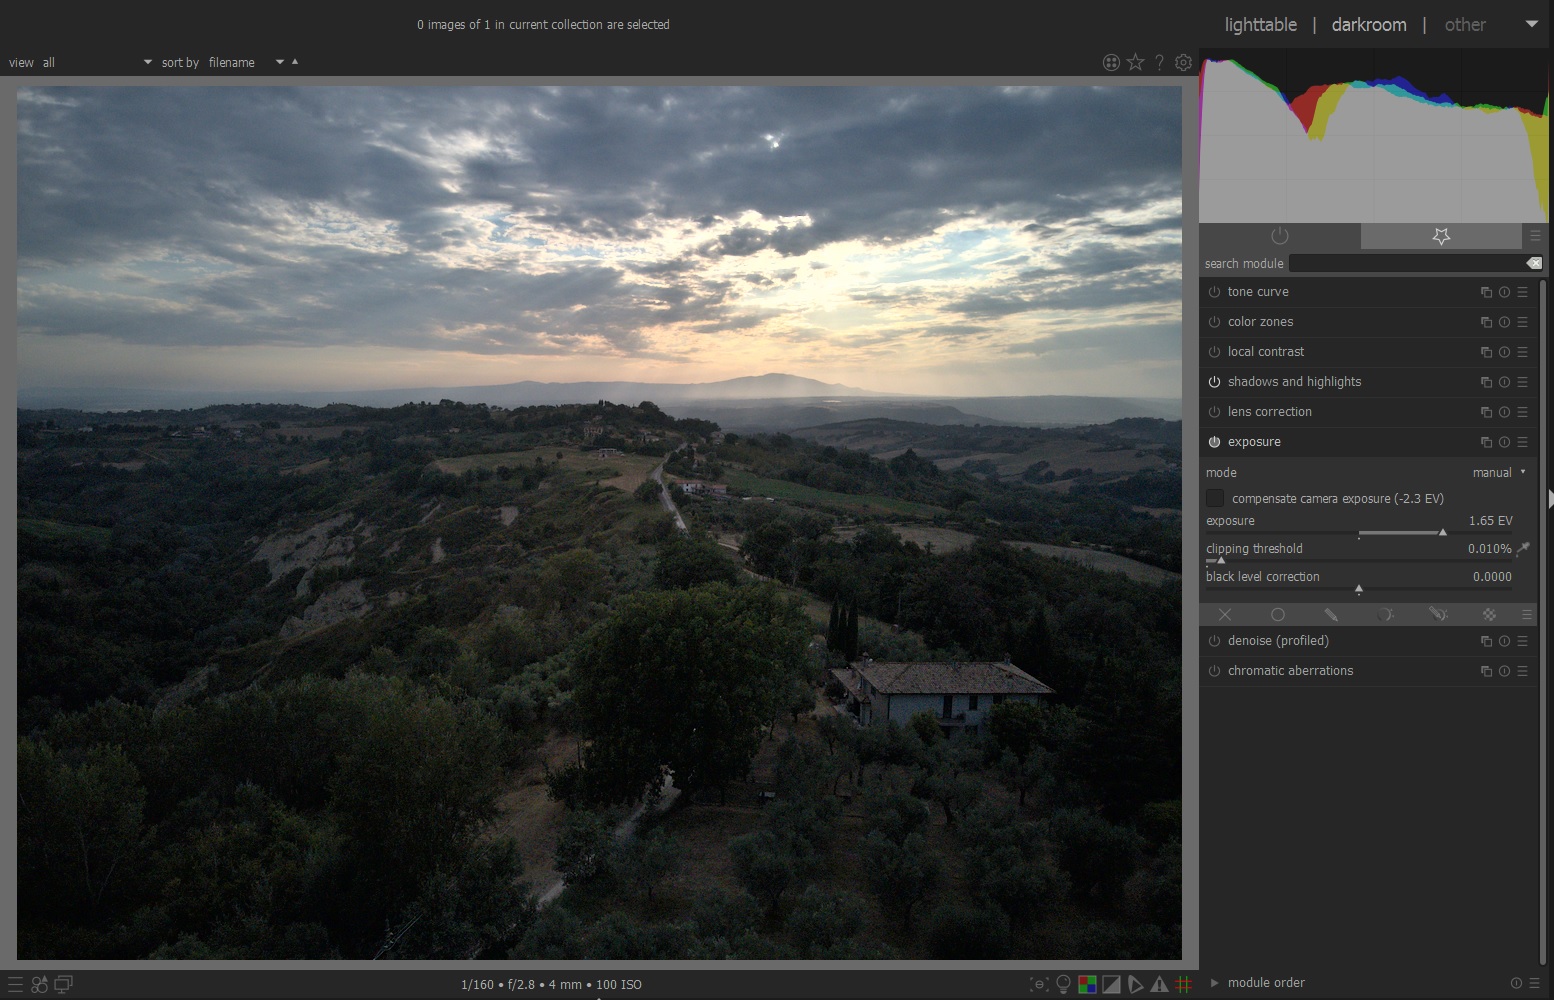
A value of 1.65 EV seems to work well, but we can adjust it later after the effects of the other modules are applied. In fact, even if we set certain values, it is common to go back and rework on them especially after making color corrections with other modules.
Local Contrast
Next module we are going to apply is “Local Contrast”. Meaning is pretty straightforward and its effect is similar to the “Shadows and Highlights” module.
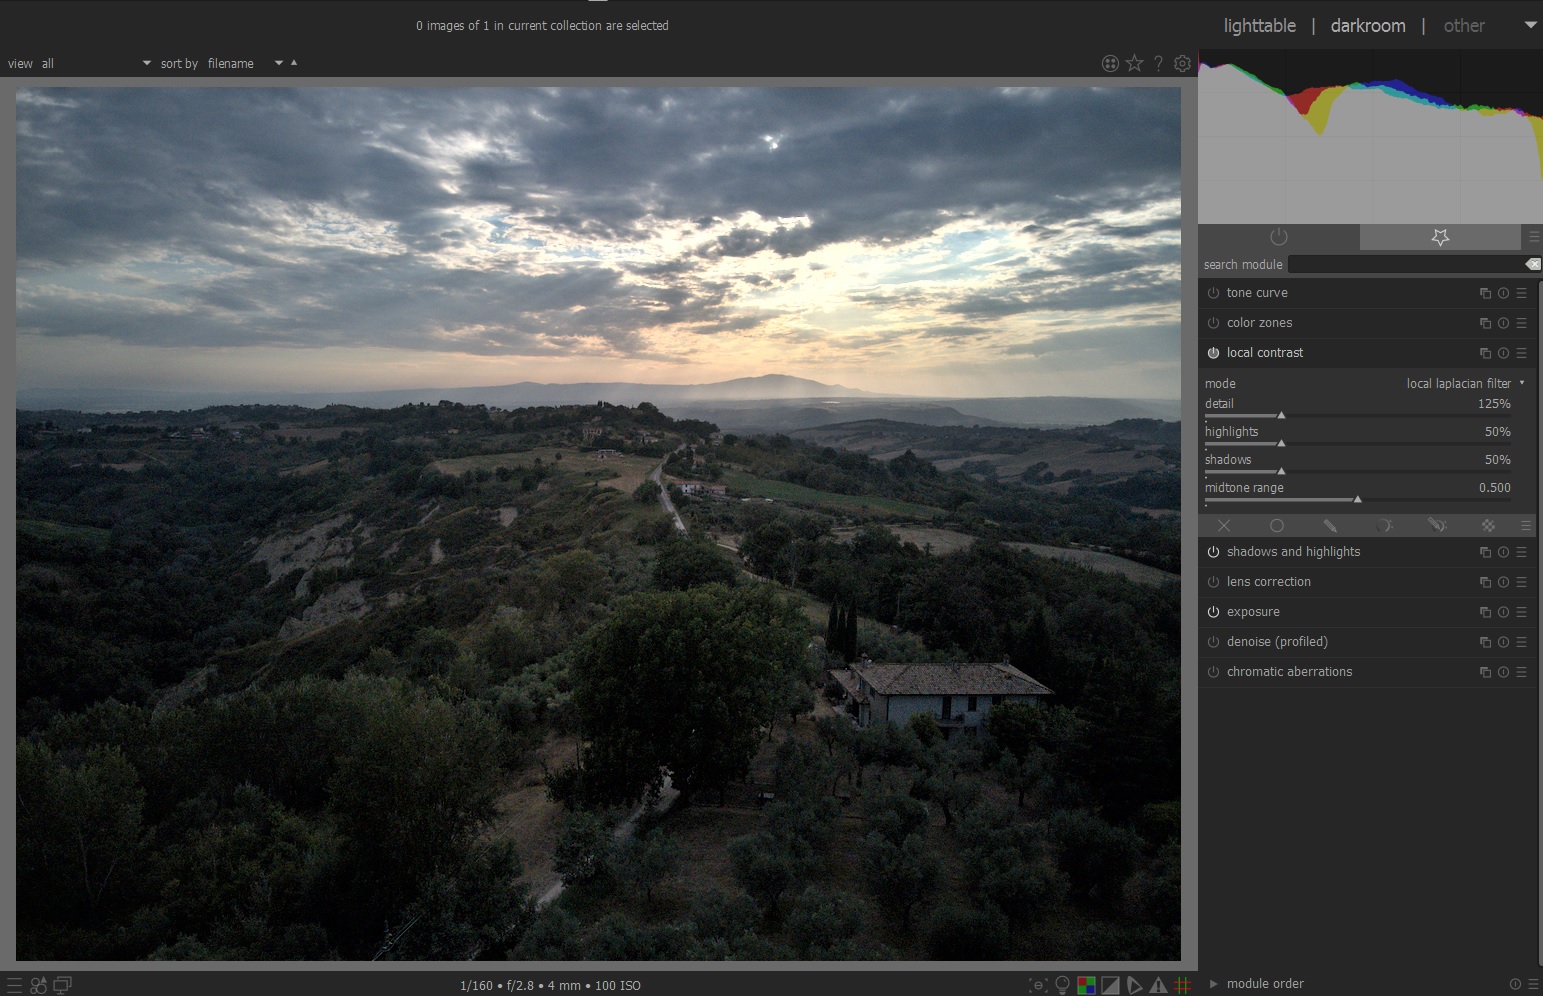
Like with all the other modules, it is important to apply small changes. This concept may seem trivial, but it is critical.
Color Zones
“Color Zones” is one of the best modules since it allows to emphasize specific colors in the image, so as to capture viewer attention in certain areas of the picture.
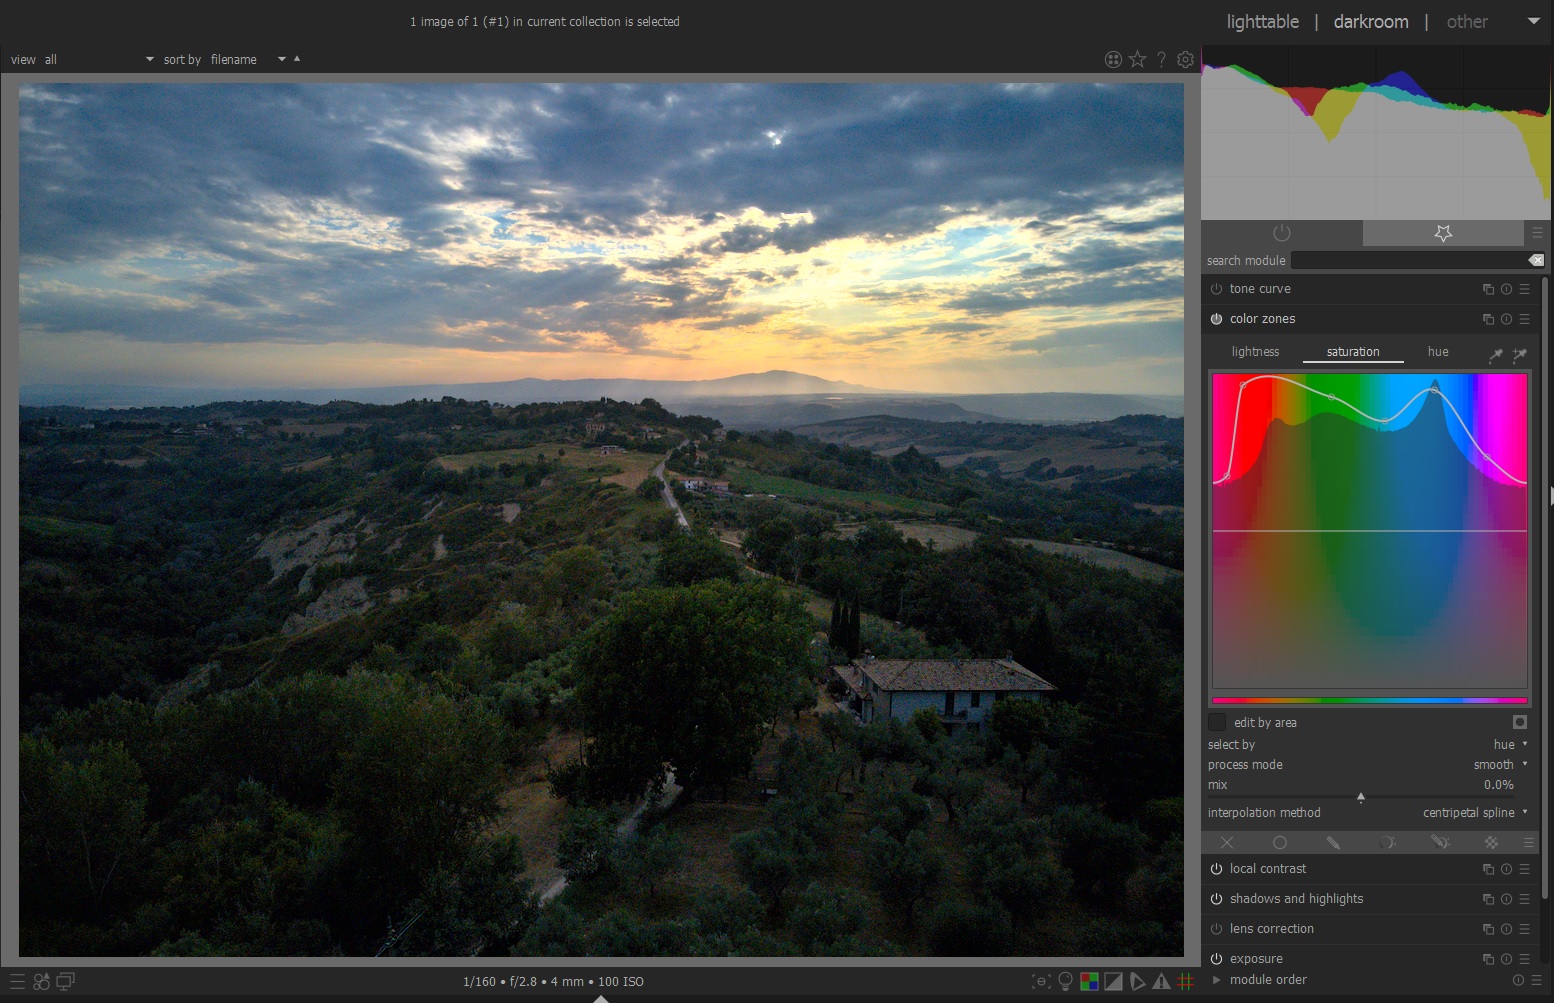
The usage is pretty simple; there are three tabs: lightness, saturation and hue. For each one of them we can set the effectiveness of the colors, i.e. the lightness, saturation and hue of pixels, by modifying the curve represented on the graph. For example, in saturation tab, the more the curve is on the upper part of the “y” axis for a specific color the more that color will be rendered vivid in the image.
Keep in mind that the graph shows also colors distribution for loaded image, so you can already see which colors are dominant in the picture.
Just experiment with the curve until you reach the desired outcome: here I have chosen a pretty aggressive profile.
Lens Corrections
“Lens Correction” module automatically correct for lens distortion after setting the camera lens the picture was taken with.
At the time of this writing the lens for the DJI Mavic Air 2, i.e. DJI FC3170, is not available, so we are going to set DJI FC210 because this seems to work decently: this is the lens correction profile for the DJI Mavic Air.
Hopefully in the future developers will add the specific one.
Denoise
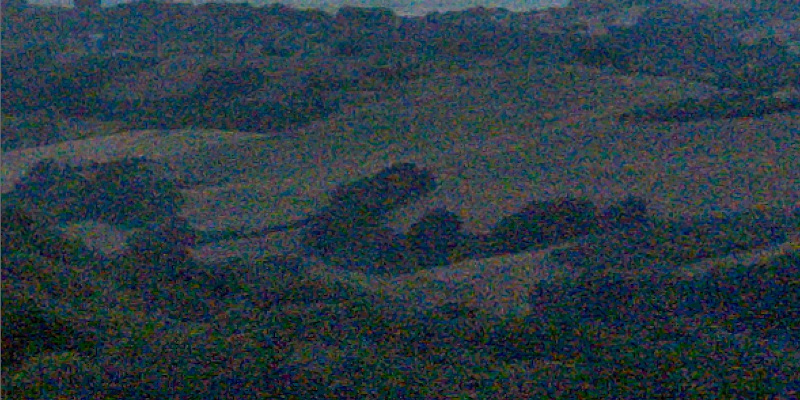
Another very useful module is “Denoise”: this module reduces the noise present in the image. It works pretty well in cases like this one where low light conditions and wide dynamic range are not easily handled by small size camera sensors.

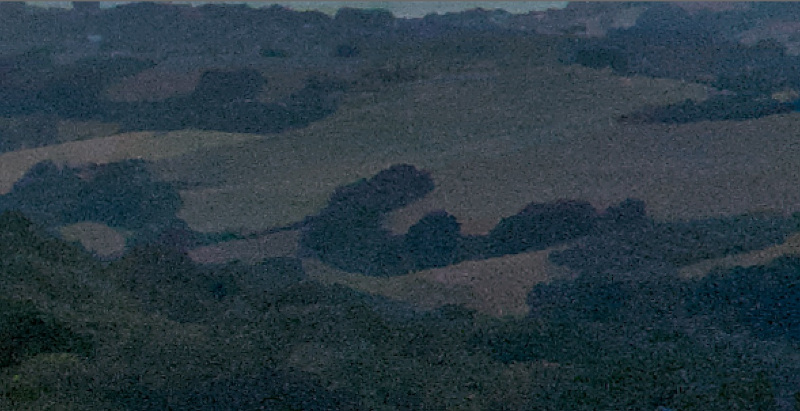
Setting the mode on “wavelets auto” does the job: zooming in, the difference is pretty clear.
Before noise reduction:
After noise reduction:
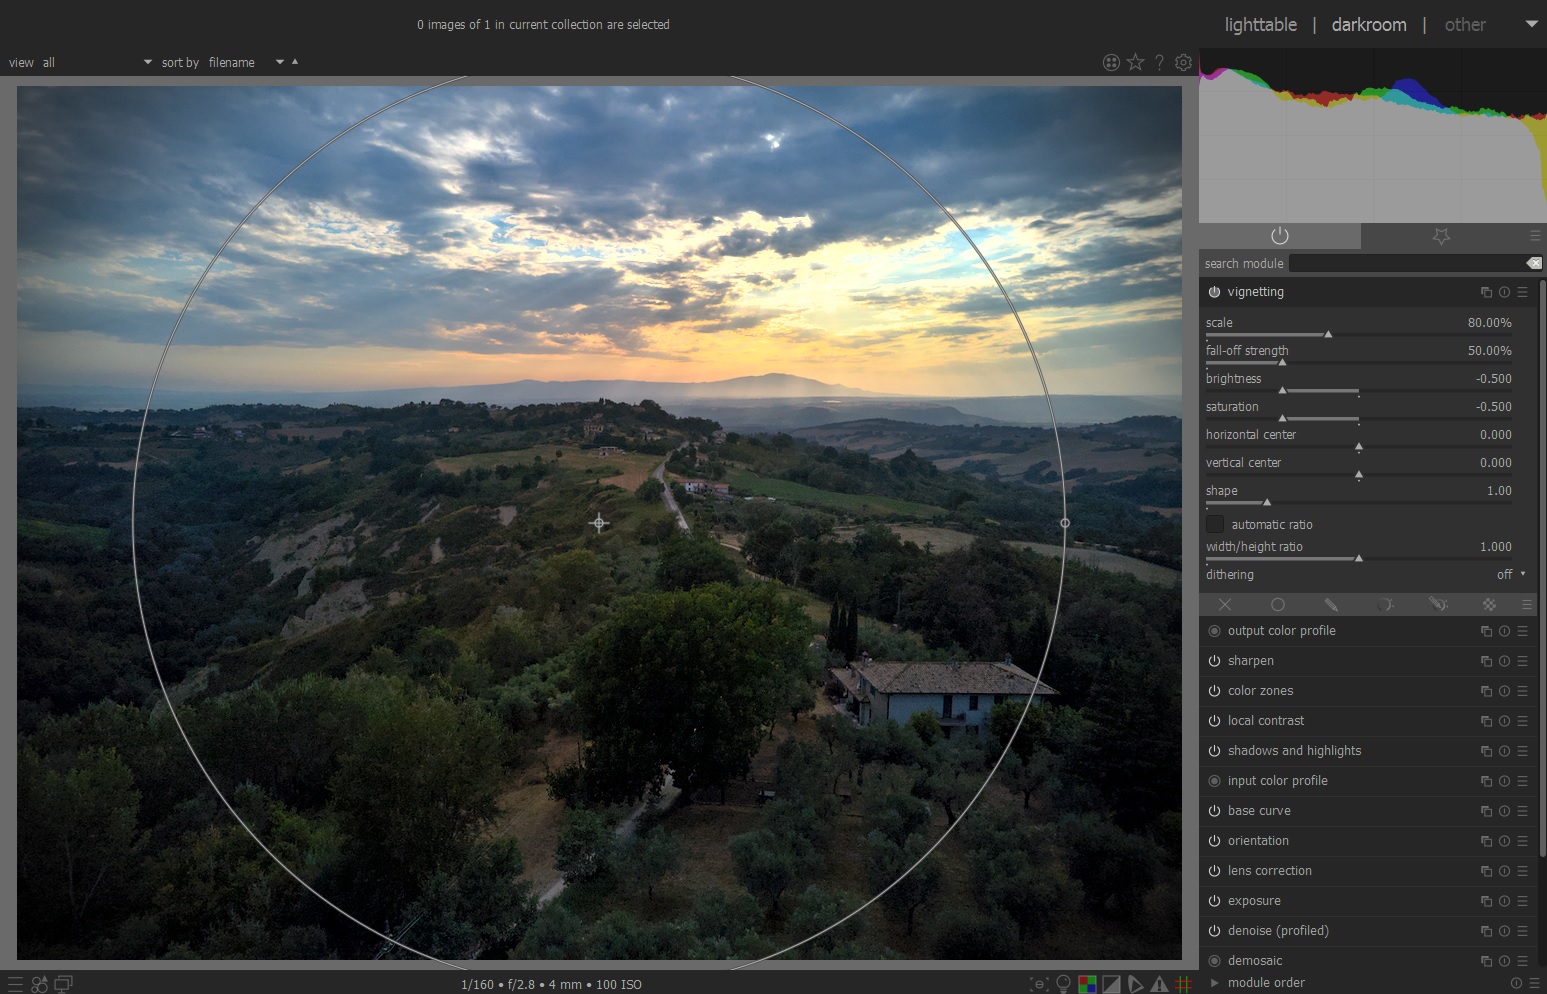
Vignetting
Finally, to make the viewer focus its attention on the central part of the image we can use the “Vignetting” module that is pretty self-explanatory. Usually I do not use this one, but in this case a soft usage gives an interesting look to the scene:
Playing a little bit more with the modules shown above, we can get the following final image which, due to how we have edited the colors, gives to the viewer the sensation of looking at a fantasy environment.
Conclusions
In this article we have seen how to edit drone RAW photos using Darktable software. This has been done by importing RAW image in Darkroom and using its modules to edit the picture according to our preferences. In this tutorial we have gone through the following Darktable modules: Shadows and Highlights, Exposure, Local Contrast, Color Zones, Lens Correction and Vignetting.
Considering the starting image we can confirm that the final result is pretty astonishing and represents a good example of what we can achieve with drone photography even in difficult light conditions, like in the case of the sunset, and with small camera sensors.