In this article we will take a look at the Eachine Pro58 Diversity Receiver and we will see how to install a custom firmware on it, specifically Pirx The Pilot. To do so, we need ST-LINK V2 STM8 / STM32 Programmer which is a USB module used to program/upload the firmware on the receiver.
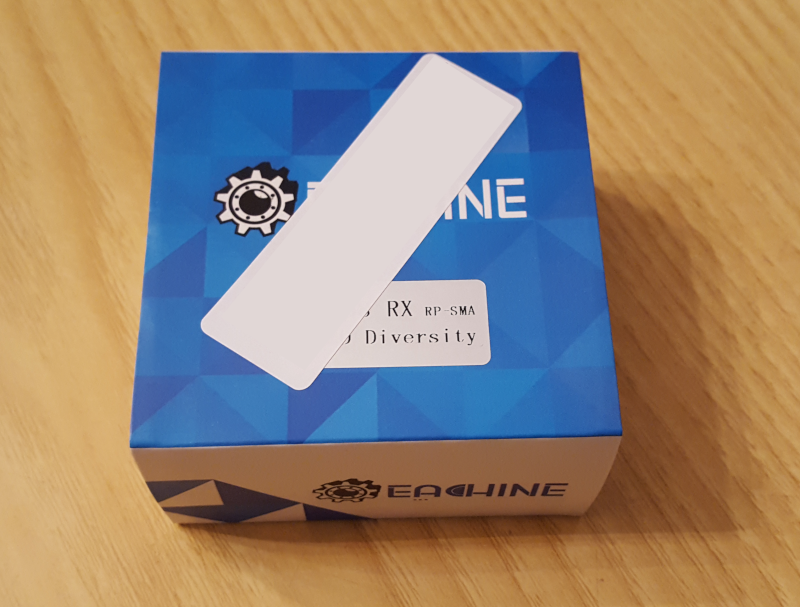
The following image shows the box containing the Eachine Pro58 Diversity Receiver:
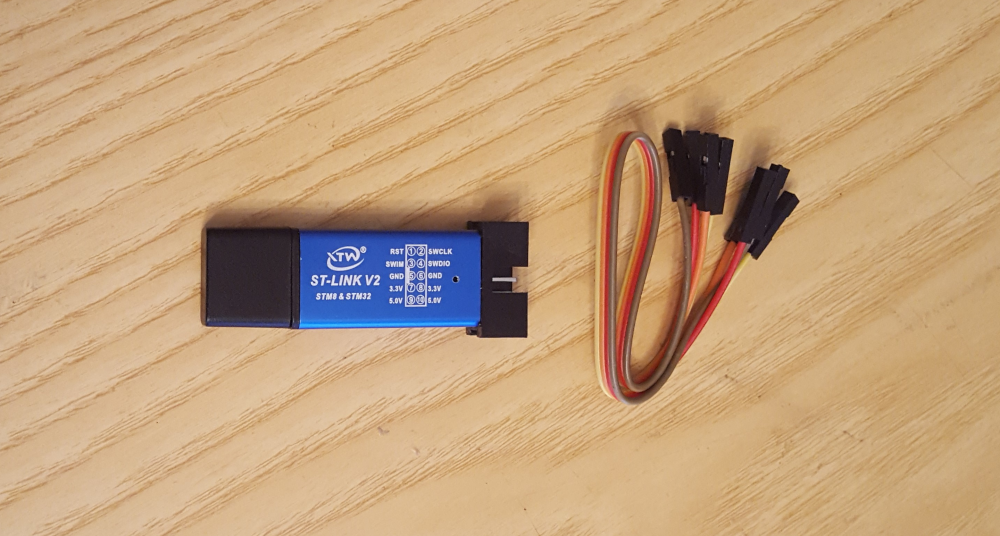
Down below it is shown the package for the ST-LINK V2:
Box Contents
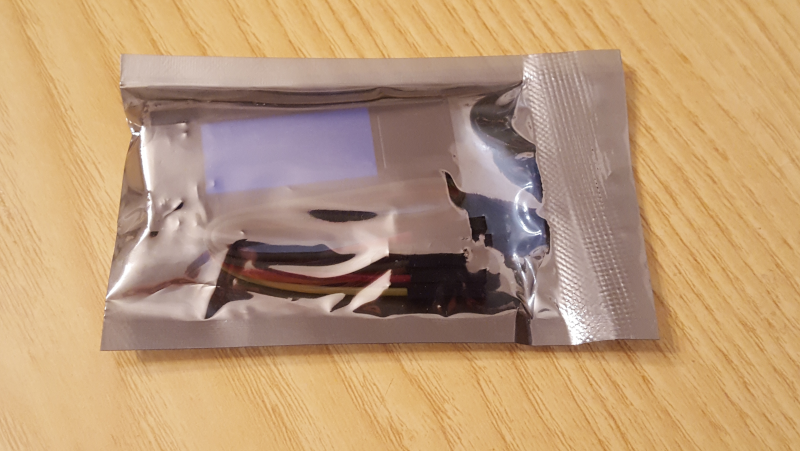
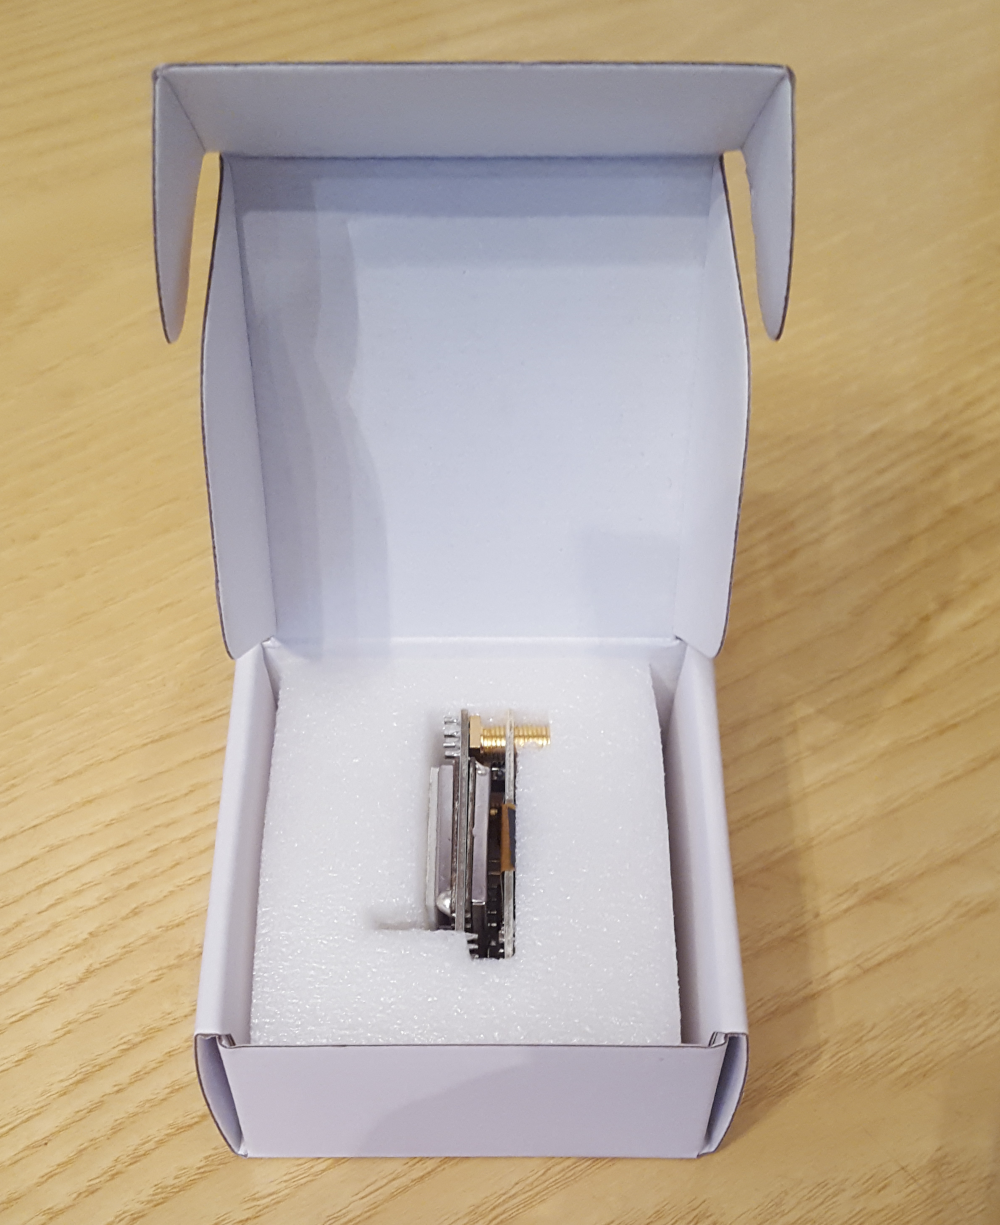
Inside the two boxes we find the following items:
- Eachine Pro58 Diversity Receiver
- ST-LINK V2 STM8 / STM32 Programmer
- Pin wires
In both cases no manual/instructions are provided inside the box.
Eachine Pro58 Specifications
Down below are reported the specs for the Eachine Pro58 Diversity Receiver:
- Frequency: 5.8G;
- Channels: 40CH;
- Power Consumption: 1.8-2W;
- Size: 42 x 30 x 25mm;
- Weight: 23g.
Soldering Iron
A good soldering iron is needed. I really like this one, which is compact and portable since it can be powered up using LiPo batteries.
ST-LINK V2 Pins and Connection with Eachine Pro58
We can start by looking at the pins of the ST-LINK V2:
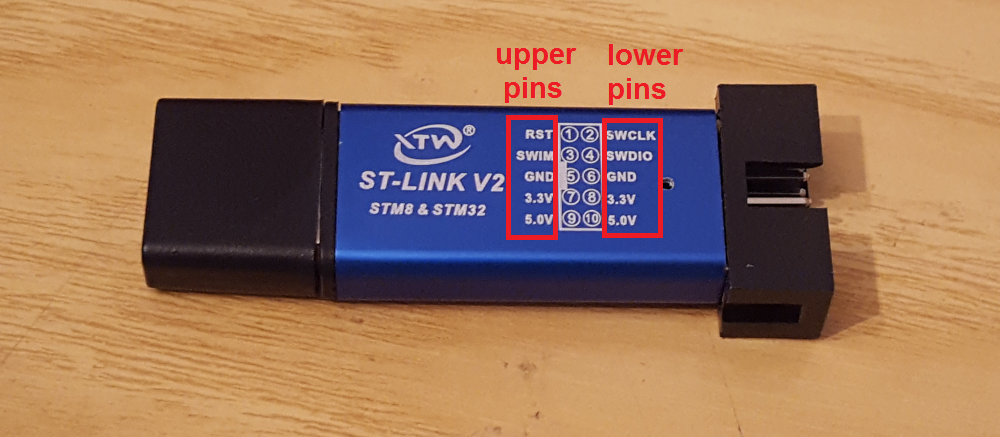
We have to use a total of four pins in order to power and upload the new firmware on the Eachine Pro58: 5.0V, 3.3V, SWCLK, SWDIO. First two are for power the module up and the other two are used to upload the firmware.
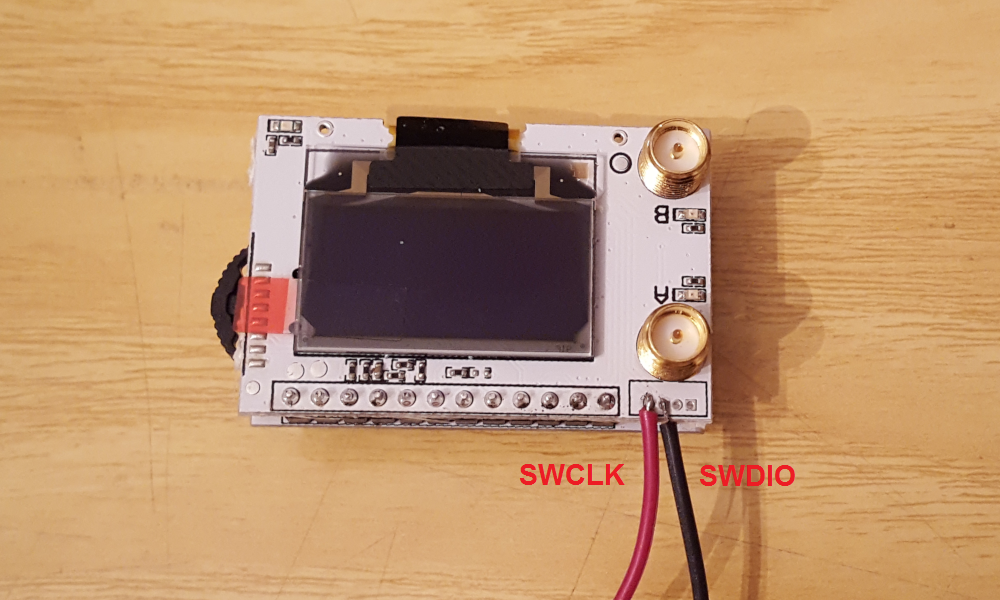
We need to solder two wires on the SWCLK and SWDIO pads of the Eachine Pro58 like shown in the following image (remember to tin pads and wires for an easy soldering job):
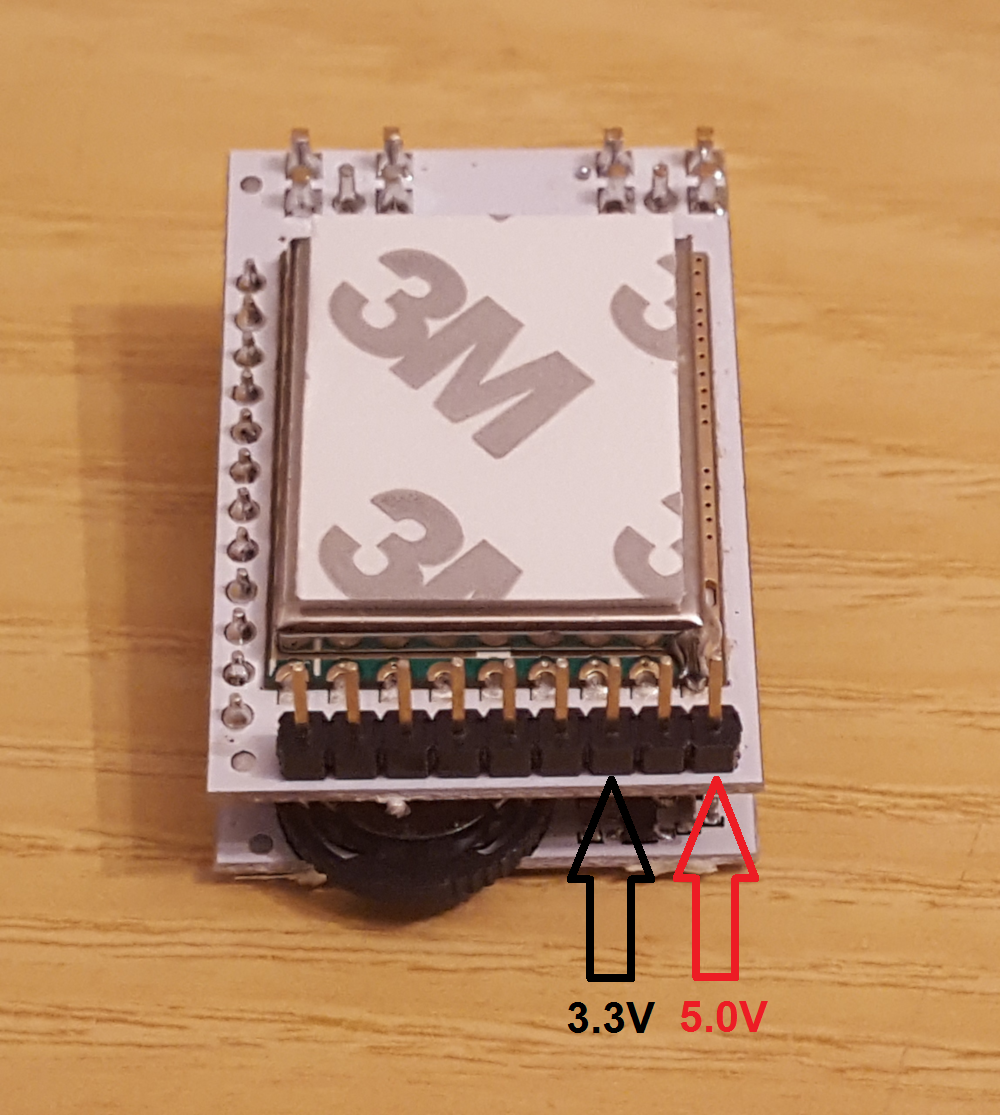
Of course, we need to connect these two wires to the corresponding ST-LINK V2 pins shown before. Looking the Eachine Pro58 from the back, the 5.0V and 3.3V from the ST-LINK V2 have to be connected as shown here (you can choose whatever pins couple that you prefer since they are identical, upper 3.3V/5.0V or lower 5.0V/3.3V):
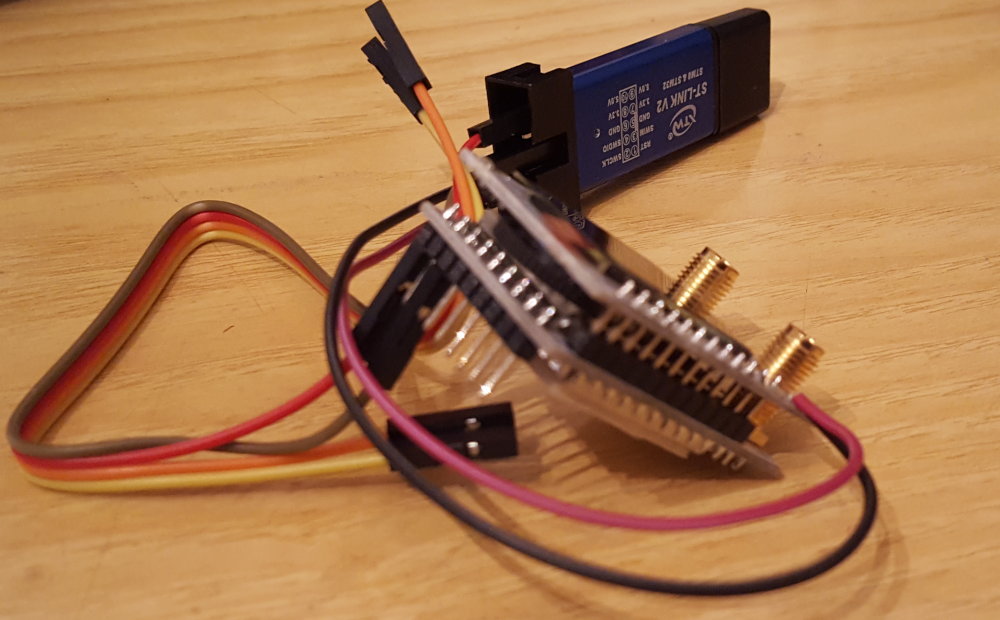
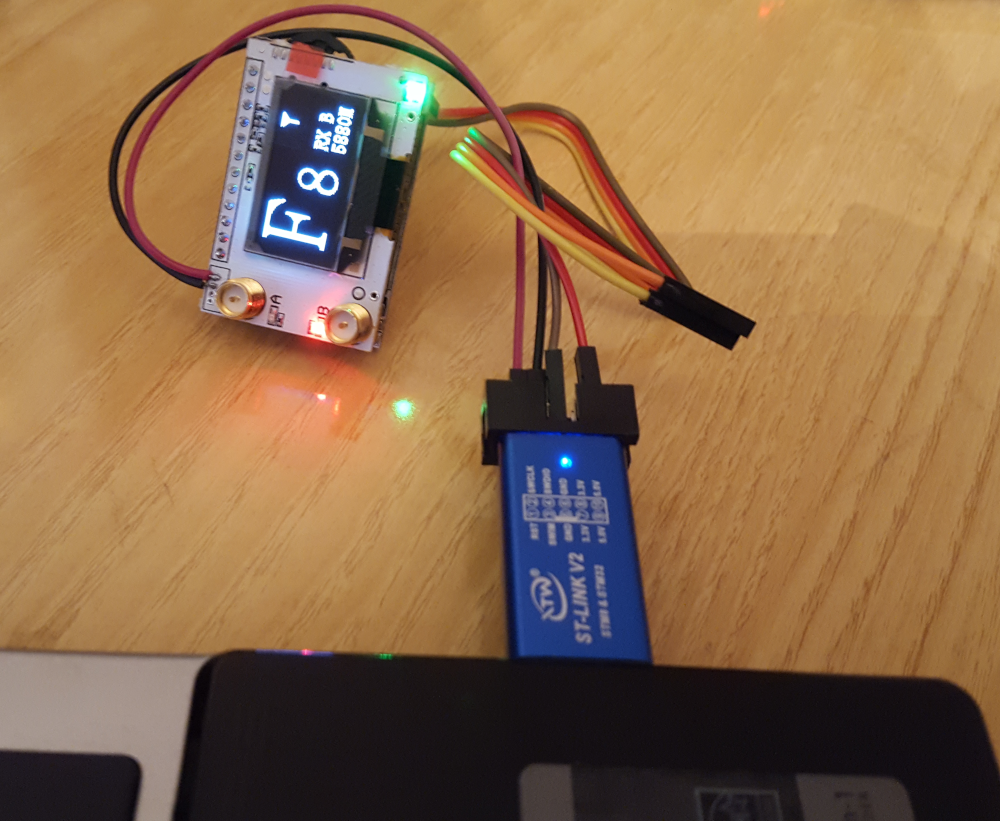
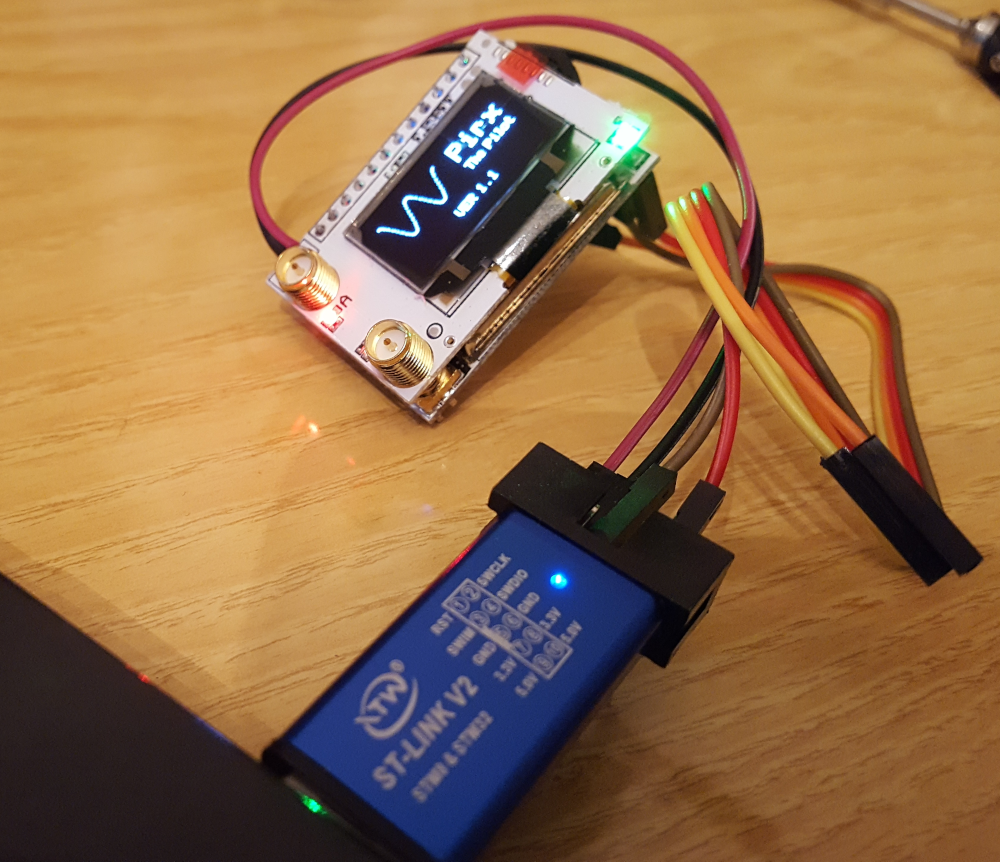
Down below is reported the complete wiring connection from the ST-LINK V2 to the Eachine Pro58 (I used upper pins for 3.3V and 5.0V):

Different view (I used only two of the four wires supplied because I already had similar wires with a free end, but of course you can use the other two and cut off one end in order to solder them on the receiver SWCLK/SWDIO pads):
If power wires are connected properly (double check before proceed), we should see the Eachine logo on the Eachine Pro58 display when connecting the ST-LINK V2 USB to the PC, meaning that it is booting up. After that we should be prompted with the following screen:
To proceed with the load of Pirx The Pilot firmware, we need to install some software on the PC.
Software Installation
All the following programs are free, but registration is needed in order to download them.
- STM32 CubeProgrammer software for programming STM32 products: we are going to use this to program the receiver, i.e. to load custom firmware on it.

This software needs Java to run, so we have to download and install also the latest Java version available.
To “Connect” the Eachine Pro58 through the ST-LINK V2, we need to install some drivers.
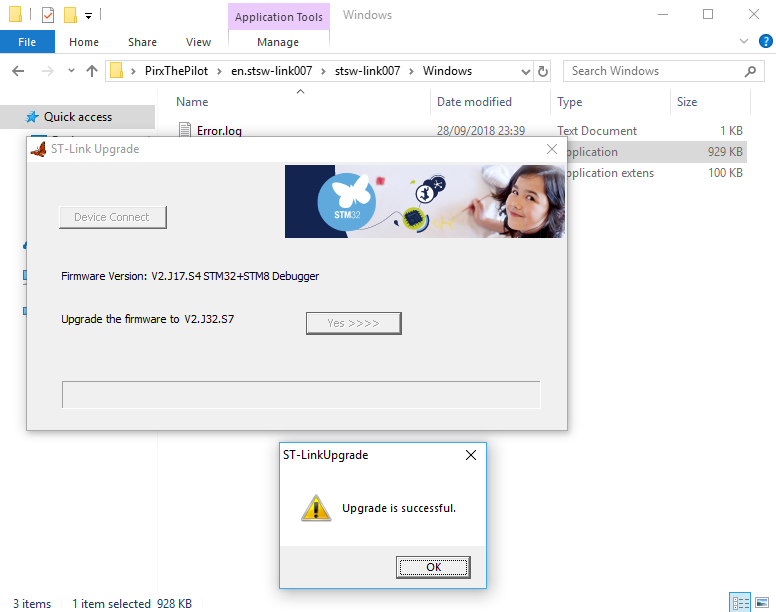
Finally we need to upgrade the firmware of the ST-LINK V2 using ST-LinkUpgrade.exe:
Once the upgrade has been done we get the following message:
We are now ready to upload Pirx The Pilot Firmware (or every other firmware we like for the Eachine Pro58). To proceed we need to install the previously downloaded STM32 CubeProgrammer and launch it.
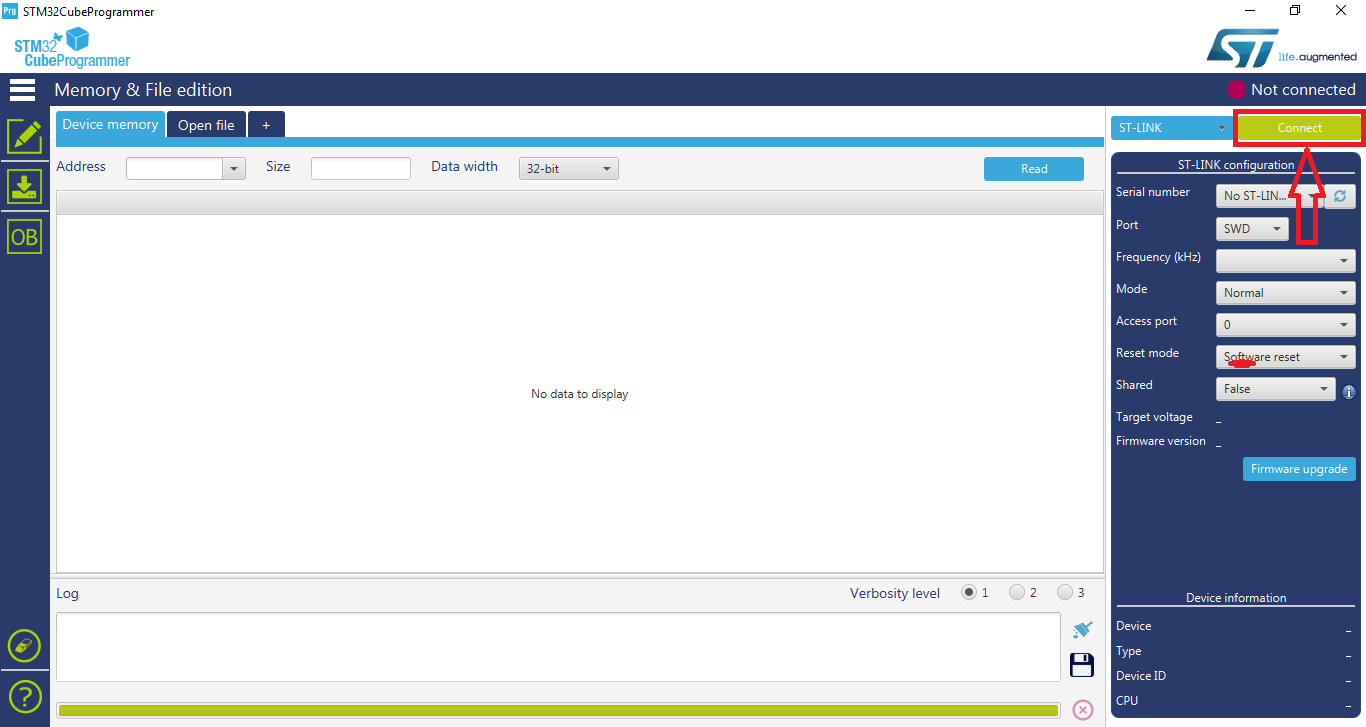
Clicking on “Connect” should connect the Eachine Pro58 to the PC through the ST-LINK V2:
Loading Pirx The Pilot Firmware
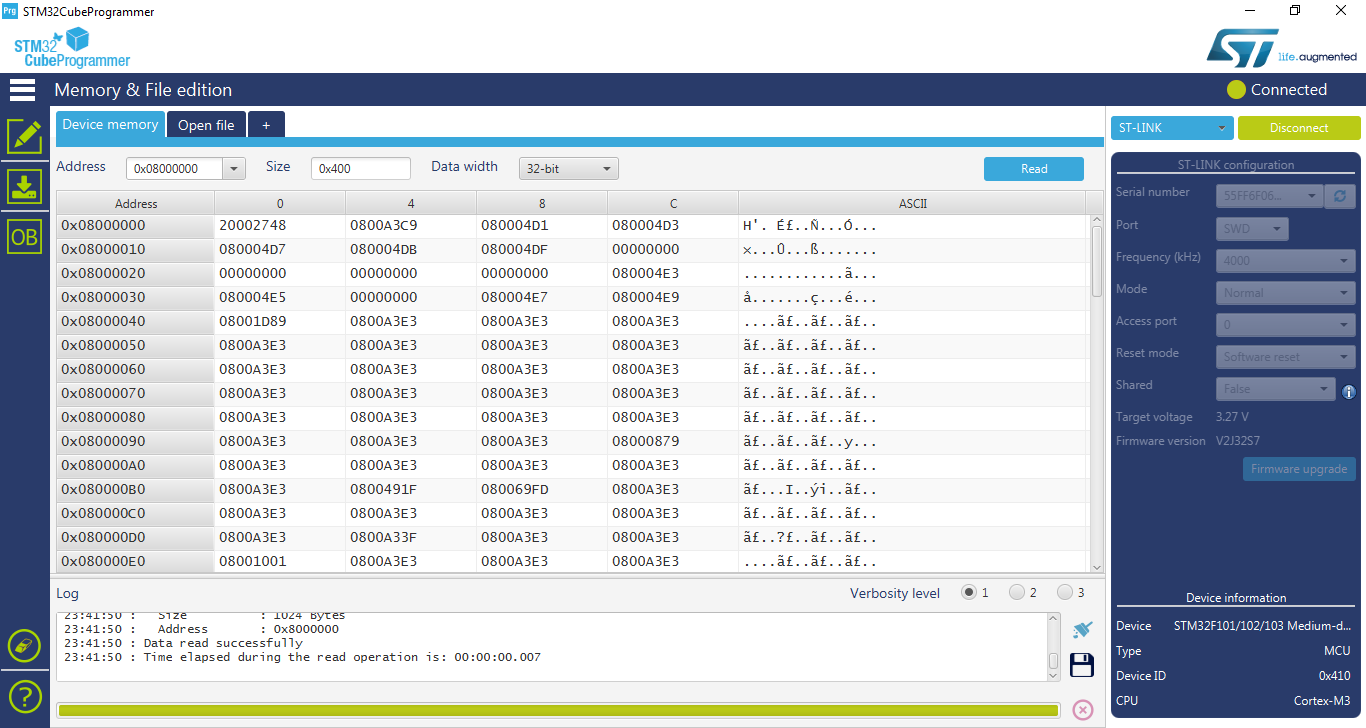
Once connected, we should get the following screen:
Be sure that, on the screen shown after clicking on “OB” on the left, the box for the “Read protection option byte” (RDP) is unchecked:
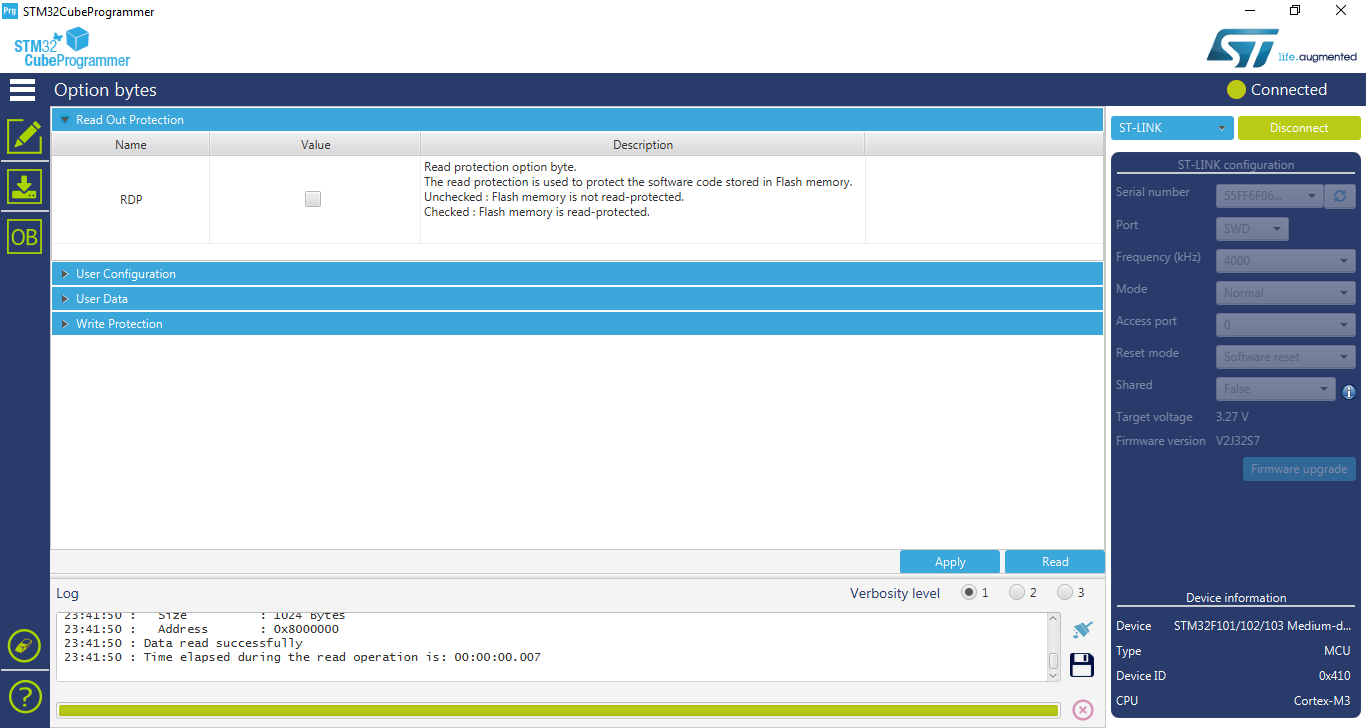
If that is not the case, uncheck it and click on “Apply”.
Before uploading the new firmware, we need to erase the old one (first click on the pencil button, then on the eraser one):

Next we have to click on the second icon from the top left (the one with the downloading arrow) and browsing for the firmware we want to load. Pirx The Pilot Firmware .bin file is available here for free (you just have to register to get the download link).
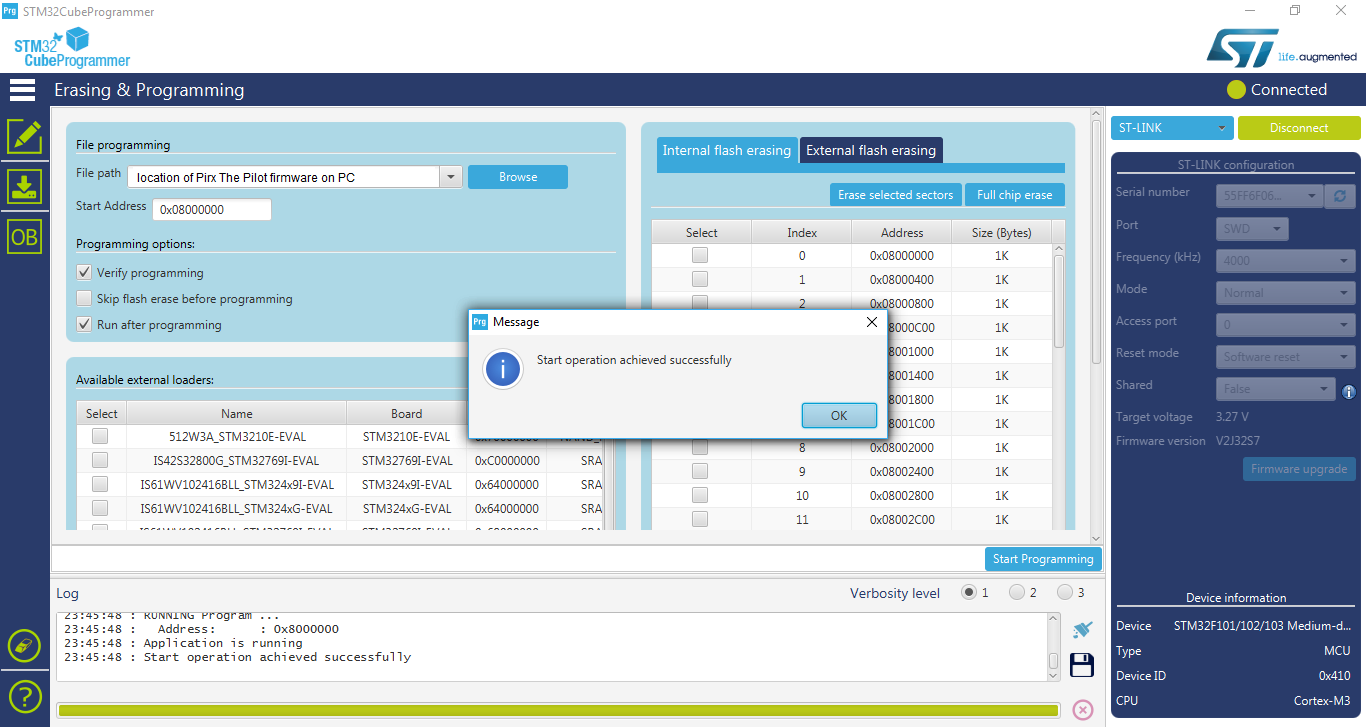
Once you have it on the PC, it is just a matter of setting the file path, controlling that “Verify programming” and “Run after programming” tick boxes are checked and clicking on “Start Programming”.
If everything went ok, we get the following message:
Then we should see Pirx The Pilot firmware in action on the Eachine Pro58:
Conclusions
In this article we have seen how to load a custom firmware, specifically Pirx The Pilot, on the Eachine Pro58 Diversity Receiver using the ST-LINK V2 STM8 / STM32 Programmer. This is a really good diversity receiver with very nice performance and this firmware just make it a must have product especially if you want to upgrade a pair of goggles not having diversity like the Eachine VR006 Mini FPV Goggles.
If you want to know how to install the Eachine Pro58 diversity receiver module on the Eachine VR006 Mini FPV Goggles, you can read this article.