A common problem with the Eachine Wizard X220S is the pretty strong video signal noise observable when motors are spinning: as the throttle value goes up, video signal noise (appearing as horizontal lines on the FPV screen) increases. In this article we will see how to remove this annoying behavior with a simple modification.
Video signal noise is generated from the 4in1 ESC, so, to remove it, we need to find a way to filter this noise before it reaches the Flight Controller (FC) to which the FPV camera and transmitter are connected.
Handy tools and soldering iron
In the modification process, having these tools comes in handy:
- Drillpro 4pcs Hex Screwdriver Tool Kit 1.5/2.0/2.5/3.0mm
- DANIU 4pcs Metal 4.0/5.5/7.0/8.0mm Hex Screwdriver Set
- DANIU 25 in 1 Multi-purpose Precision Screwdriver Set
A good soldering iron is needed. I really like this one, which is compact and portable since it can be powered up using LiPo batteries.
LC Filter
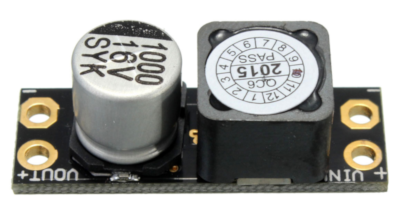
The simple modification that allows to filter the noise consists in the installation of an LC (inductor-capacitor) filter like this one in such a way that DC power supply coming from the 4in1 ESC and going to the FC is cleaned up.
Here are reported the main specs of the LC filter:
- Maximum input voltage: 16V;
- Maximum current: 2A;
- Size: length: 3.5cm, width: 1.1cm, heigth: 1cm;
- Product weight: 14g.
Its dimensions allow to place it right behind the FPV camera in vertical position.
LC Filter Connections
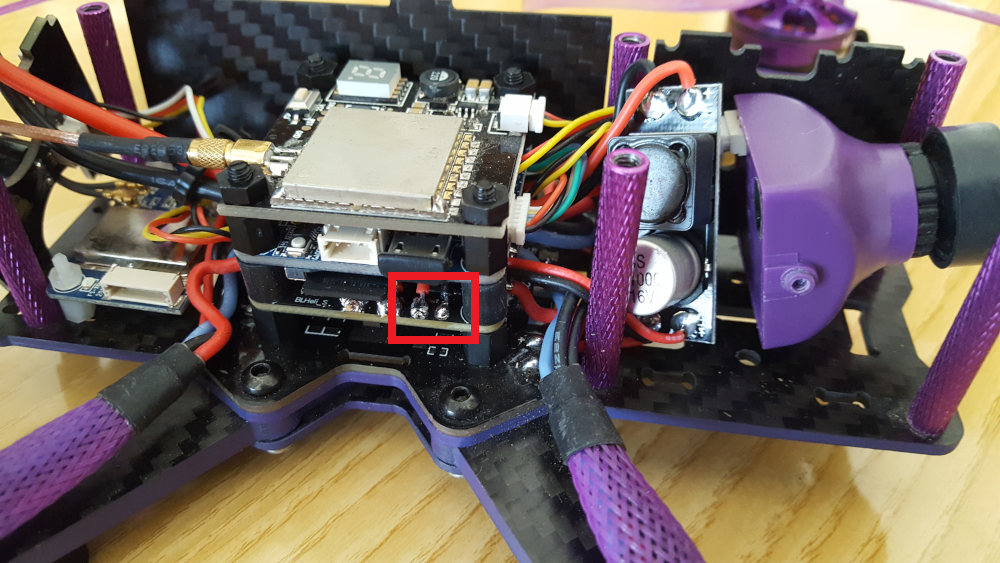
We need to have access to the 4in1 ESC, so we have to remove the top carbon plate, the VTX and the FC boards.
As the above image shows, we have a total of four pads: two for VIN and two for VOUT.
VIN represents voltage input, that is the one we need to filter coming from the 4in1 ESC, where pads are labeled as BAT (red is positive “+”, black is negative “-“); VOUT stands for voltage output, i.e. the filtered voltage that goes into the FC:
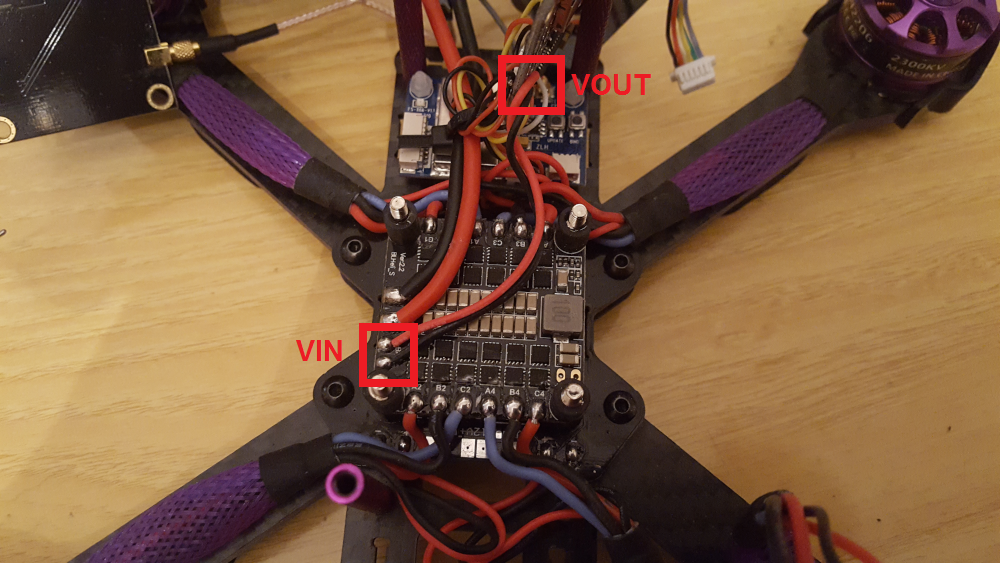
So, looking at the image, we have to put the LC filter between the two ends. To do so, an easy way is to unsolder the wires on the 4in1 ESC pads while leaving connected the ones on the FC.
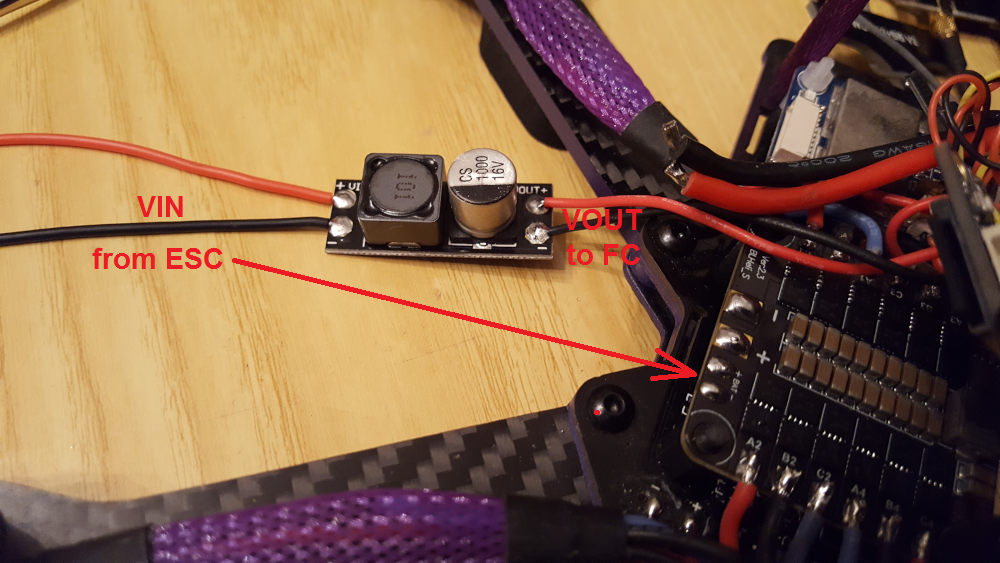
To make the connection between LC filter VIN pads and 4in1 ESC BAT pads, I used 24 AWG wires. Remember to tin the wires and the pads before soldering them together: in this way the final soldering will be easier.
The following image shows the resulting connections (ignore the fact that, in the following two images, mid “+” and “-“ pads have no wires soldered on):
Detail of VOUT going to the FC:
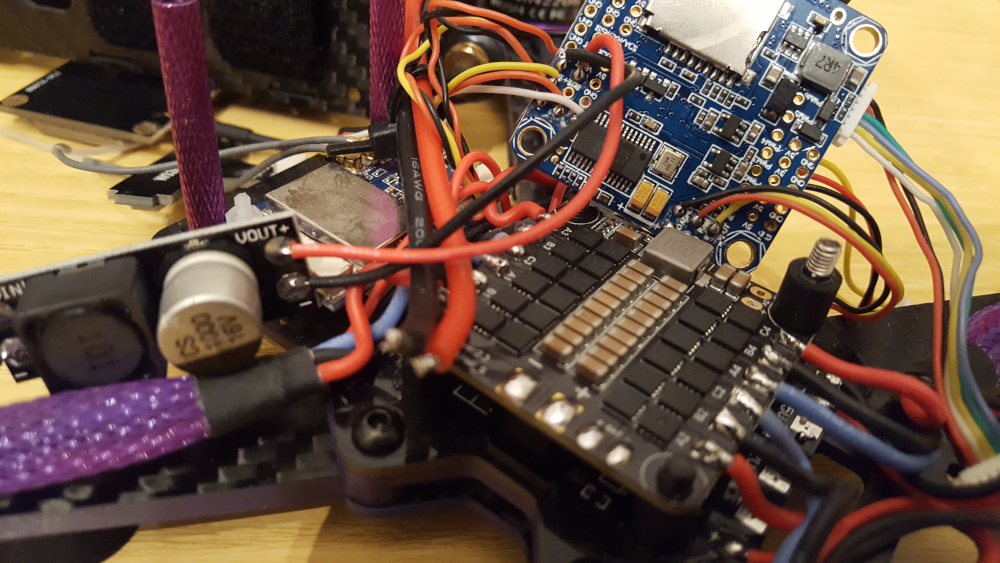
Finally we can solder VIN wires to the 4in1 ESC pads (remember to solder the wires so as they are oriented towards the inside of the board) and mount everything back together positioning the LC filter between the FPV camera and the stack:
Video Signal Comparison
Here is the comparison between the video signal before and after the application of the LC filter (images are taken with lens cover on to see the difference more in detail):
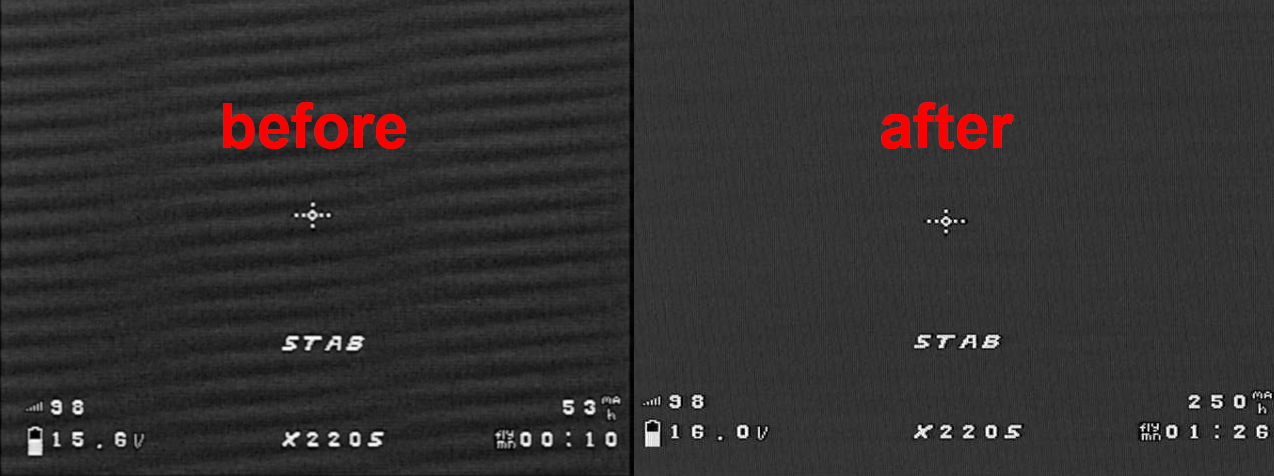
As shown, the noise has been drastically reduced and the horizontal lines caused by it are almost completely gone so we can finally fly with a clear FPV view.
Conclusions
In this post we have seen how to remove video signal noise on the Eachine Wizard X220S, by adding a LC filter between the 4in1 ESC and the FC. Considering the low cost of the LC filter and the benefits it gives, it is a must have mod.
For the overview of the Eachine Wizard X220S, read this article.
If you want to upgrade Betaflight firmware for the Omnibus F4SD on the Eachine Wizard X220S, read this article.
If you want to update Eachine Wizard X220S BLHeli 4in1 ESC firmware, read this post.
If you are experiencing yaw wobbling, here is the resolution.
If you want to know how to setup and configure the 1179 FPV camera that comes with the quad, take a look at this article.