In this article we will go through the setup and configuration of the 1179 FPV camera equipped on the Eachine Wizard X220S, which is a 650 (declared 800, but, as we will see, it is not) TVL (TeleVision Lines) CCD (Charge-Coupled Device) PAL (Phase Alternating Line) format camera.
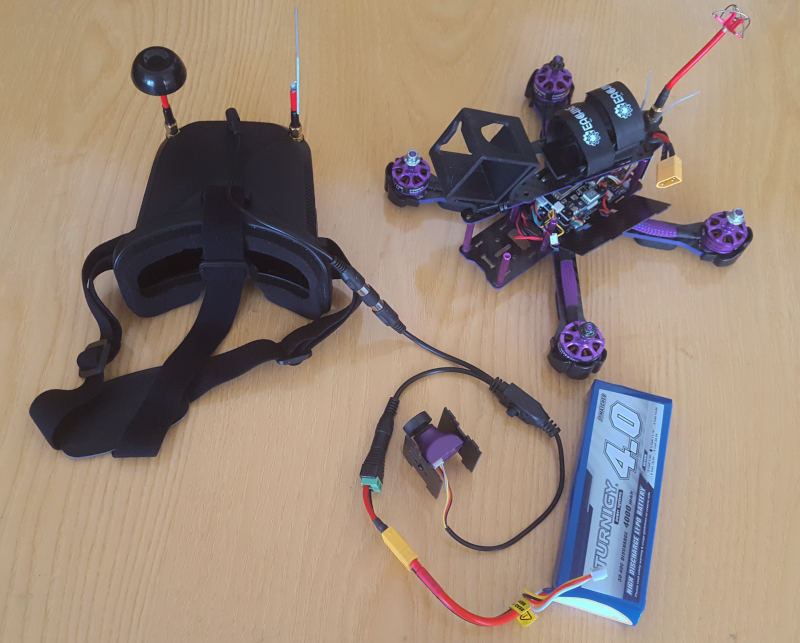
Cables and adapters
In order to connect the camera to the monitor or to the goggles, we need some cables and adapters.
The first cable we need is the following which allows us to use FPV camera OSD to change the configuration:
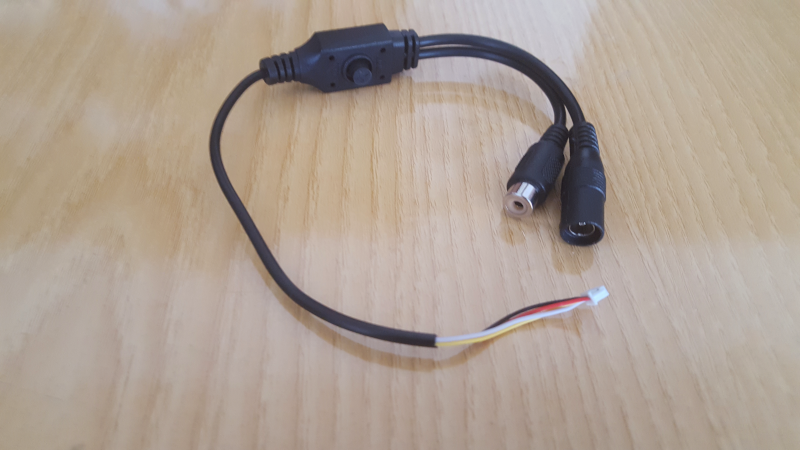
One end of the cable goes to the FPV camera, while the other one is divided in two parts: one goes to the AV IN port of the monitor/goggles and the other one is for battery power (max 5-13V). I got it from a Foxeer HS1177 FPV camera, but you can find a similar one here.
Then we need some adapters:
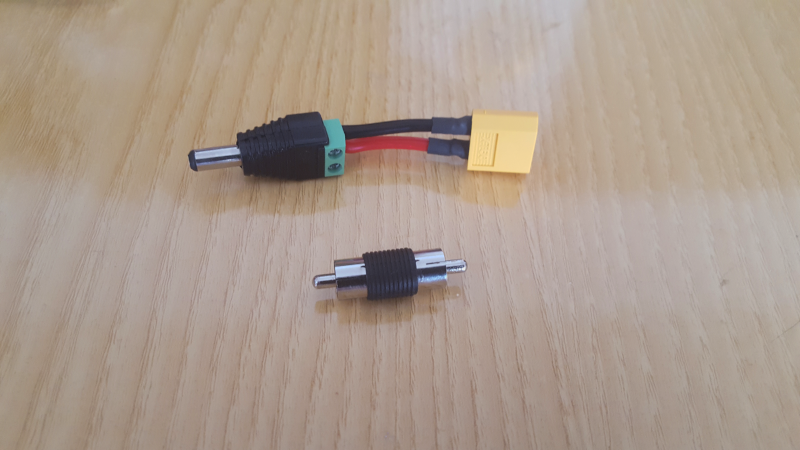
The top one is for battery connection (custom made by connecting a Plug Jack Adapter Connector 5.5x2.1mm for CCTV and an XT60 connector connected together using 14 AWG silicone wire; the other adapter is used to connect the video plugs.
We will see it possible to configure camera settings both from LCD monitor or goggles: in both cases, we need to remove the six screws from the top carbon plate of the Eachine Wizard X220S and disconnect the 1179 FPV camera by unplugging the white connector that comes from the FC.
Monitor connection
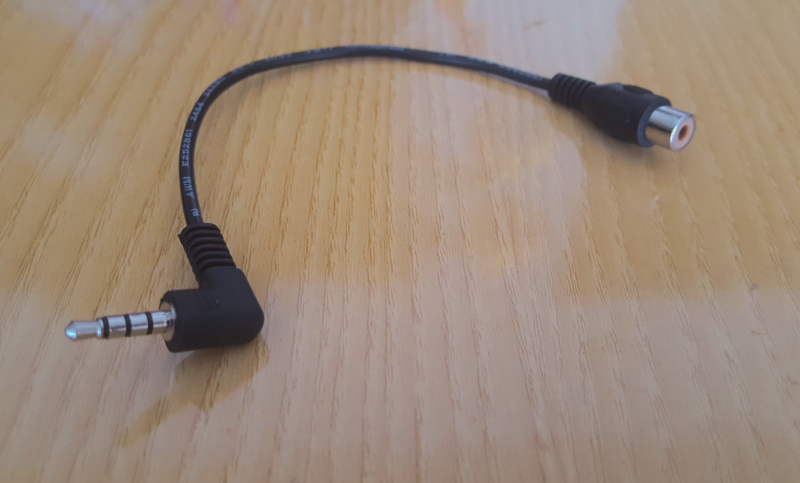
For the monitor, we will use the Eachine LCD5802D (review available here); included with the monitor, we get the following cable that can be used to connect a video input to AV IN port:

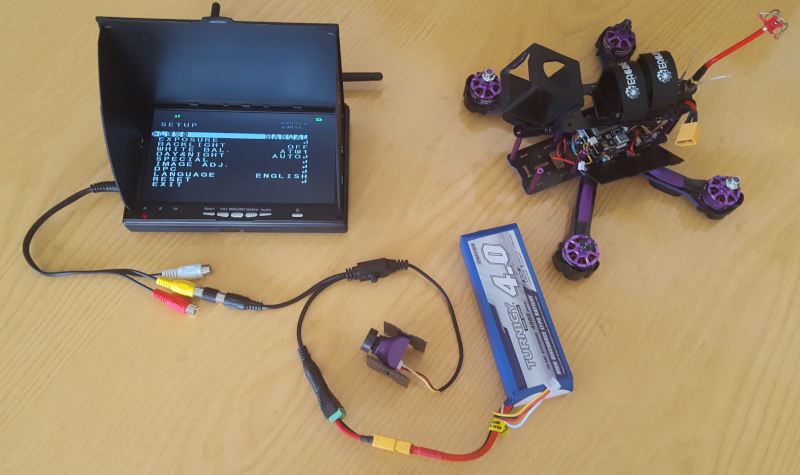
Now, it is just a matter of connecting everything together.
To power up the camera we can use, for example, a 3S LiPo battery (remember the working voltage range for the 1179 is 5-13V):
Goggles connection
To show the possibility to configure the 1179 FPV camera through the goggles, we will use the Eachine VR006 (review available here); this is the cable that come with the goggles and we are going to use it to connect to AV IN:
This is the resulting connection with AV IN located in the top part of the goggles:
FPV Camera Setup
Now that everything is connected, we can finally proceed with camera configuration. Using the joystick located on the camera OSD cable, we can modify the settings: by pressing the button one time, we get access to the setup menu (here we can clearly see in the top right that the camera sensor is a SONY CCD 650 TVL):
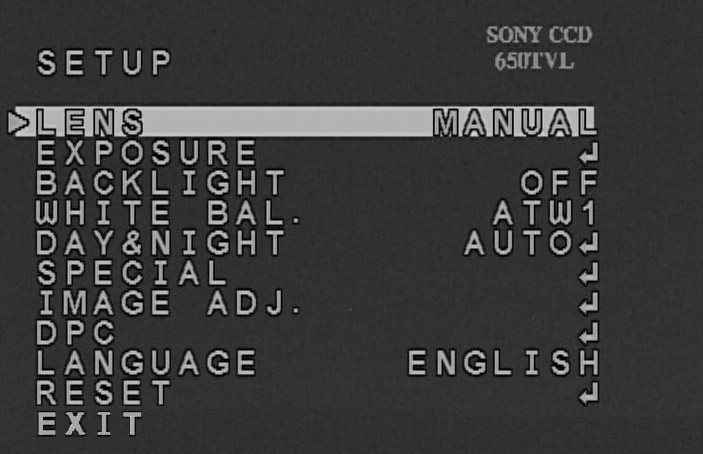
The first time we access the menu, language is set to Chinese, so we have to go down at the 9th row and push the joystick to the right. In this way we change to language to English.
Settings Menu is pretty much the same as the one of the famous HS1177, with items just presented in a different order. Two are the most important configurations: Exposure and Image Adjustment. However, we will take a look also to the other ones.
We can start by modifying the Exposure setting:
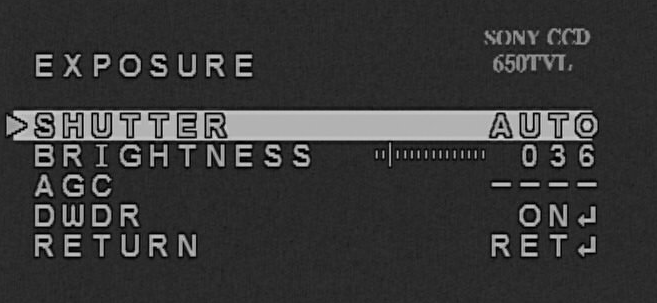
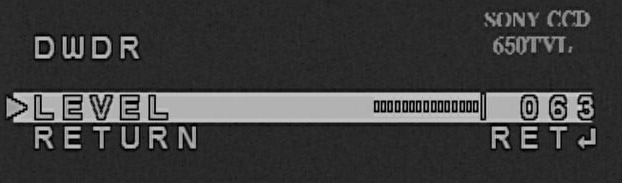
Activating DWDR (Digital Wide Dynamic Range) is really important for FPV, since it allows to handle very well light changes from bright spots to dark ones.
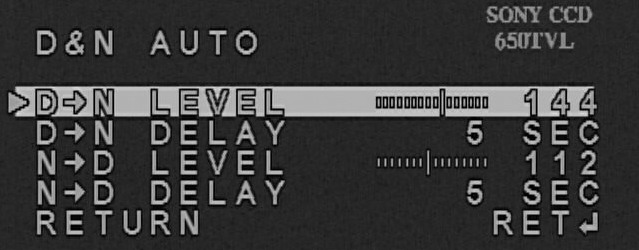
Day&Night setting is configured to AUTO with the following values handling the transition in 5 seconds:
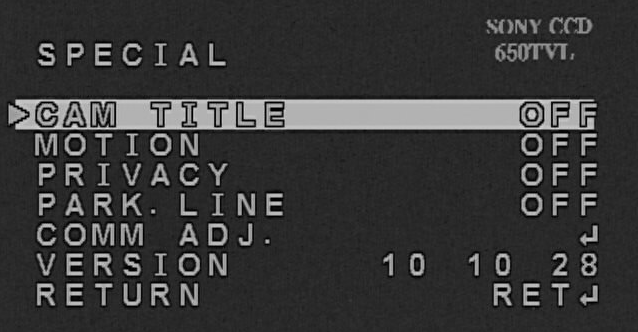
In the Special tab, everything is set to Off (I prefer to not use the Cam Title, since it covers part of the screen and I already have set what I want to display in the OSD through Betaflight Configurator):
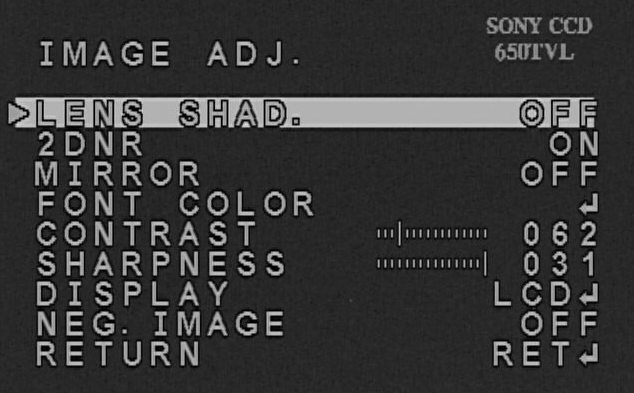
As written above, the other important setting is Image Adjustment and here are reported the values I use:
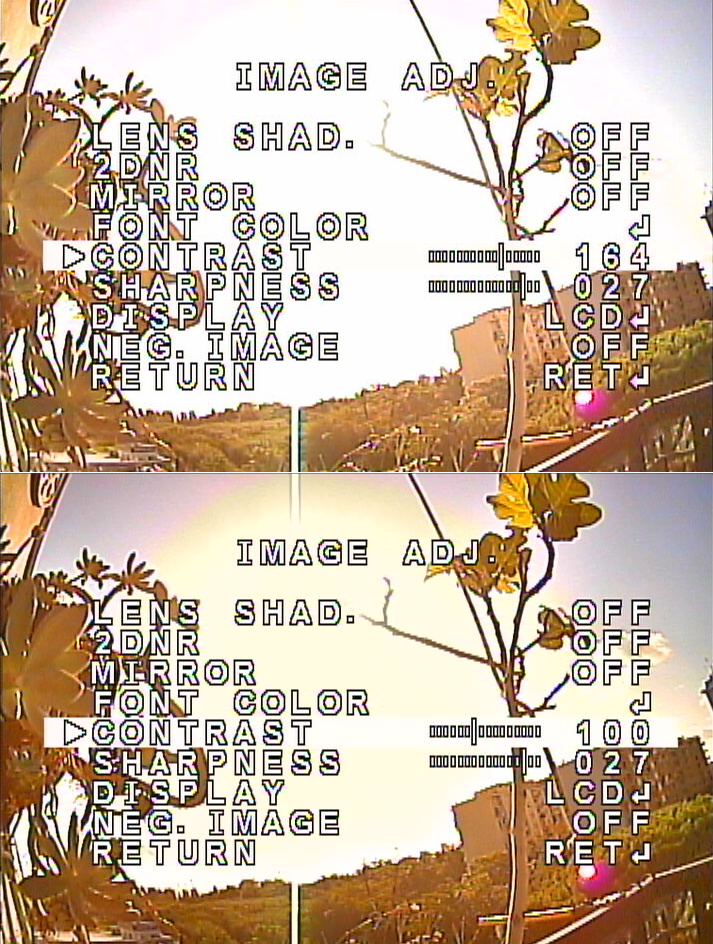
Contrast value is fundamental: in fact, next is reported how much difference a change in its value causes when looking directly into the sun. The image below shows the comparison between a contrast value of 164 with respect to 100:
A good value is 62, but consider to raise it up if you are flying in dark environments.
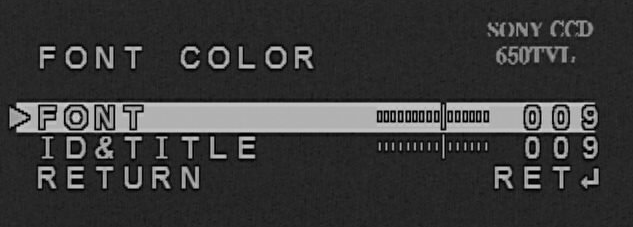
Here are the settings for the Font Color:
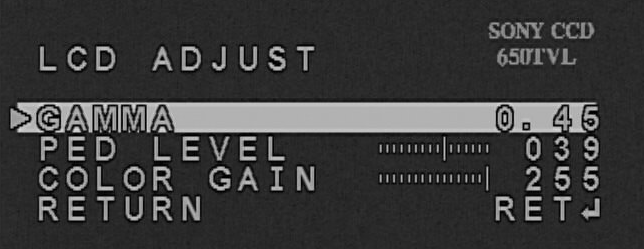
Be sure to set Display to LCD and then enter in its menu to change the values as reported below:
To configure Defective Pixel Compensation remember to put the lens cover on the FPV camera:
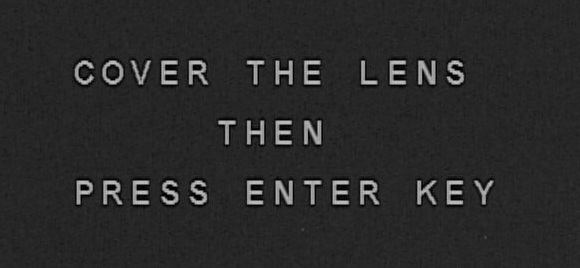
Normally this sort of calibration is not needed, so you can skip it.
All the configurations are now done and, in the next snippet, a recap for the values is reported:
#Lens
Manual

#Exposure
Shutter: Auto
Brightness: 36
AGC: ----
DWDR: On

#DWDR
Level: 63

#White Bal.: ATW1

#Day&Night
Auto
D -> N Level: 144
D -> N Delay: 5 sec
N -> D Level: 112
N -> D Delay: 5 sec

#Special
Cam Title: Off
Motion: Off
Privacy: Off
Park. Line: Off

#Image Adj
Lens Shad.: Off
2DNR: On
Mirror: Off
Contrast: 62
Sharpness: 31

#Font Color
Font: 009
Id&Title: 009

#Display
LCD
Gamma: 0.45
PED Level: 39
Color Gain: 255
Now you can navigate back to the main menu and click on Exit, so the settings are automatically saved. After that, you can disconnect all the cables, reconnect the FPV camera to the FC, screw back the top plate and go fly to test the new setup, which works very well for me. Of course, everyone has its own flight style and preferences, so keep trying modifying the values until you find the ones working good for you.
Conclusions
We have seen how to setup and configure the 1179 FPV camera for the Eachine Wizard X220S. Looking through the settings we have made some important changes to assure a better image quality for FPV flying, particularly during rapid changes in the lighting.
If you are experiencing video noise appearing as horizontal lines on the FPV camera view when motors are spinning, here is the resolution.