In this previous article, Eachine VR006 Mini FPV Goggles have been reviewed and we have seen that a weak point is the lack of Digital Video Recorder (DVR). In this blog post we will see how it is possible to integrate DVR in the Eachine VR006 by the application of a simple modification.
In order to record FPV footage using the Eachine VR006 we need to modify them by adding a DVR module: Eachine ProDVR.
Specifications
Specs are reported down below:
- Operating Voltage: DC 5V;
- Video Format: NTSC/PAL;
- Video Output Size: VGA(640*480px), D1(720*480), HD(1280*480);
- Light Frequency: 50HZ/60HZ;
- Compress Format: MJPEG;
- Records Frame Rate: 30 Frames;
- SD Max Size Support: 32G TF Card;
- Size: 41mm*32.9mm*9mm;
- Weight: 9.5g.
As we can see, it is really lightweight, which it is really important since we are going to mount it on the goggles.
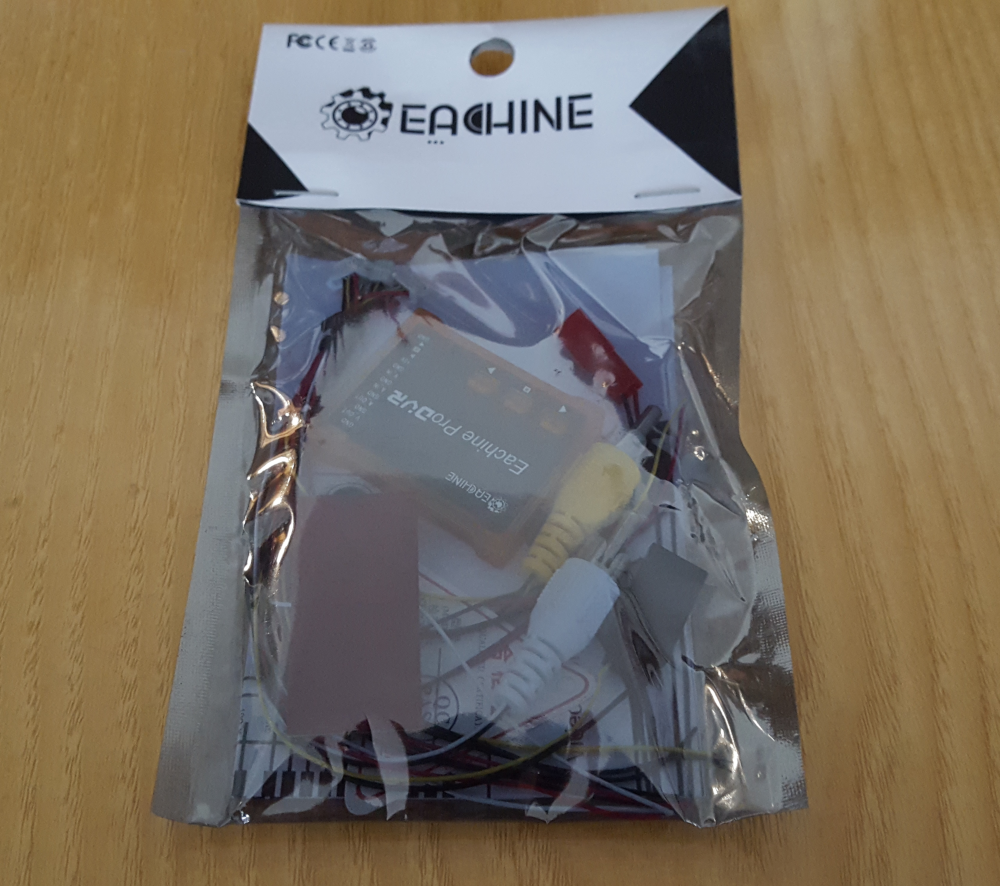
Next image shows how the package arrives:
Package Contents
Package contents are the following:
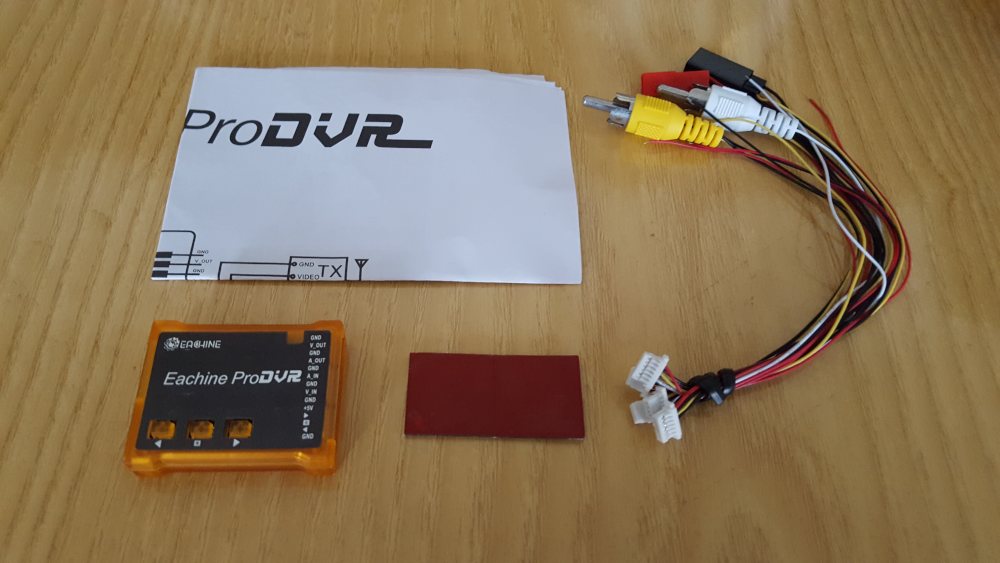
- DVR recorder;
- Cables to connect power supply, video and audio (we are going to use only two of them);
- 2 x 3M adhesive;
- Instructions Manual.
Cables and Wiring
We need to modify one of the two cables (both have a white connector on one side and free leads on the other one) we are going to use: it is the one with two black wires, a yellow wire and a white one. We need to remove one of the black wires and the white one, like shown in the next image:
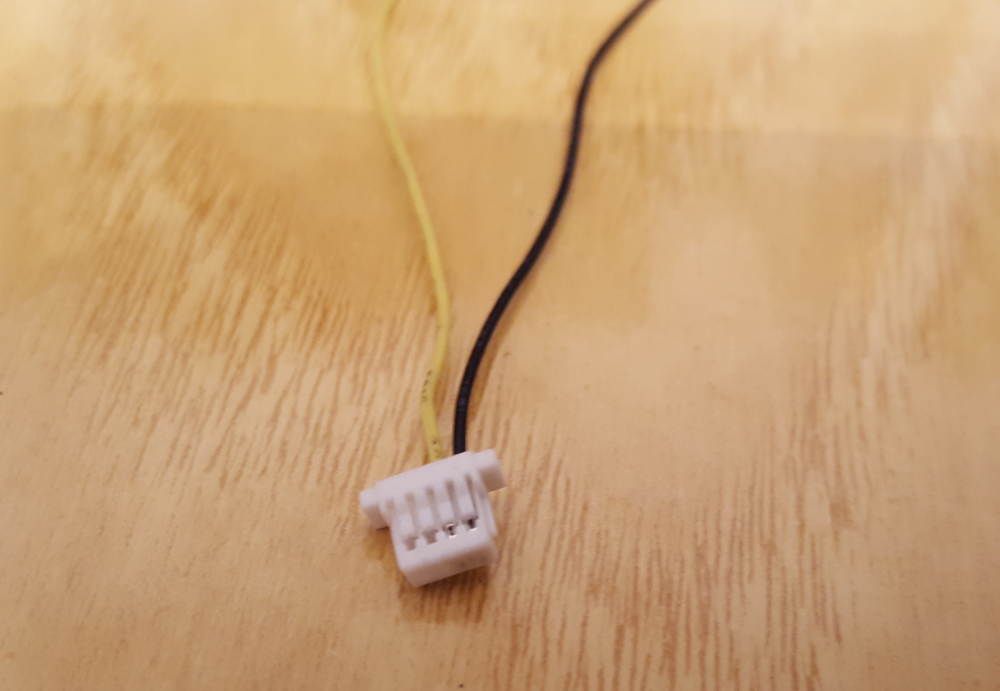
To remove them it is just a matter of lifting up the little white strip that locks the wire in place and gently pull off the wire.
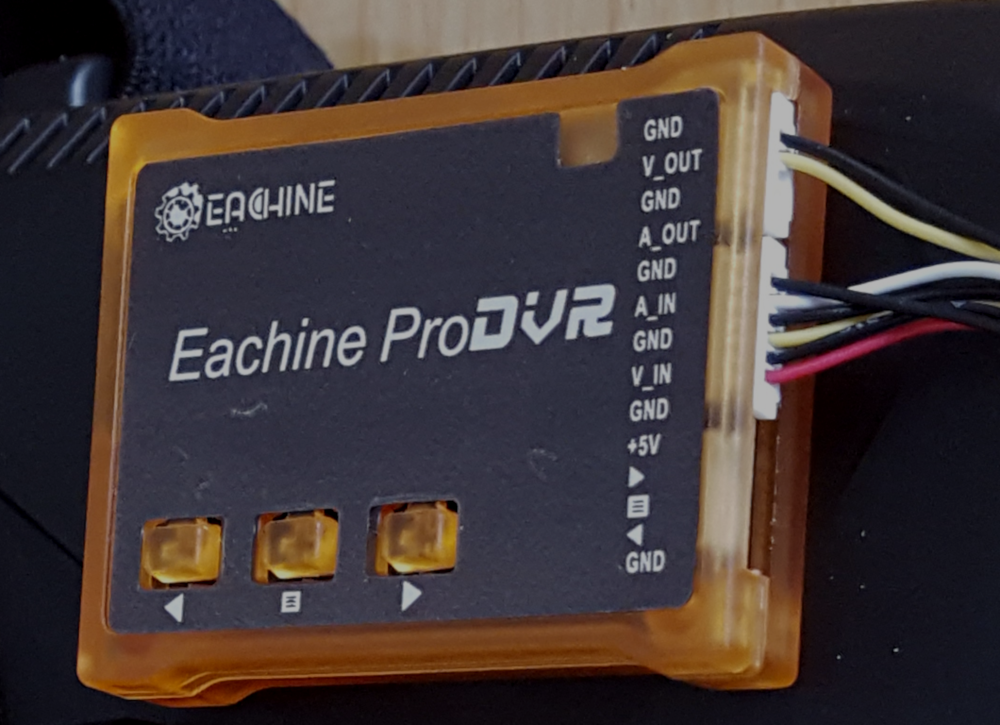
The following image shows the other cable needed, together with the one we prepared above, both connected to the Eachine ProDVR module:
Disassembling
Since we are going to solder wire leads on the pads located on the board inside the goggles, we need to disassemble them. To do this, we need to cut the black sponge in two points, the ones in which the bottom part of the goggles links up to the top part:
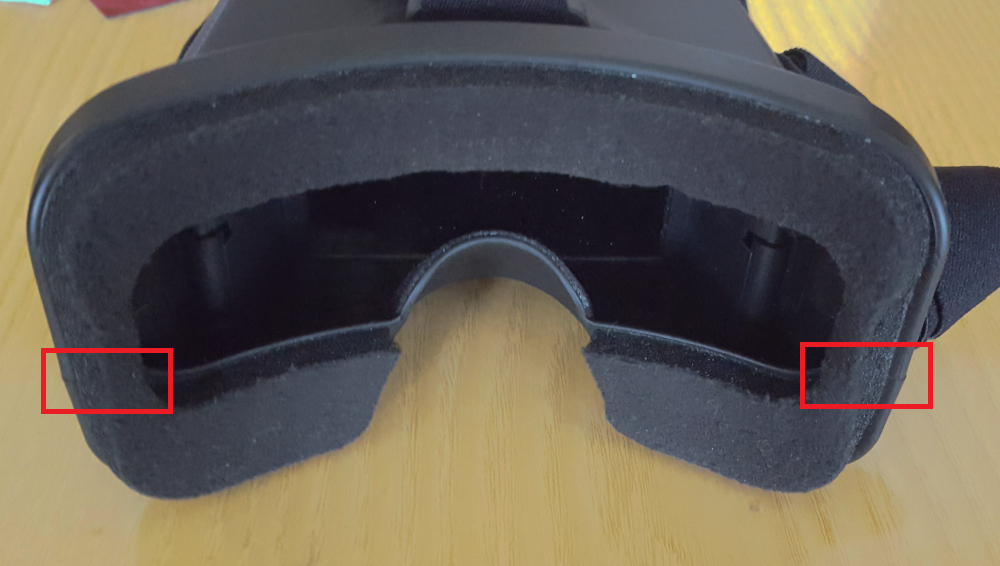
Once the cutting job is done, we can proceed with the separation of the two parts by removing the four screws located inside the highlighted holes in this picture:

If you do not want to cut off part of the front vent to get the wires exiting from the inside of the goggles, you need to make them pass through the holes of the vent before proceeding with the soldering job:
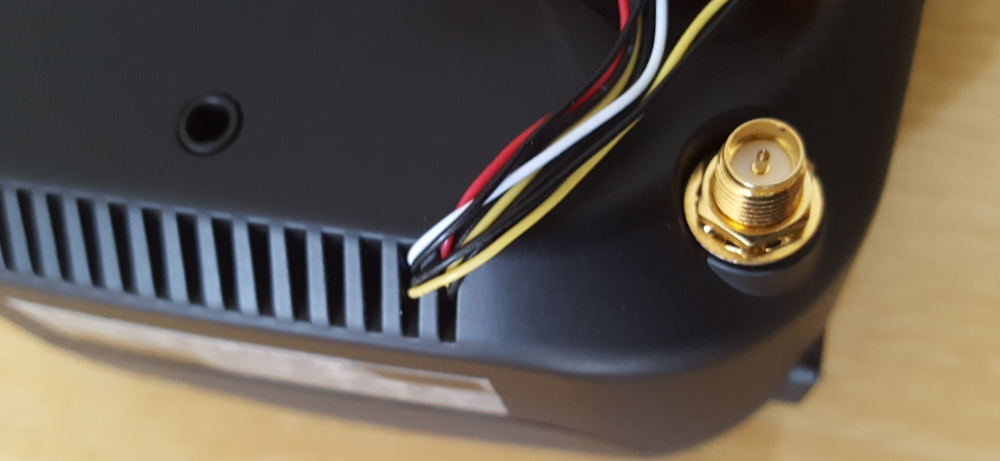
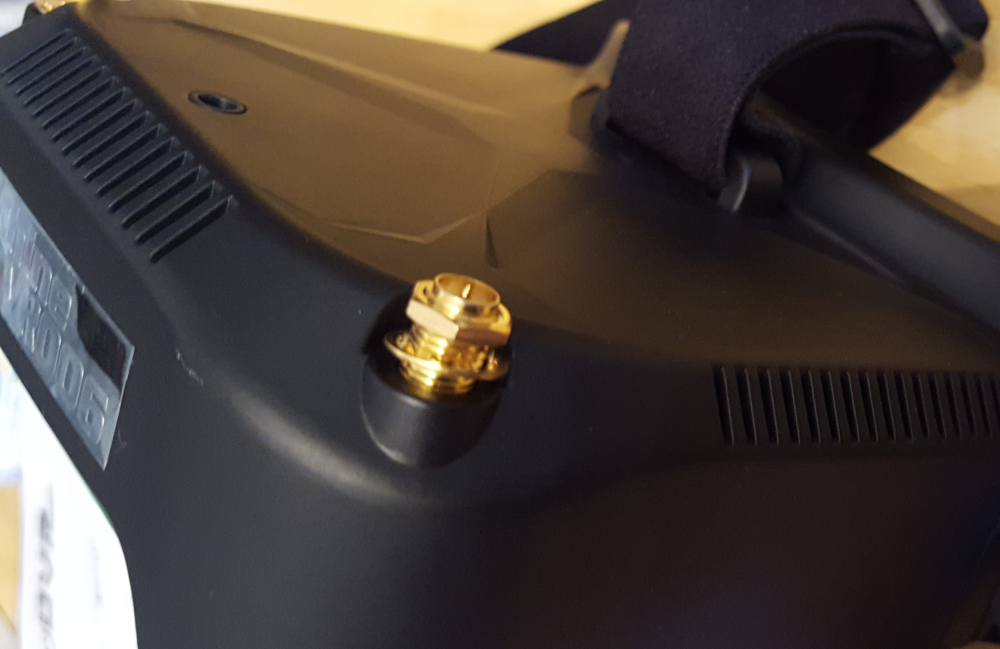
Before we can pull off the board we have to remove the two RP-SMA antenna connectors:
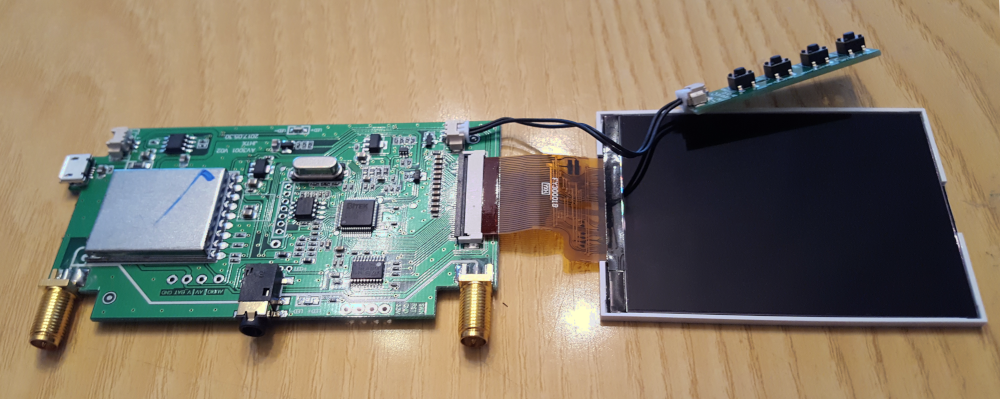
Once that is done we can unplug the battery connector, gently pull out the board and the LCD screen and place them on the table:
Soldering
As always, for an easy soldering job, remember to tin the wires and the pads on which we are going to solder the wires. This is the soldering iron I use (actually it is a real compact soldering station), which is my preferred one at the moment due to its quality, dimensions and portability.
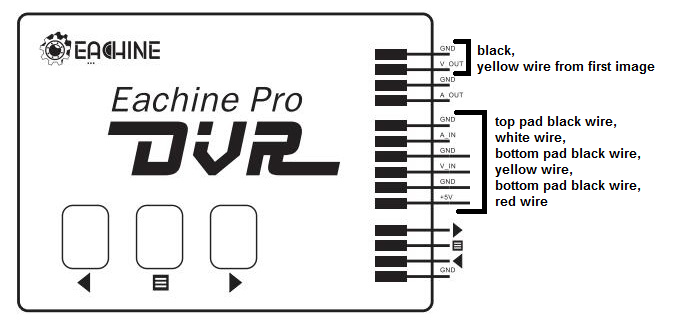
The following two images show how to solder the wires on the board pads; the black and yellow wires of the first image correspond to the ones going into the smaller white connector (GND, V_OUT):
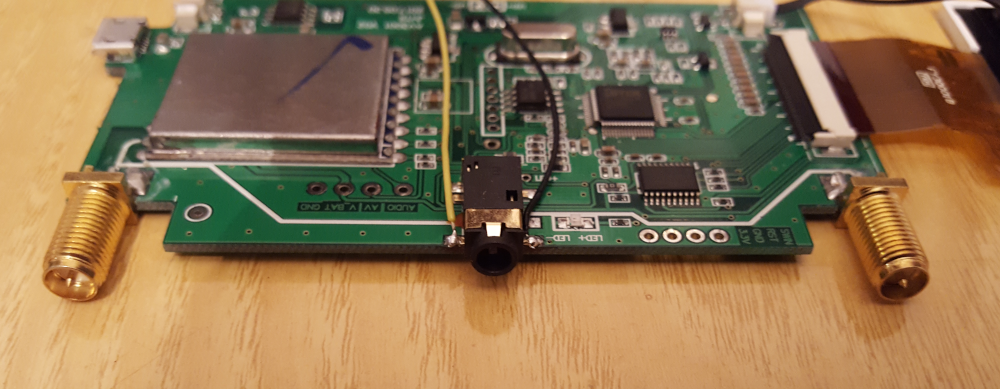
These wires make possible to use DVR as AV IN for the goggles: in this way we can watch/erase DVR recorded videos directly from the goggles.
For the bigger white connector, pin leads order starting from the top pad is the following: GND, +5V, A_IN, V_IN, GND/GND:
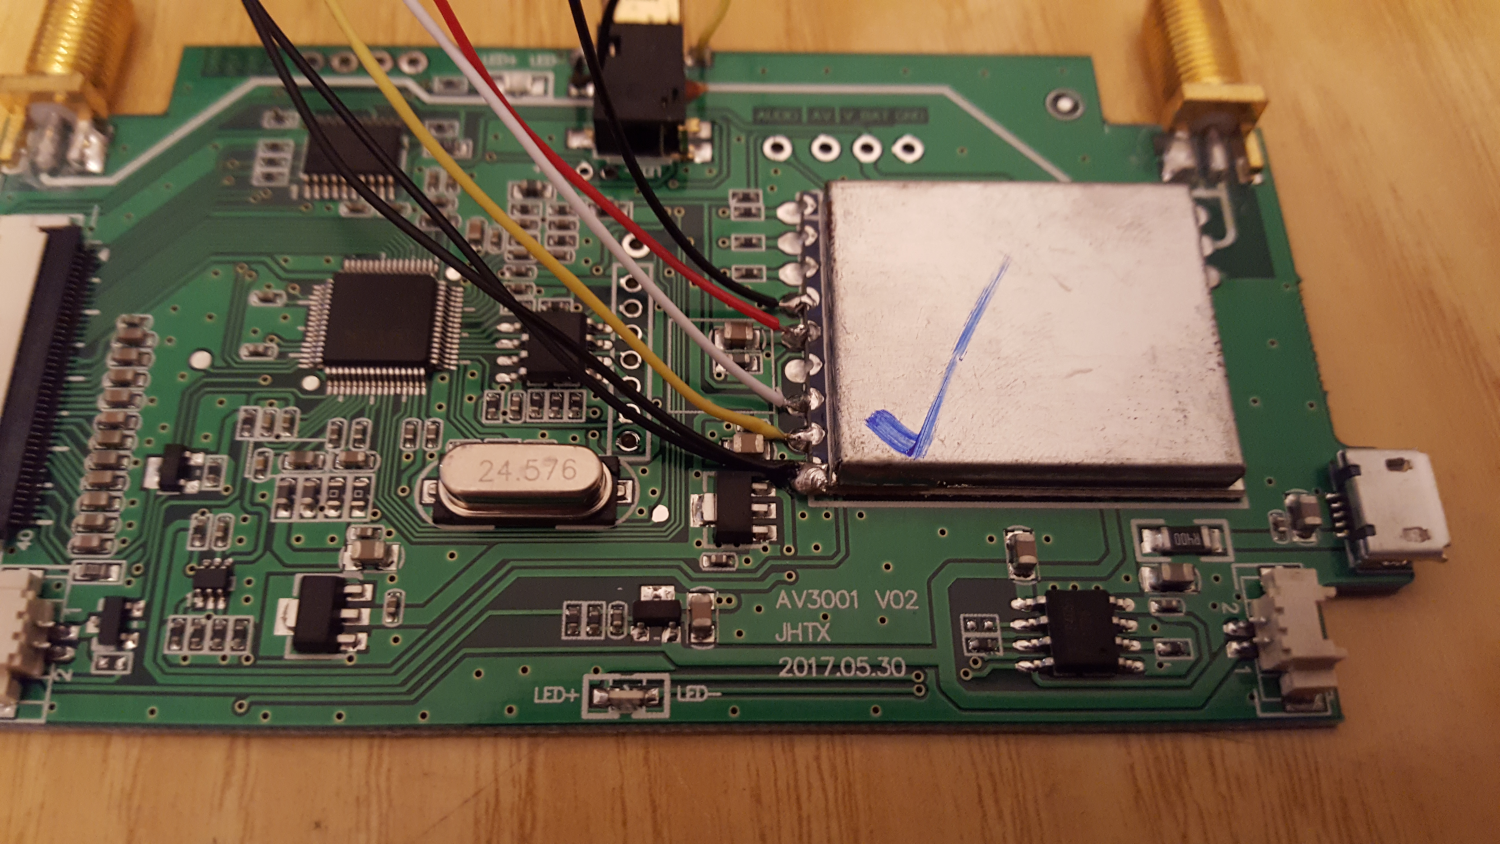
Just keep attention that the top pad black wire corresponds to the top ground pin for the bigger white connector; the other two black wires soldered together are the ground for A_IN and V_IN:
Recording
Once the soldering job is done, before reassembling everything back, we need to test if DVR is working correctly: connecting the battery and powering up the goggles should make the led of the DVR module light up. To start recording (remember to insert an SD card inside the DVR module), we need to press one time the right arrow button: if the recording starts, the led should be flashing. To stop video recording we need to press again that button.
To play a previously recorded video, we need to set DVR as AV IN in the Eachine VR006 Menu (if you do not know how to do that look here). Be aware that, if in the future we want to use a different AV IN, we need to unplug the yellow/black connector from the DVR module. Once AV IN is set, we just press and hold for 3 seconds the left arrow button and then we can navigate through the media files using arrow buttons; press the mid button to play.
Video and Main Menu
To enter Video Menu we need to long press the mid button (here we can change Size, Rec Sound and Video Time values); once there, we can enter Main Menu by short pressing right arrow button. Here we can:
- Format memory card;
- Change language;
- Restore default settings;
- Change display frequency;
- Change TV output frequency.
By hold pressing the mid button we exit Main Menu.
Reassembling and Module Fixing
Finally we can put the board and the display back inside the case and close the goggles by screwing back together the two parts.
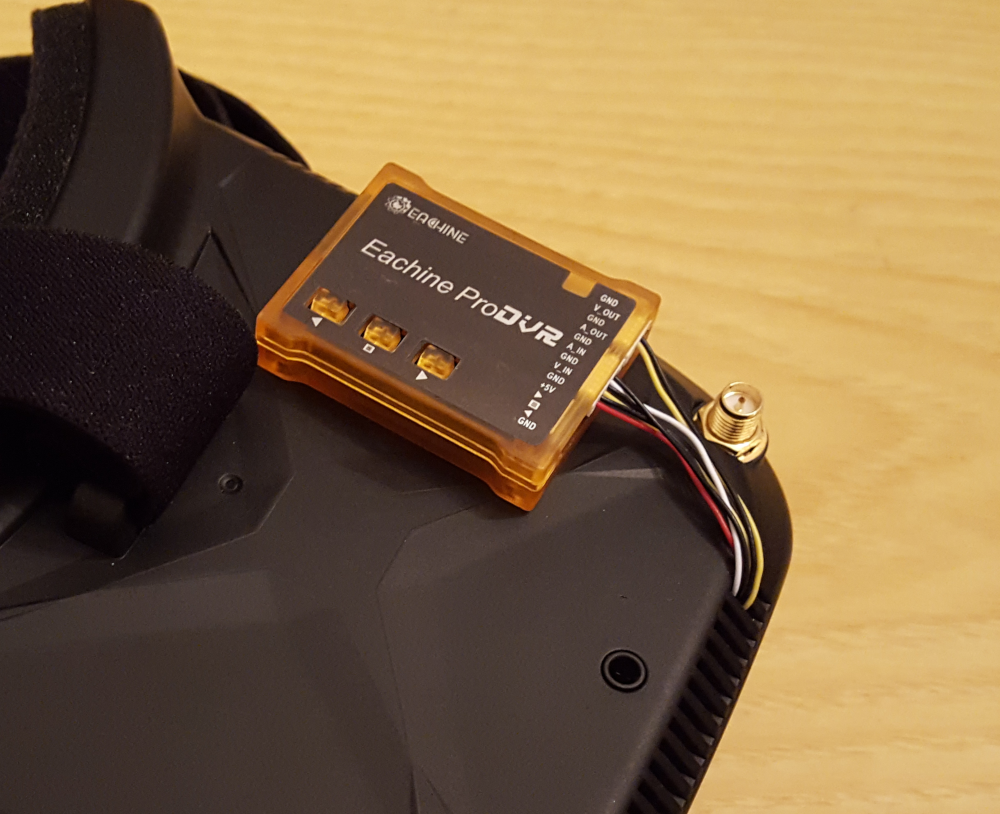
Then we can just fix the DVR module on the top part of the googles by using the included double side tape:
Conclusions
We have seen how to install ProDVR module on the Eachine VR006 Mini FPV Goggles; in this way we can finally record FPV footage directly from our goggles by saving it to an SD card. We can even watch saved videos on goggles screen through AV IN port using DVR as input source.
This module is really cheap and it is a must have mod for VR006 Mini FPV goggles: you can get it here at a good price.
If you want to read the review of the Eachine VR006 Mini FPV Goggles, take a look at this article.
If you want to know how to install a diversity receiver module on the Eachine VR006 Mini FPV Goggles, read this article.