It is always important to keep board’s firmware updated to the latest release. This article shows how to update Betaflight firmware for the Omnibus F4SD which is the Flight Controller (FC) equipped on the Eachine Wizard X220S.
The first thing to do is to check the current firmware version loaded on the FC. This can be done by using Betaflight Configurator which at the time of this writing has reached version 10.3.1: it can be run as a Chrome Extension on the Chrome Web Store or it can be downloaded from Github and installed on the operating system (Windows, Linux and Mac OS X versions are available).
Current firmware version check
Once it is installed, to check current BF firmware version, we just need to connect the board to the PC, launch the application, click “Connect” and navigate to the Command Line Interface (CLI). Here we need to type the command “version” and then just press enter:
Entering CLI Mode, type 'exit' to return, or 'help'

# version
# Betaflight / OMNIBUSF4SD 3.1.7 Apr 10 2017 / 17:10:55 ()
As we can see, by default, the FC on the Wizard X220S is loaded with Omnibus F4SD version 3.1.7.
We can check what is the latest release for the firmware by disconnecting the quadcopter, selecting “Firmware Flasher” and choosing the version from the dropdown menu:
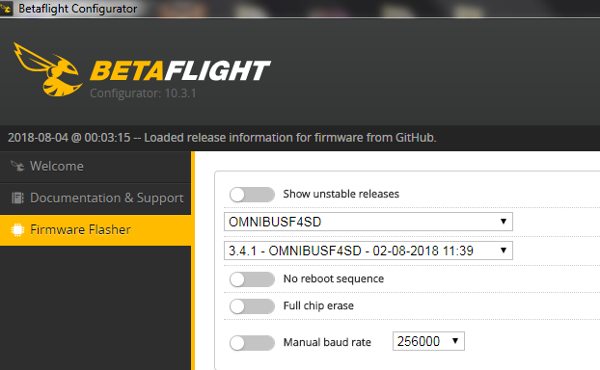
So, at the moment, the last release is 3.4.1.
Betaflight Configuration Backup
Before going forward, there is a really important activity to do. We need to backup Betaflight current confuguration: this is because, when the new firmware will be loaded, all settings/configurations (ports, PIDS, led strips lightning, OSD settings and so on) are reset to BF default. So, if you do not want to lose them, you better save them using the CLI command “diff” (recommended) or “dump” and copy the output to a text file.
For example, here is reported the output of the “diff” command:
# diff

# version
# Betaflight / OMNIBUSF4SD (OBSD) 3.4.0 Jul  8 2018 / 04:24:36 (cce8a59be) MSP API: 1.39

board_name OMNIBUSF4SD
manufacturer_id

# name
name X220S

# resources

# mixer

# servo

# servo mix


# feature
feature -RX_PARALLEL_PWM
feature RX_SERIAL
feature LED_STRIP

# beeper

# beacon

# map

# serial
serial 0 64 115200 57600 0 115200

# led
led 0 0,11::AI:8
led 1 0,12::AI:8
led 2 0,13::AI:2
led 3 0,14::AI:2
led 4 0,15::AI:2
led 5 15,11::AI:8
led 6 15,12::AI:8
led 7 15,13::AI:2
led 8 15,14::AI:2
led 9 15,15::AI:2

# color

# mode_color
mode_color 6 0 2
mode_color 7 0 0

# aux
aux 0 0 2 1300 2100 0
aux 1 1 1 900 1225 0
aux 2 2 1 1300 1700 0
aux 3 13 3 1300 2100 0
aux 4 28 1 1300 2100 0

# adjrange

# rxrange

# vtx

# rxfail

# master
set acc_calibration = -2,71,-94
set baro_hardware = NONE
set max_check = 1950
set rssi_channel = 12
set serialrx_provider = IBUS
set dshot_idle_value = 800
set motor_pwm_protocol = DSHOT600
set small_angle = 180
set pid_process_denom = 2
set osd_vbat_pos = 2497
set osd_rssi_pos = 2465
set osd_tim_1_pos = 2519
set osd_flymode_pos = 2413
set osd_crosshairs_pos = 2285
set osd_craft_name_pos = 2509
set osd_warnings_pos = 2345

# profile
profile 0

set dterm_notch_cutoff = 0
set p_pitch = 58
set d_pitch = 35
set p_roll = 44
set i_roll = 40
set d_roll = 30
set p_yaw = 75
set i_yaw = 50

# rateprofile
rateprofile 0
Drivers installation
Before we can upload the new firmware to the FC, we need to install some drivers which allow to connect the FC to the PC in Device Firmware Update (DFU) mode, that is the mode used to flash the firmware to the board:
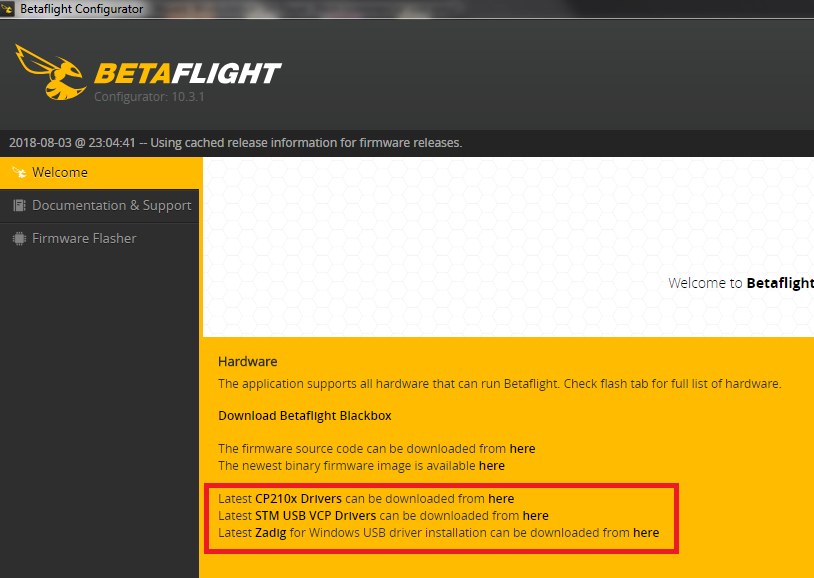
- CP210x USB to UART Bridge VCP Drivers;
- STM32 Virtual COM Port Driver (download link to STM32 Virtual COM Port Driver since it is not directly available from the website);
- Zadig (tool to install driver on STM32 Bootloader).
Once CP210x and STM32 drivers are installed, it is possible to start the FC in DFU mode: this can be either done by pressing and holding the “Boot” button on the FC and then connecting the quadcopter to the PC or by first connecting the drone to the PC and, using the CLI, entering the “bl” command or “dfu” for versions older than 3.2 (first method is preferred):
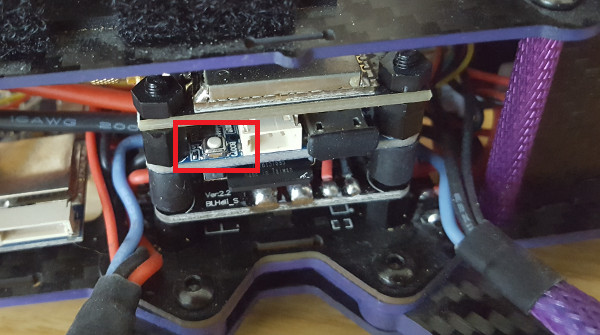
A continuous beep from the FC warns it is in DFU mode. However, to make it possible to flash the firmware, we need to install one last driver by using Zadig (otherwise DFU mode does not show up in Betaflight Configurator). In Zadig, to list all devices, click on “Options -> List All Devices”.
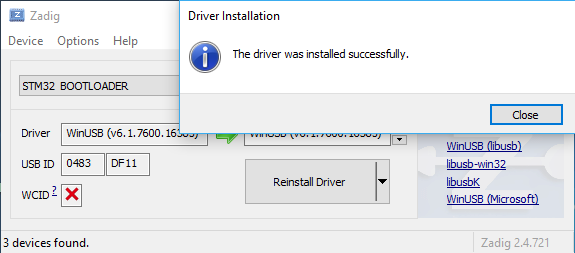
As the image below reports, by default we have the value “NONE” for the STM32 BOOTLOADER (if you do not see this entry it means you have not installed correctly STM32 Virtual COM Port Driver).
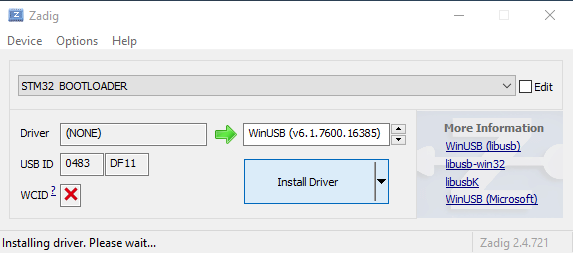
To fix this, it is just a matter of clicking on “Install Driver” and waiting for the installation of WinUSB (v6.1.7600.16385) to complete:
Flashing Firmware
Finally we can flash the new firmware in DFU mode.
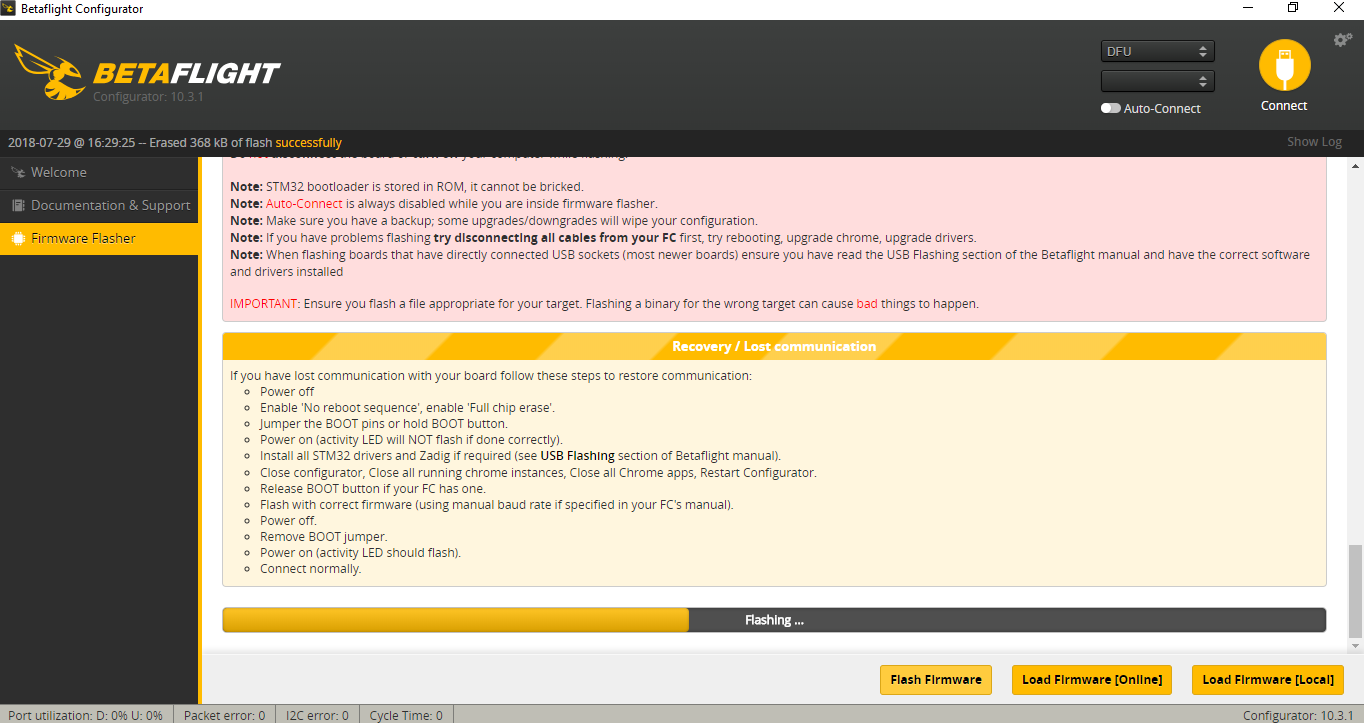
So, we need to go to Firmware Flasher tab, select the latest firmware version for the Omnibus F4SD (like seen before) and click on “Load Firmware [Online]”. Then, we can press on “Flash Firmware” and the process will start:
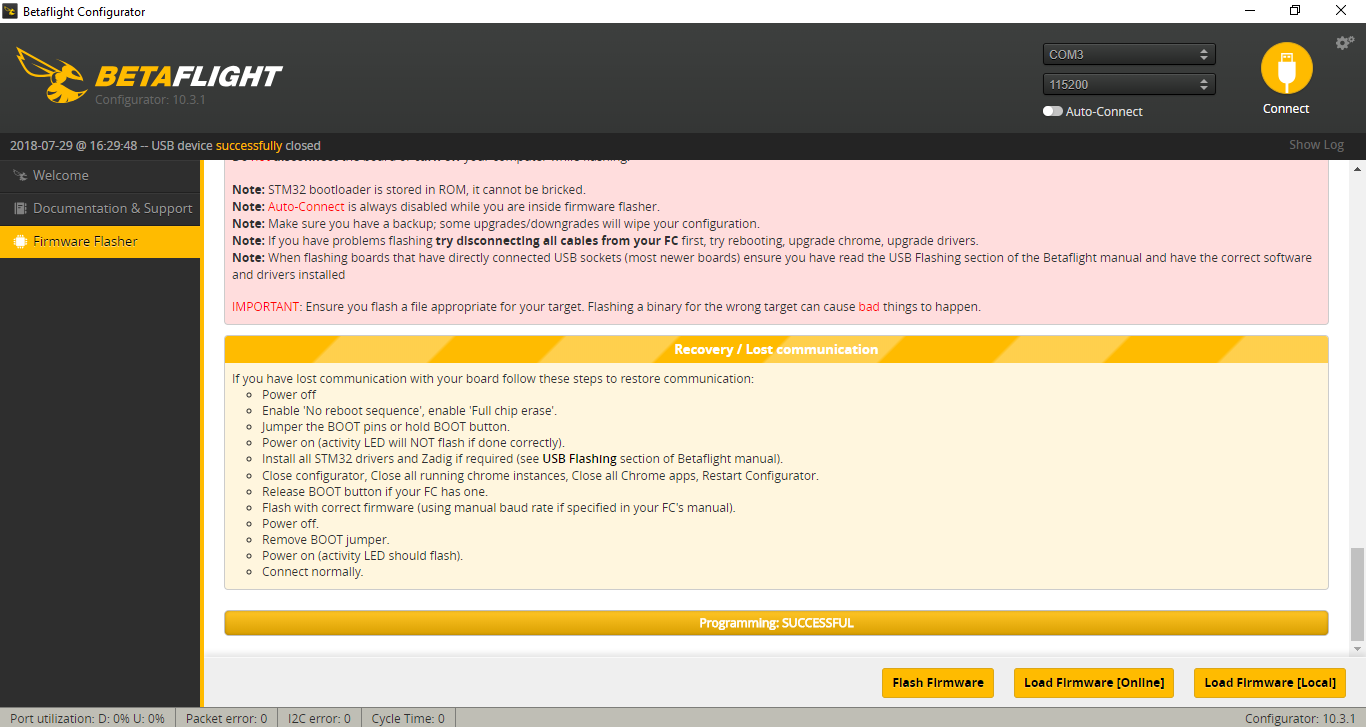
Once the activity is completed, we get the message “Programming: SUCCESSFUL” and we see, in the top right of the window, the change from DFU to COMX (in my case COM3).
As final check, you can use the command “version” to check the correct release is displayed.
Finally, it is just a matter to report back all the configurations on Betaflight: for example, to import back led configurations, we need to open the CLI, paste the portion of the dump regarding the leds, press enter and commit the changes using the “save” command (of course, you can do all of this manually from Betaflight Configurator tabs, but for some settings, like led lights, it is faster to import them back through CLI).
Conclusions
In this article, we have seen how to flash the latest Betaflight firmware version for Omnibus F4SD on the Eachine Wizard X220S (similar steps can be applied for other FCs) and how to save/import back settings/configurations.
For the overview of the Eachine Wizard X220S, read this article. If you want to update Eachine Wizard X220S BLHeli-S 4in1 ESC Firmware, read this article.