In the previous article we have seen an overview of the Eachine Wizard X220S and how to install the FlySky X6B receiver on it (if you have the RTF version I highly suggest to switch to this receiver due to its long range reception capability). Now we take a look at the setup and configuration of the quadcopter in Betaflight Configurator.
Betaflight Configurator
Betaflight Configurator is a really popular application that allows to configure the aircraft via GUI and it can be downloaded as an extension for Google Chrome browser. Both flight controller and GUI application are open source.
Once the application is correctly installed, it is possible to launch it. Then, it is just a matter of connecting the quadcopter to the PC using a micro USB (Flight Controller) to USB (PC) cable and clicking on “Connect” to establish the connection.
If you have flashed or you are planning to flash the latest version of Betaflight firmware here is the setup and configuration on Betaflight 4.2 firmware, otherwise, if you have Betaflight 3.x firmware, stick with this guide.
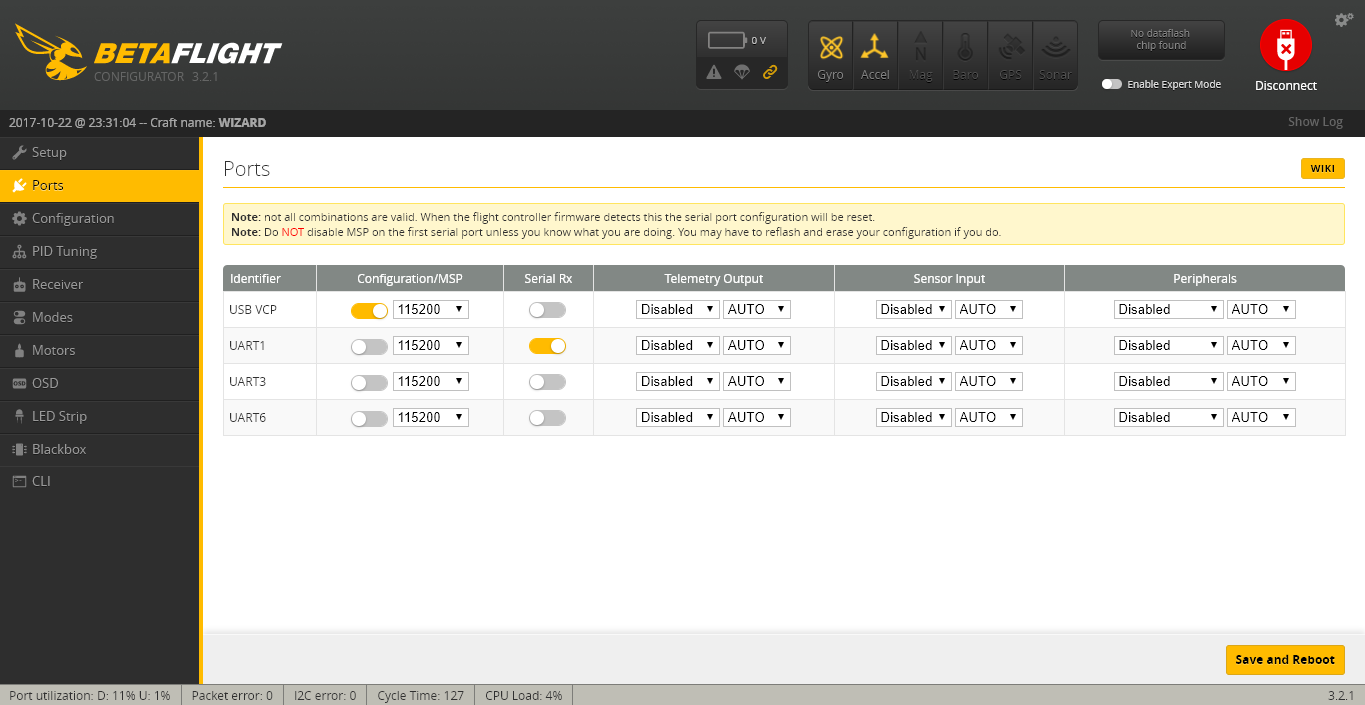
Ports
First, we need to correctly setup the ports on the FC in the “Ports” tab: since we are using FlySky X6B with i-BUS protocol we have to enable “Serial RX” on UART1, which is the port we have soldered receiver cables on:
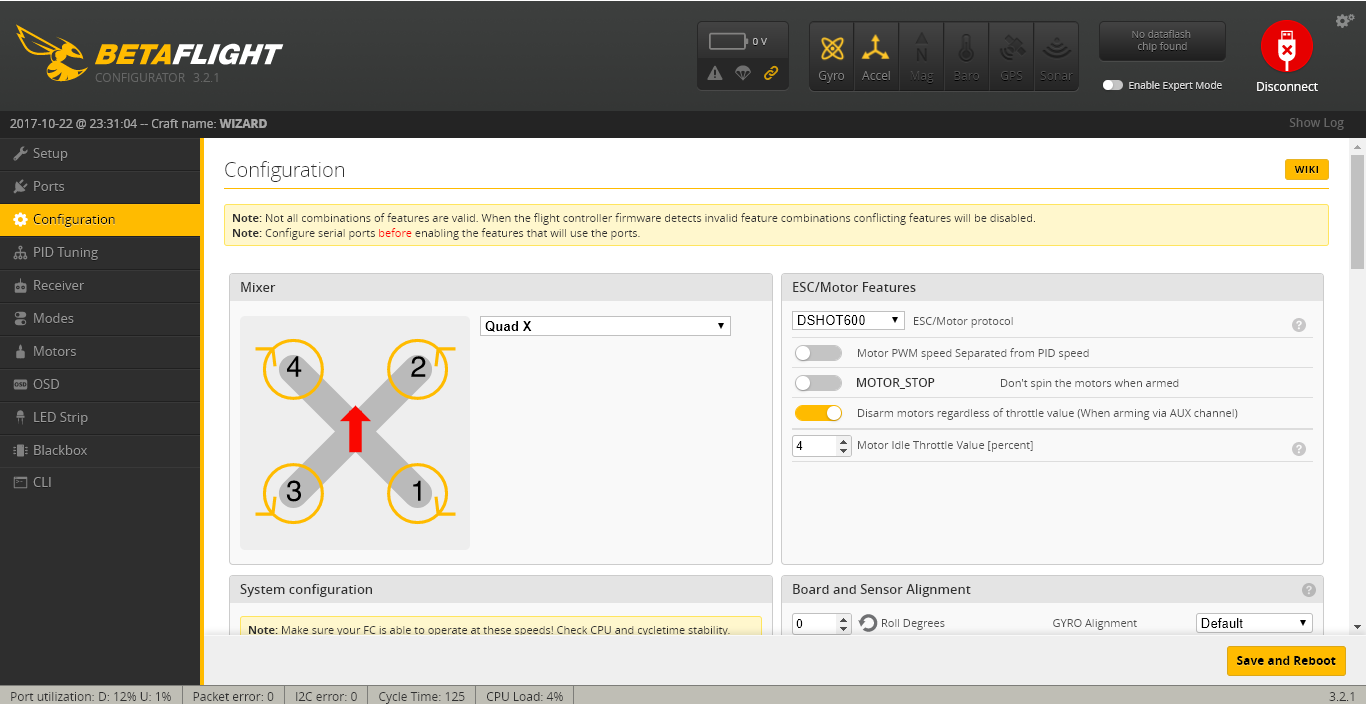
Configuration
In the “Configuration” tab we need to be sure DSHOT600 is selected and we can deactivate “MOTOR_STOP” switch (personal preference):
Under “Receiver” we have to set Serial-based receiver (SPEKSAT,…) with “IBUS” selected in the drop down menu:

Under “Other Features” it is important (we see how much in the next post) to activate BLACKBOX and SDCARD since these are critical to have flight logs for post flight analysis, especially during the tuning phase when it is possible to use an SD card: class 10 is recommended, while the space required is not important since it will be used to store text files (2 GB is more than enough).
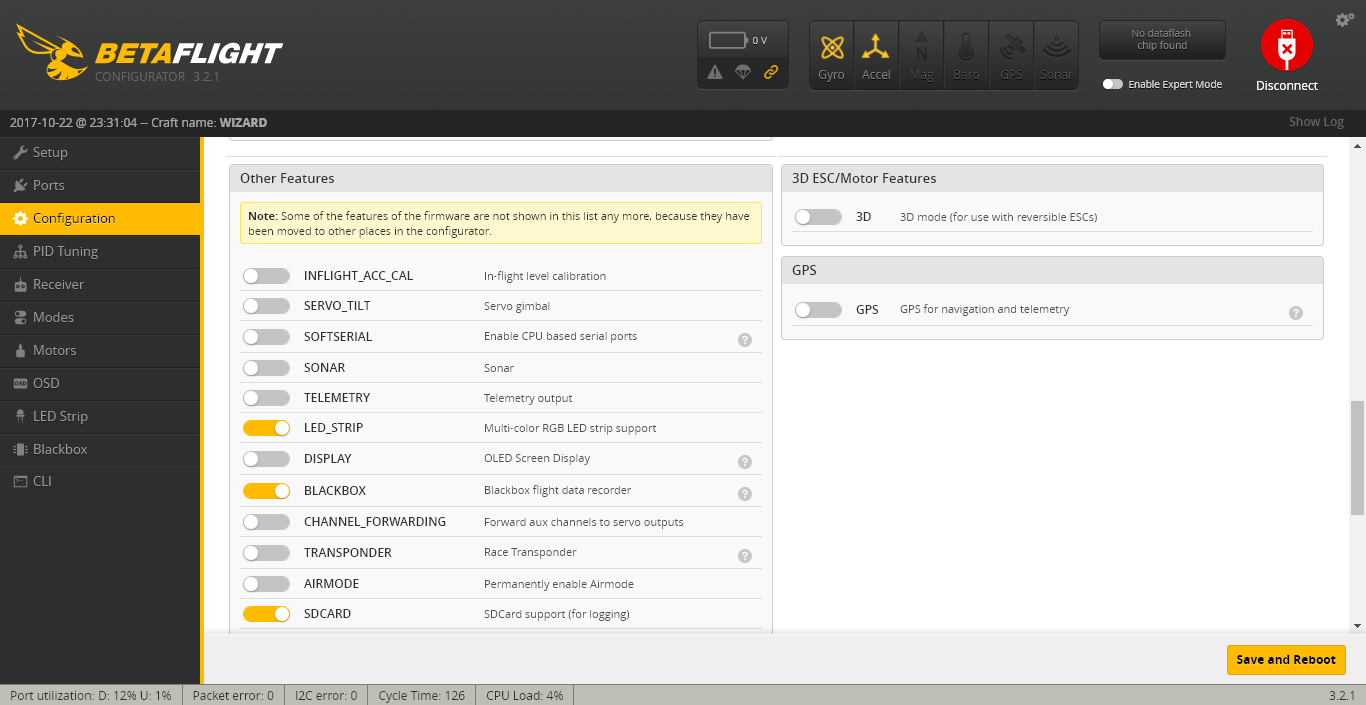
Also OSD (On Screen Display) has to be activated to keep track of useful information on the FPV screen or goggles during the flight.
We can enable VBAT to have battery voltage monitoring (remember we have also connected VBAT output from FC to the receiver to have telemetry on the transmitter) which is a must especially when flying in FPV so we can check on our monitor/goggles the current battery voltage through OSD.

Failsafe
To configure the failsafe we need to access to an advanced configuration menu which can be activated by clicking on “Enable Expert Mode” like shown in the image below:
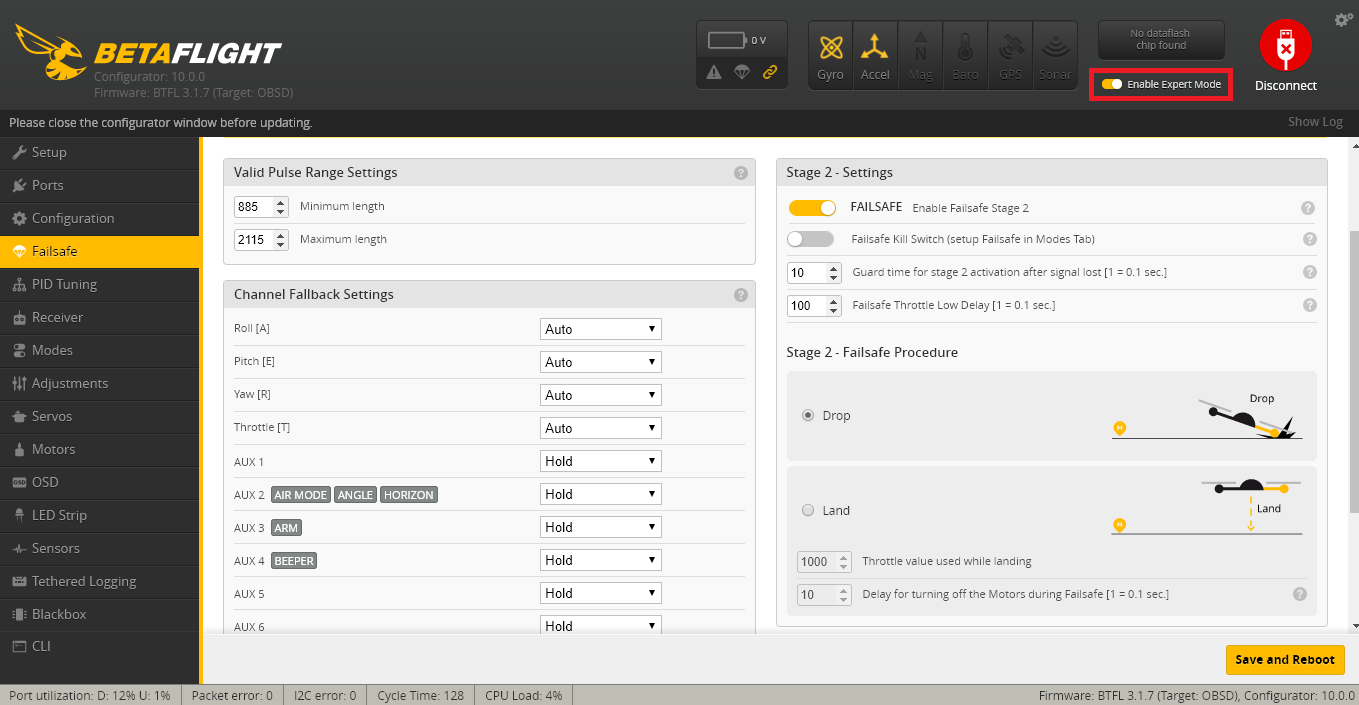
It is recommended to set Failsafe Stage 2 to “Drop”, so if the receiver loses contact with the transmitter for more than a certain time, then the FC turns off the motors. In my case the guard time is 10x0.1s = 1s.
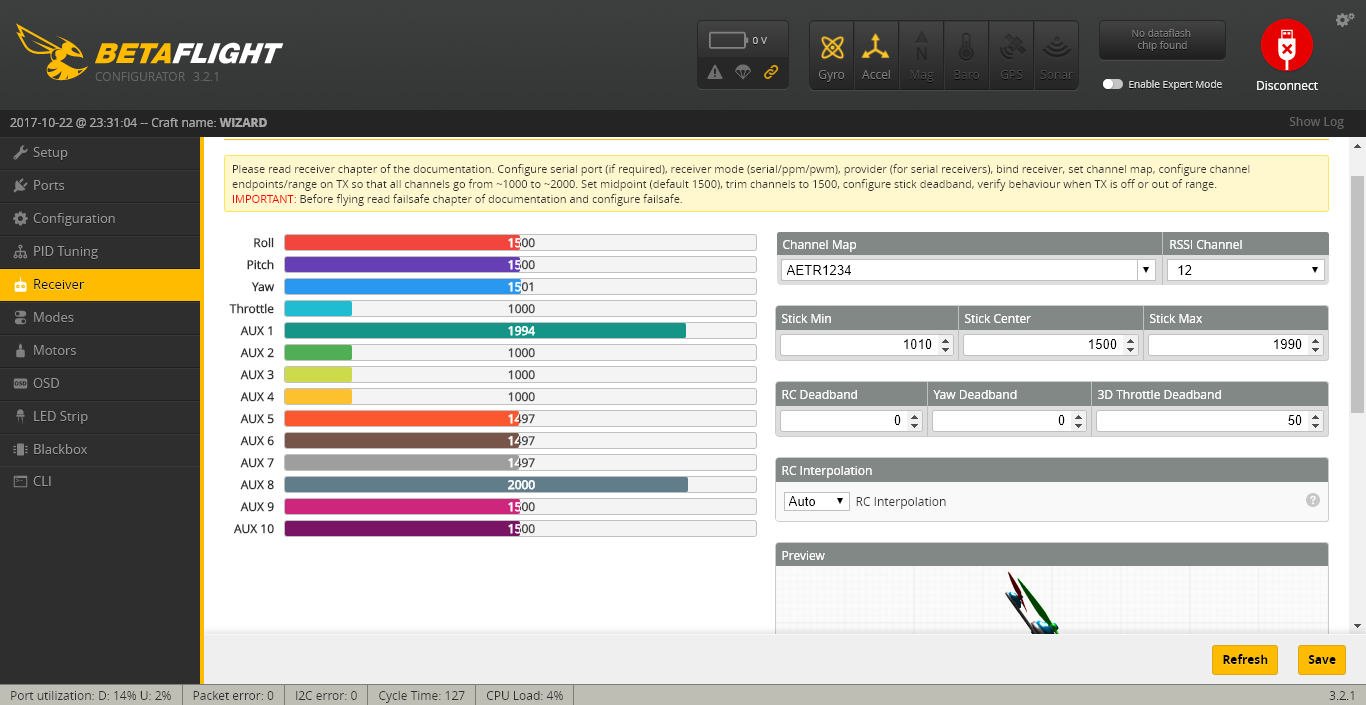
Receiver
In the “Receiver” tab we have to make sure the values of the channels are configured properly in such a way when radio sticks are centered, the value is 1500, while the minimum and maximum value are equal respectively to ~1000 and ~2000. This can be achieved configuring trims on the radio. Set also Stick Min to 1010 and Stick Max to 1990.
Modes
For the “Modes” tab, we can set the switches on the radio to arm the quadcopter or change from a flight mode to another one or to enable the buzzer for example. In the next figure are reported my settings (Arm, Angle, Horizon, Air Mode, Beeper):
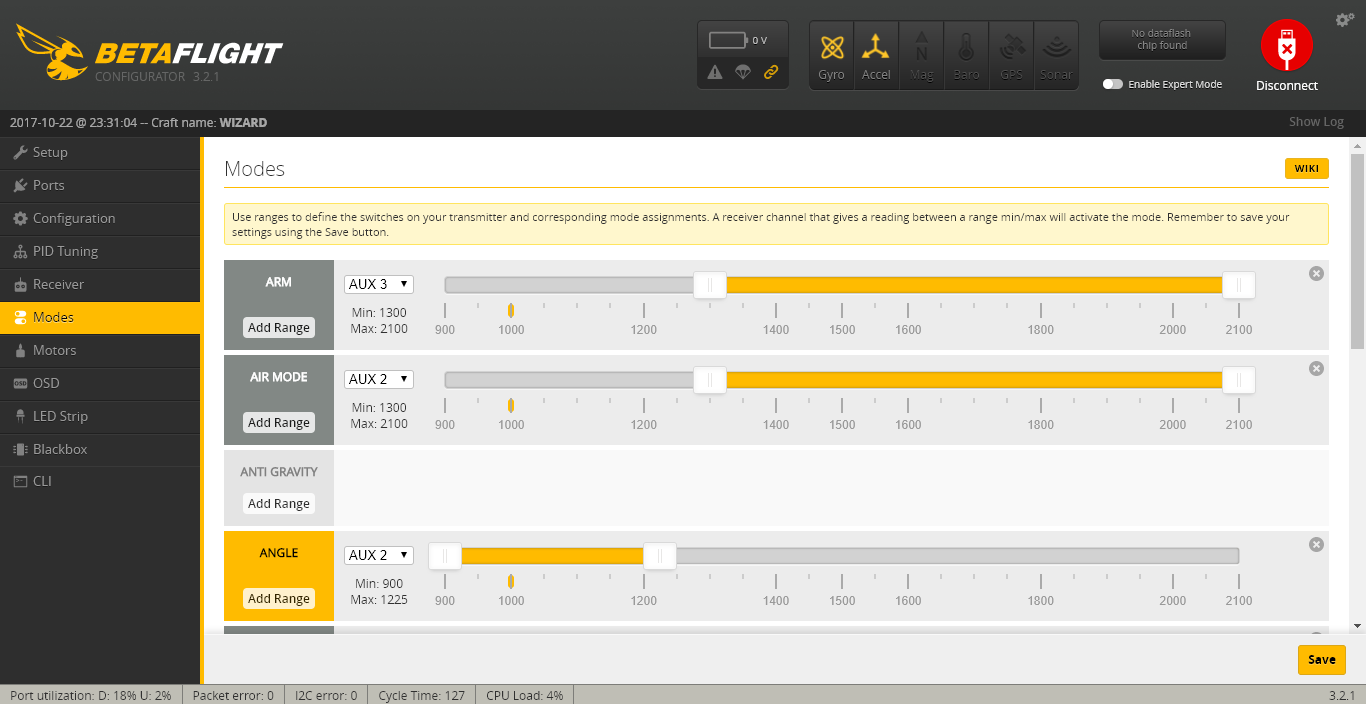
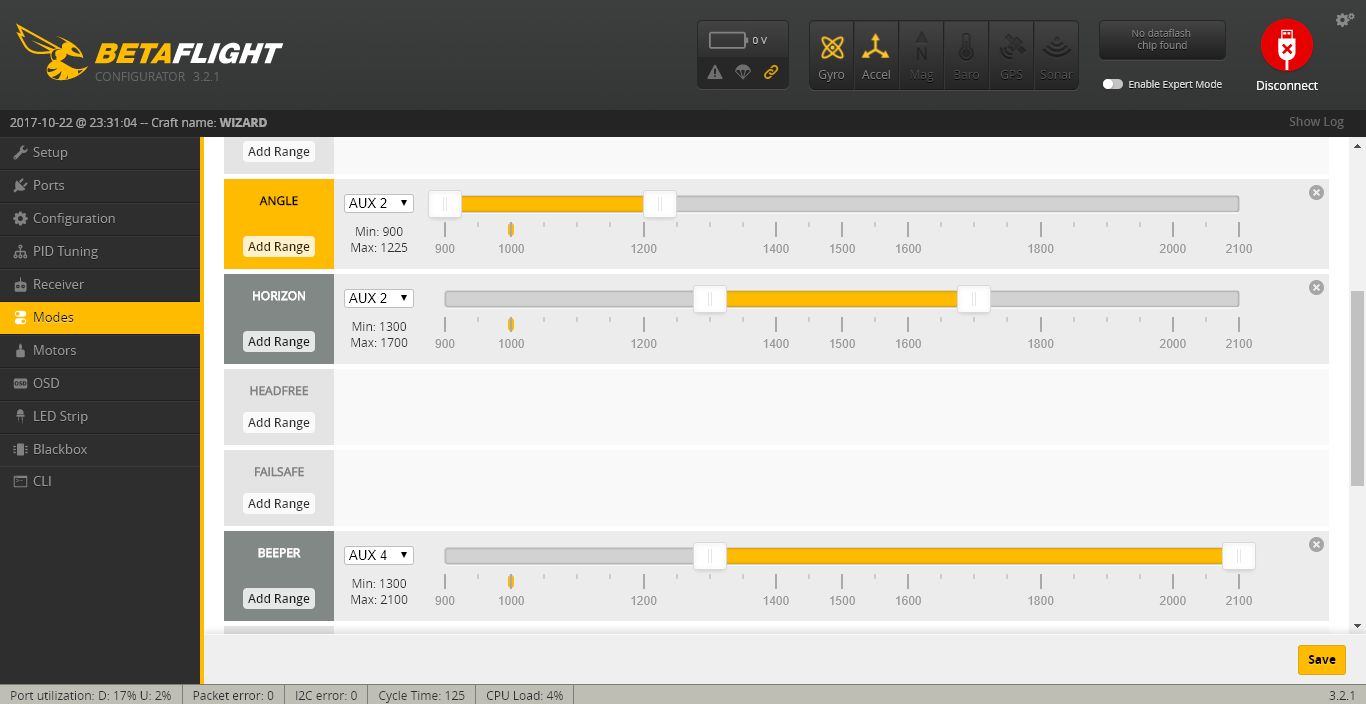
In this way channel AUX 2, a three position switch, controls the flight modes, AUX 3 arms the quadcopter and AUX 4 activates the beeper.
Since I am using Devo 7E loaded with Deviation TX firmware with 3 position switch mod, I will report the steps to configure the switches for this particular radio (instructions below are for the three position switch to change between three flight modes and can be replicated for other features, like arming the quadcopter, on two position switches as well).
In Model Menu go on Mixer and set Ch6 to Complex with 3 Mixers:
- on Page 1 set Switch “SW B0”, Mux “replace”, Curve “Fixed”, Scale “-100”;
- on Page 2 set Switch “SW B1”, Mux “replace”, Curve “Fixed”, Scale “0”;
- on Page 3 set Switch “SW B2”, Mux “replace”, Curve “Fixed”, Scale “100”.
If you like Deviation TX firmware and you do not want to solder additional modules inside Devo 7E, there is a new multi-protocol radio already loaded with Deviation firmware, inside which are already installed additional RF modules, including the FlySky one (it has a 4in1 RF module - CC2500, CYRF6936, A7105, NRF2401): Jumper T8SG V2.0 Plus.
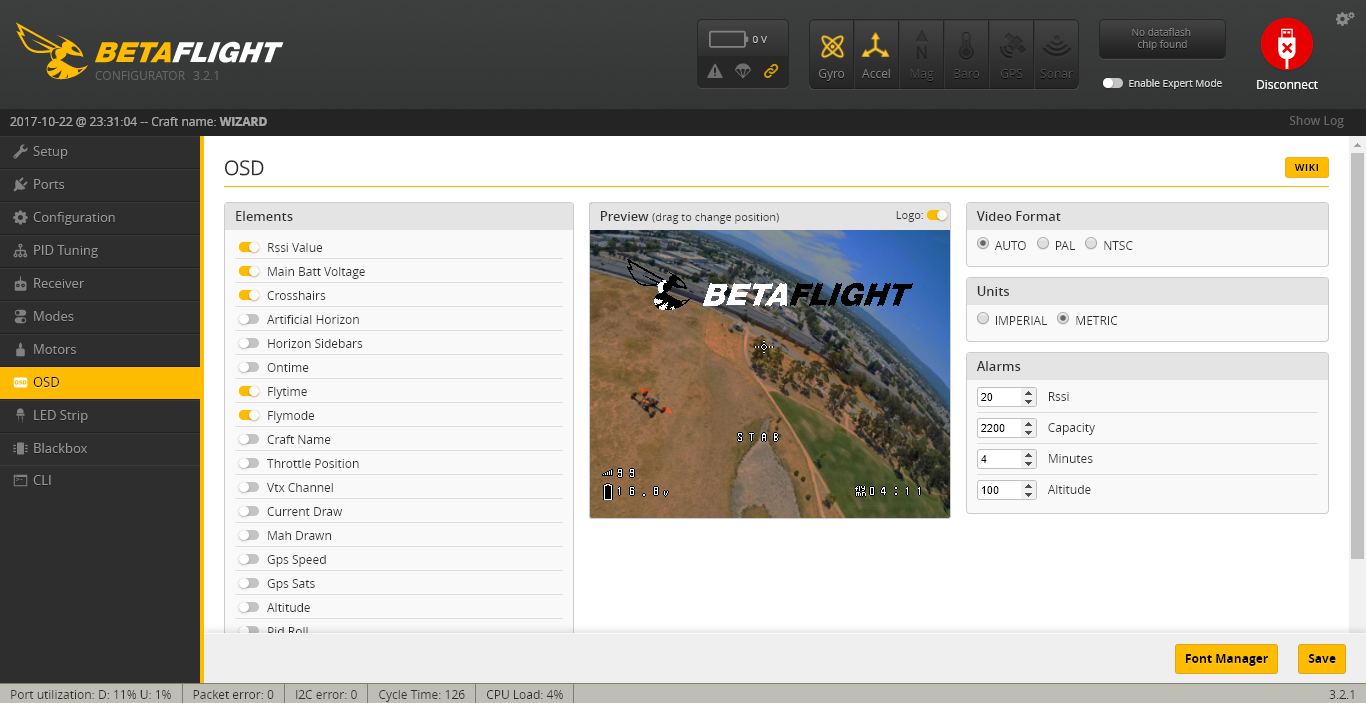
OSD
Finally, we can setup the OSD in the way we like, for example, with the following indicators: RSSI, Main Batt Voltage, Crosshairs, Flytime, Flymode.
Once we have checked that everything fits well on our FPV goggles or screen, we are ready to fly.
Conclusions
We have seen how to set up and configure Betaflight for the Eachine Wizard X220S using Betaflight Configurator Chrome App.
For the overview of the Eachine X220S, read this article.
If you are experiencing yaw wobbling during the hovering, here is the resolution.
If you need a guide in order to upgrade Betaflight firmware for the Omnibus F4SD on the Eachine X220S, read this article.
If you want to know how to setup and configure the 1179 FPV camera that comes with the quad, take a look at this article.
If you are experiencing video noise appearing as horizontal lines on the FPV camera view when motors are spinning, here is the resolution.